Disk Bound Covers | File + Tutorial
Project Overview:
I have made quite a few bookbinding tutorials for the Glowforge Laser. Book binding is one of my favorite things to explore. You can check out many of my other tutorials below if that’s a subject that interests you too:
Sewn (Coptic + 6 Needle) Covers
Easy Wooden (Post Binding) Journal
Super Simple 3-Ring Clip Bindings
Peekaboo Notebook Design
Shaker Baby Book Cover
6 Needle Sewn Cookbook (No laser cutting, just binding)
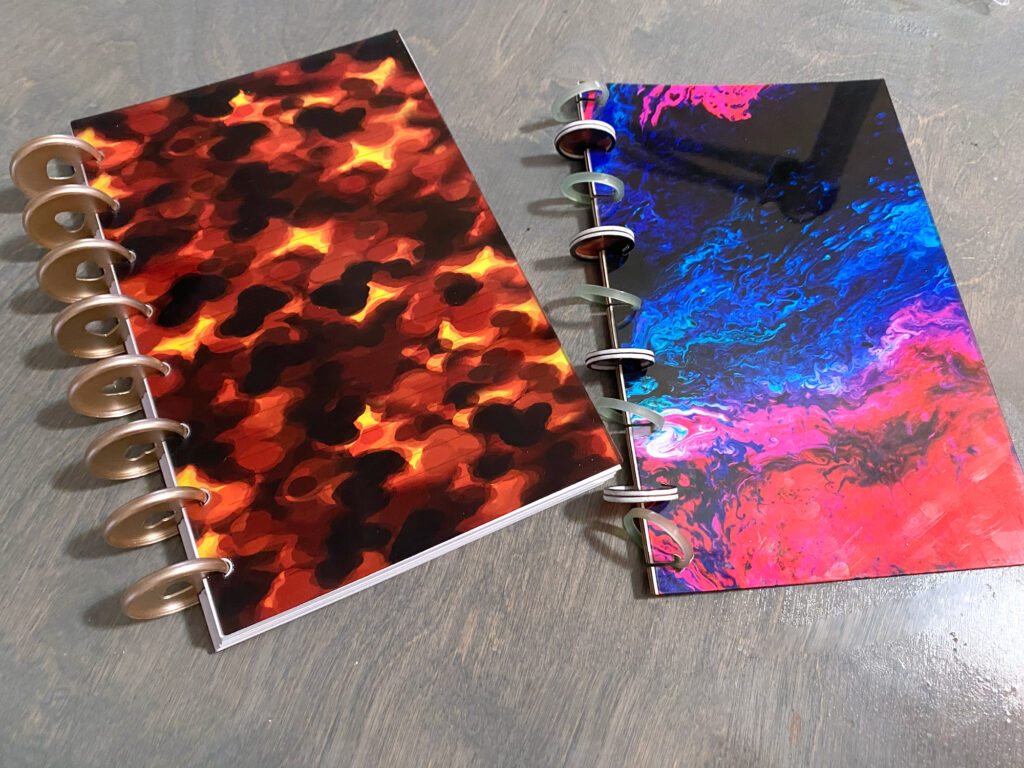
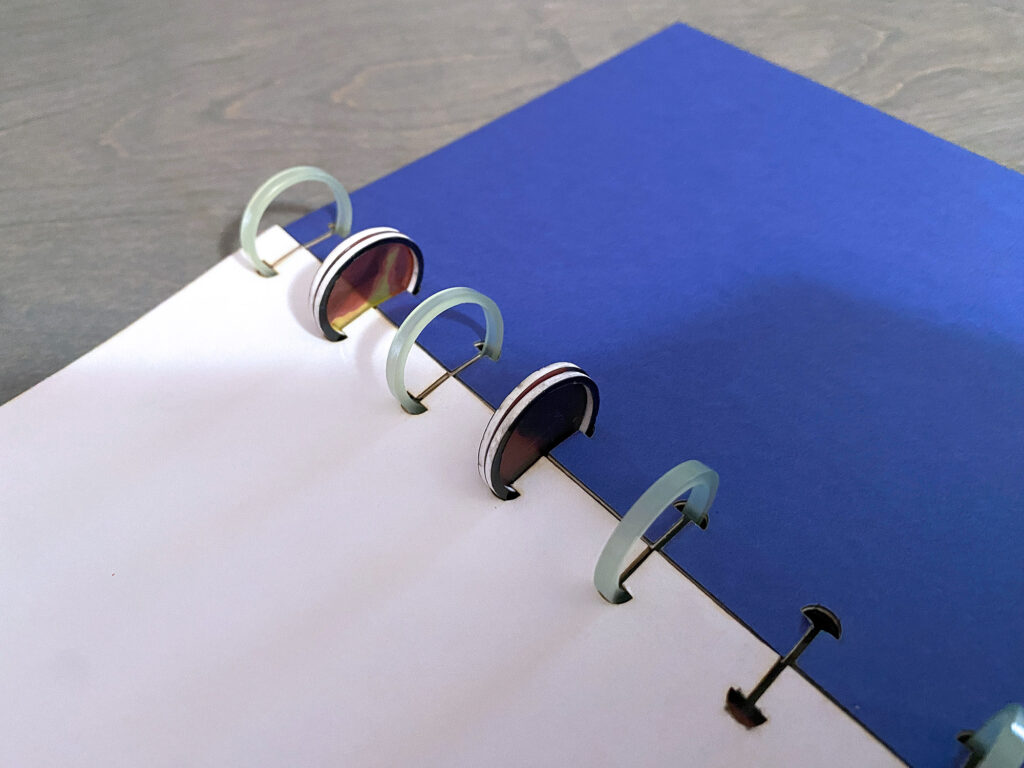
For this post, I’ll be adding Disk Binding to the catalog. Disk binding uses premade disks (or you can cut them with my file) to create journals which allow you to add or remove pages easily. This makes them great for day planners where you might need to swap out content. many people also like them for sketchbooks so they can rearrange or group ideas.
A key feature of this binding is that the covers and pages must have flexible spines so they can slide onto and off the disks. I have found that Smokey Hills Flex material is perfect for this and you’ll see it featured in this post.
Get the File
Not interested in trying to measure and design your own covers (trust me getting that perfect spacing wasn’t easy the first time around haha).
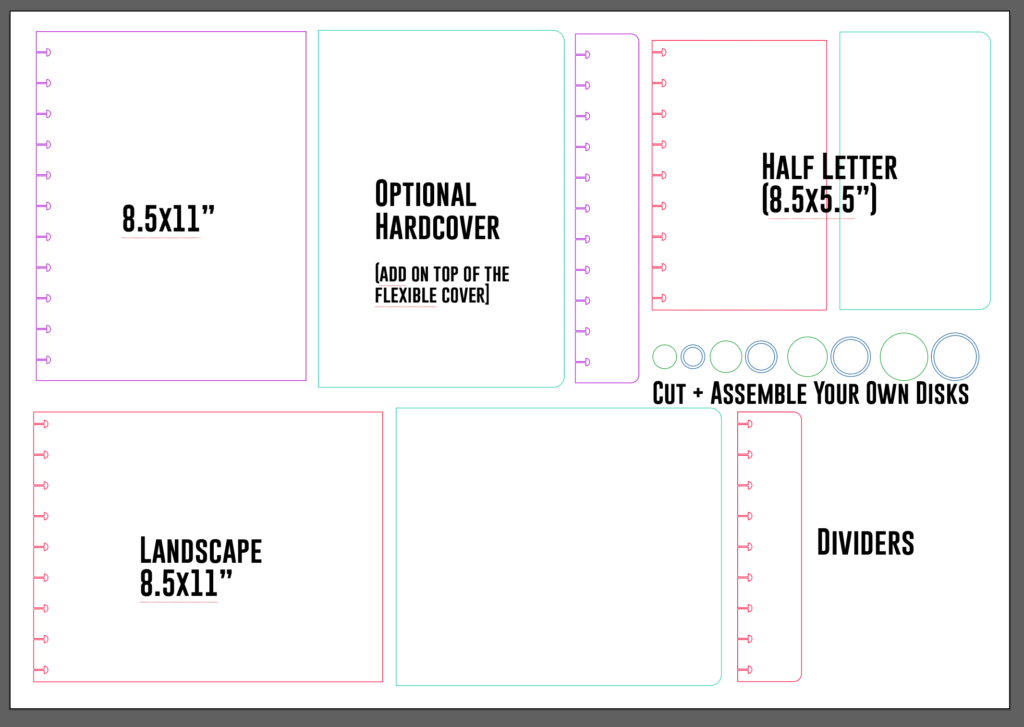
Purchase my file below and follow along with this post. it includes 3 sizes of covers, the disks, and the paper cutting jig.
MATERIALS OVERVIEW
- For the Covers and the Cores of my self-cut disks I used Smokey Hills Flex
- For the rings I used 1/8″ material
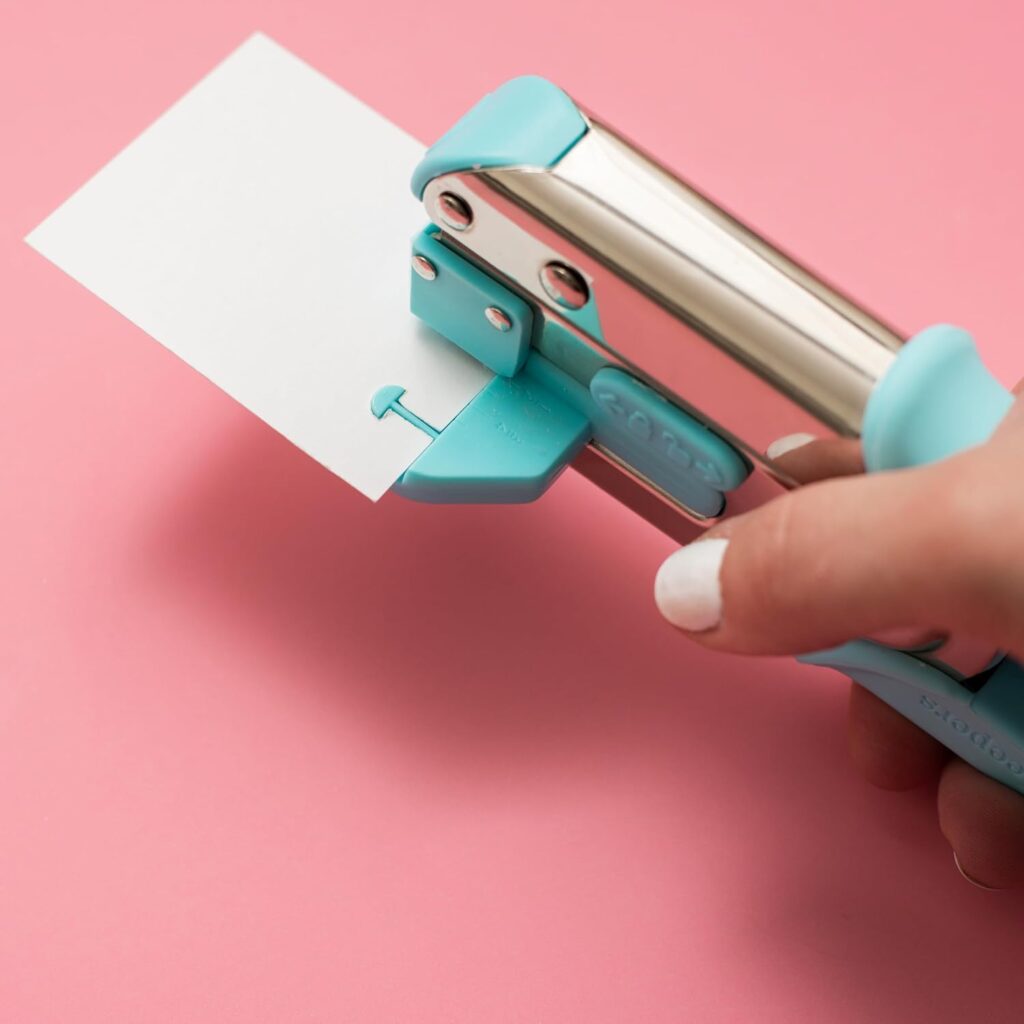
- The Punch my file is designed to work with is the Crop-a-Dile Disk Punch
- For my pre-lined paper I used this set of 100 from Amazon (my file includes a bonus cover that matches these holes perfectly as they are different from the punch spacing)
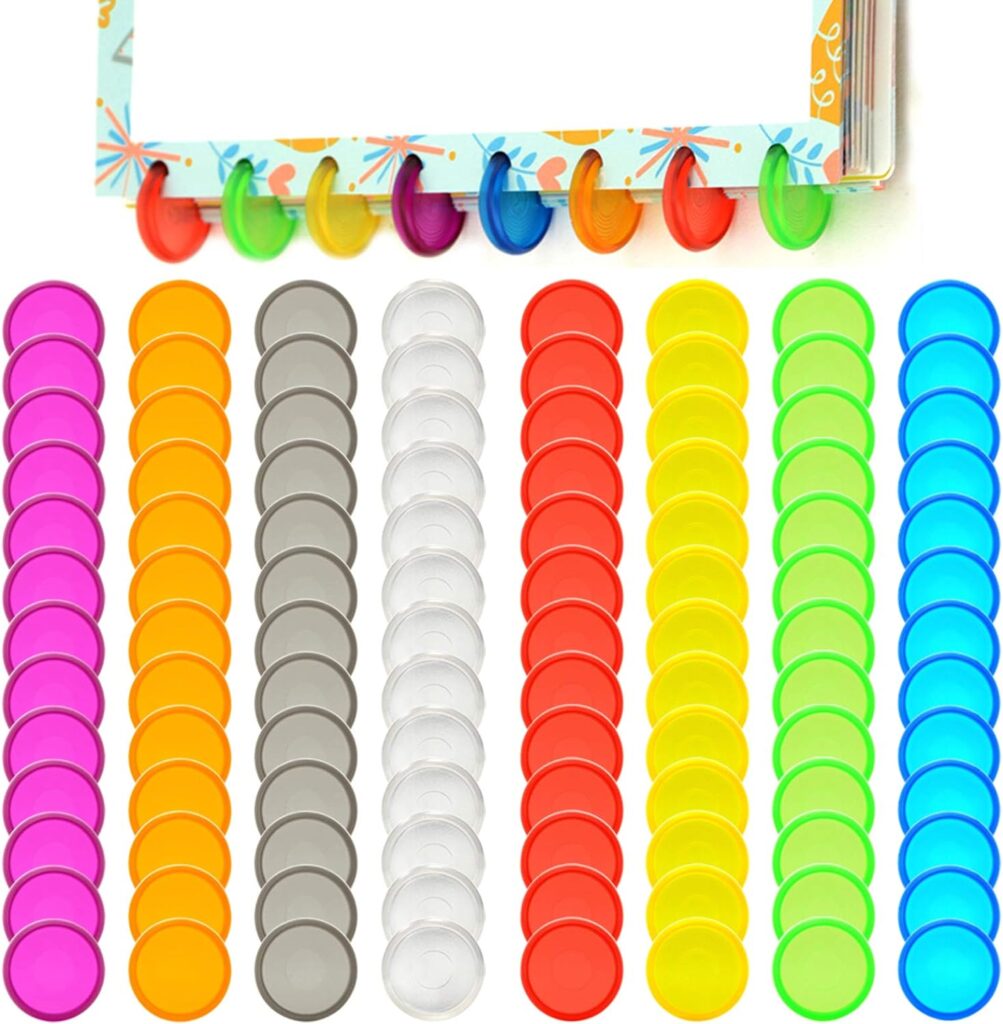
- I ordered this set of disks as well for testing – the pink ones you see were a clearance item from Michael’s Craft Store
Settings
Please be aware these settings are Glowforge-specific. Your laser machine may have different settings, but these hopefully offer a starting point in terms of power and speed.
Smokey Hill Flex:
POWER: 50
SPEED: 340
1/16″ Material:
POWER: 80
SPEED: 150
NAVIGATE POSTS
Helpful Links
Latest Posts
Posts by Category
Explore Posts By Tags
Acrylic Adobe Illustrator Alcohol Ink Baby Room Beginner Post Book Binding BuyTheFile Christmas Felt freefiles Gifts Gilding Glowforge Holiday Jewelry Journal Kaleidoscope LED Notebook Resin Rubber Stamp Settings Sign Stamping Yupo
Get Your Own Glowforge Laser
If you have found this post helpful and would like to purchase a Glowforge of your own you can receive a discount using my referral link when you are ready to purchase:
Sign Up to Blog Newsletter
About the File - Cutting Your Pieces for Assembly
This video shows you what’s included, how to cut paper with the jig, and steps for creating your own covers to match punched paper you may already have using my jig file.
Cutting the Materials - Notes
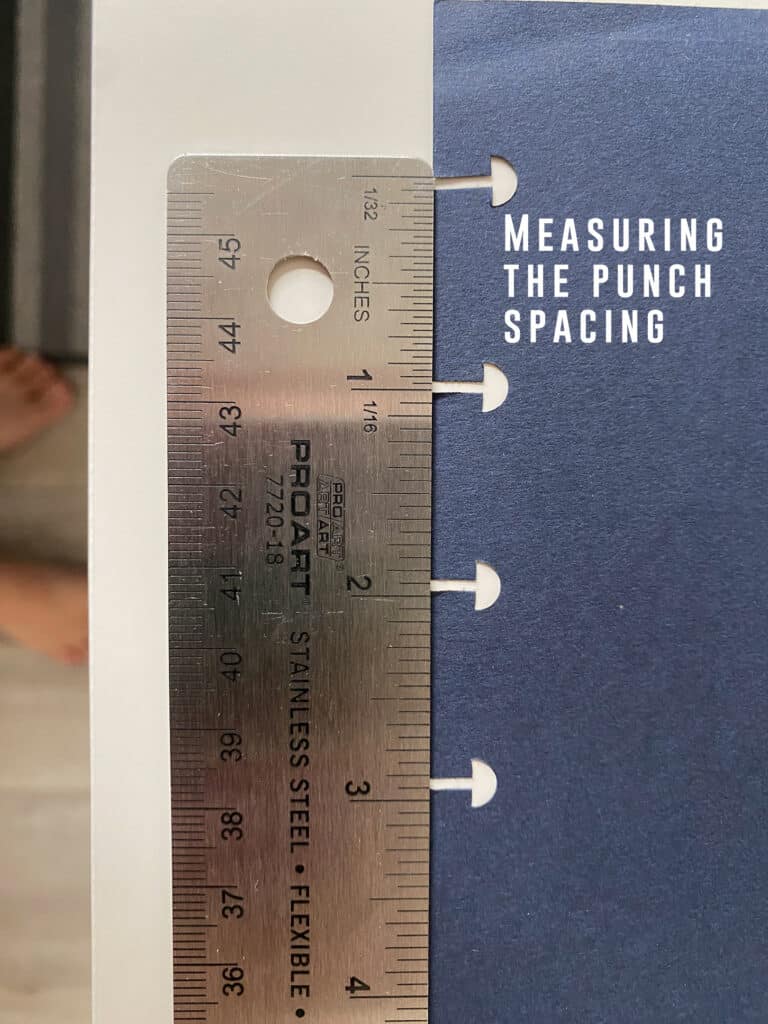
Ok, so every disk binding system is very, very slightly different. Disks themselves should work with any system, but the spacing and the margins on every disk binding set are slightly different. This can make getting your cover right to an existing stack of paper (or a different punch system) a little challenging. However, if you watch the video above it will walk you through how to use my Jig file to make your own covers that match the system you already use.
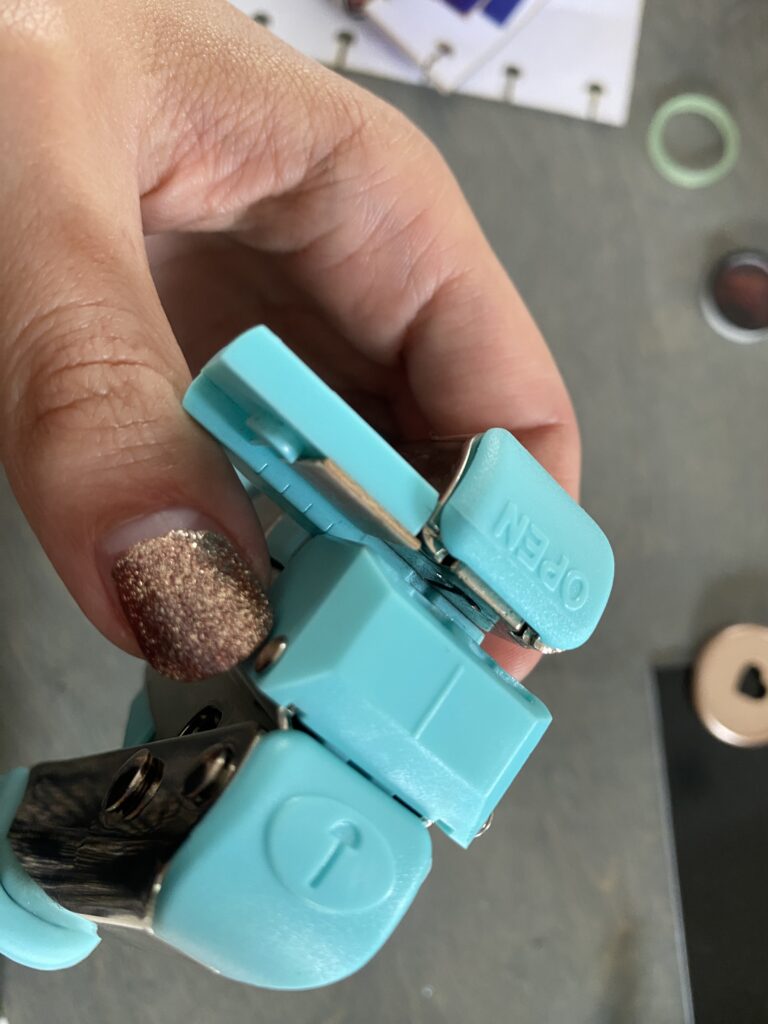
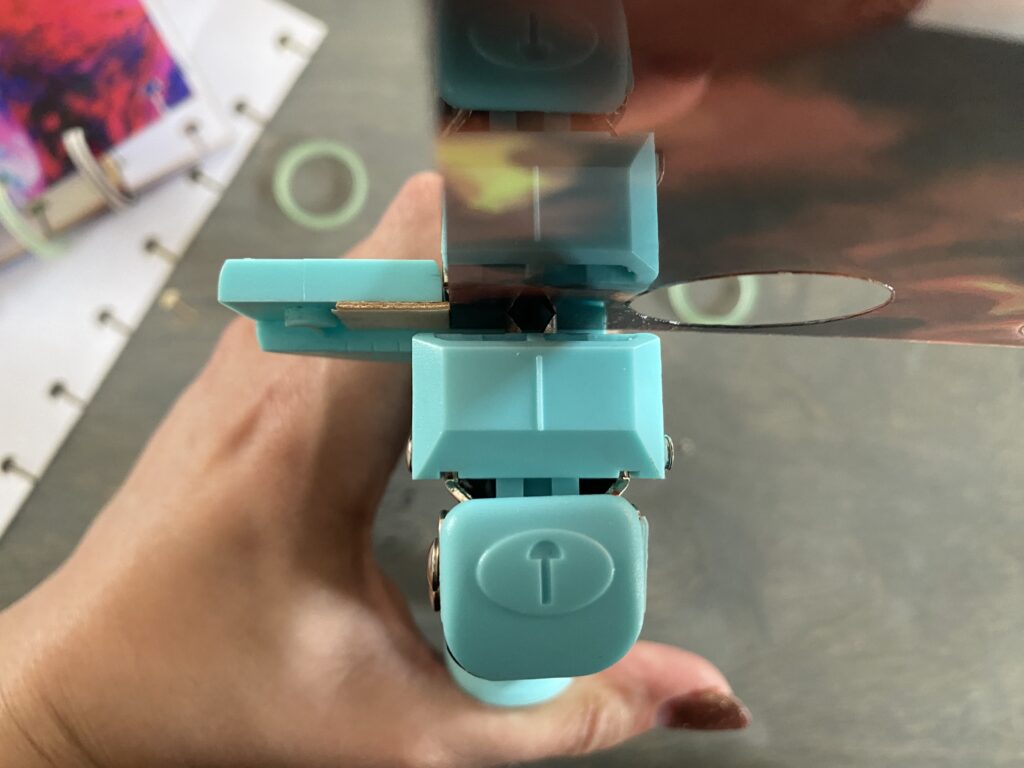
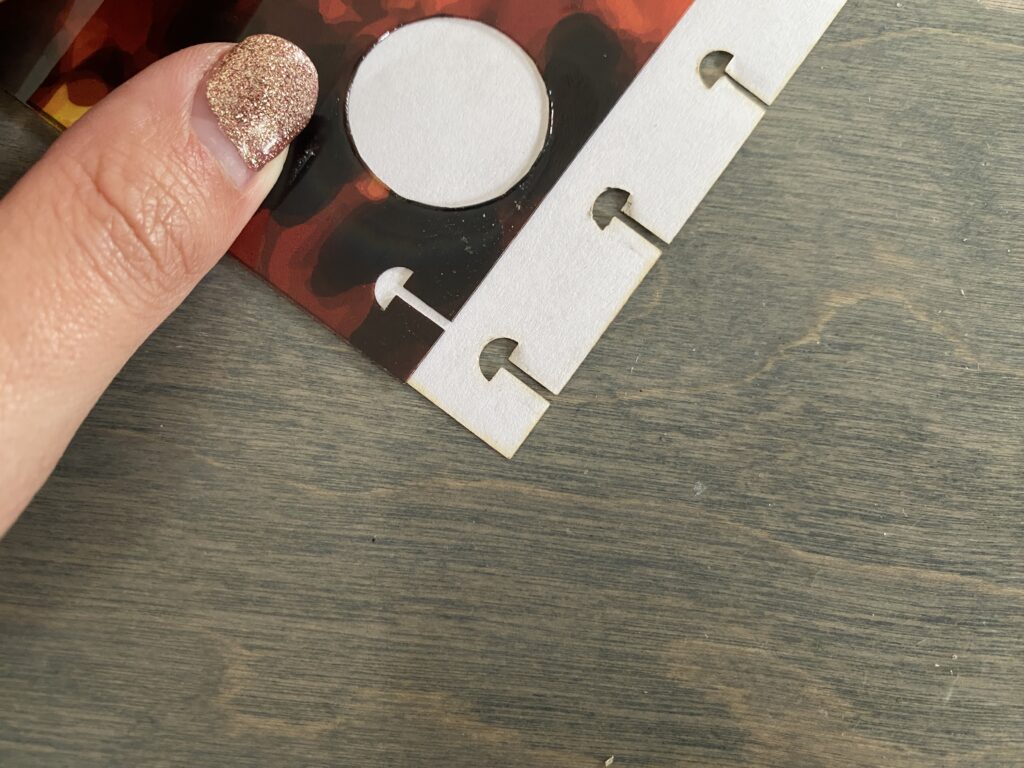
I chose to match my file to the We R Memory Keepers Crop-a-Dile Disk Punch, simply because I like their punches and they can go an “infinite” distance” so to speak. It took me a LOT of fiddling to get the spacing just right. The ONLY thing that’s kind of tricky about this file set, is that if you are using the Crop-a-Dile punch it can be difficult to get the first hole correctly lined up with the sheet of paper. Below I’ve included a video, as that will explain how to do that correctly.
- Using your already cut cover (or a practice piece you’ve cut from the file) get it aligned into the Crop-a-Dile, squeeze it closed, and lock it
- Use a small piece of scrap veneer, chipboard, or even thin cardboard and tape it onto the guide so that it butts up against the paper (ensure it’s square)
- Release the lock and remove your sample paper or cover
- Use your new guide to align your sheets of paper to cut that first hole in the stack
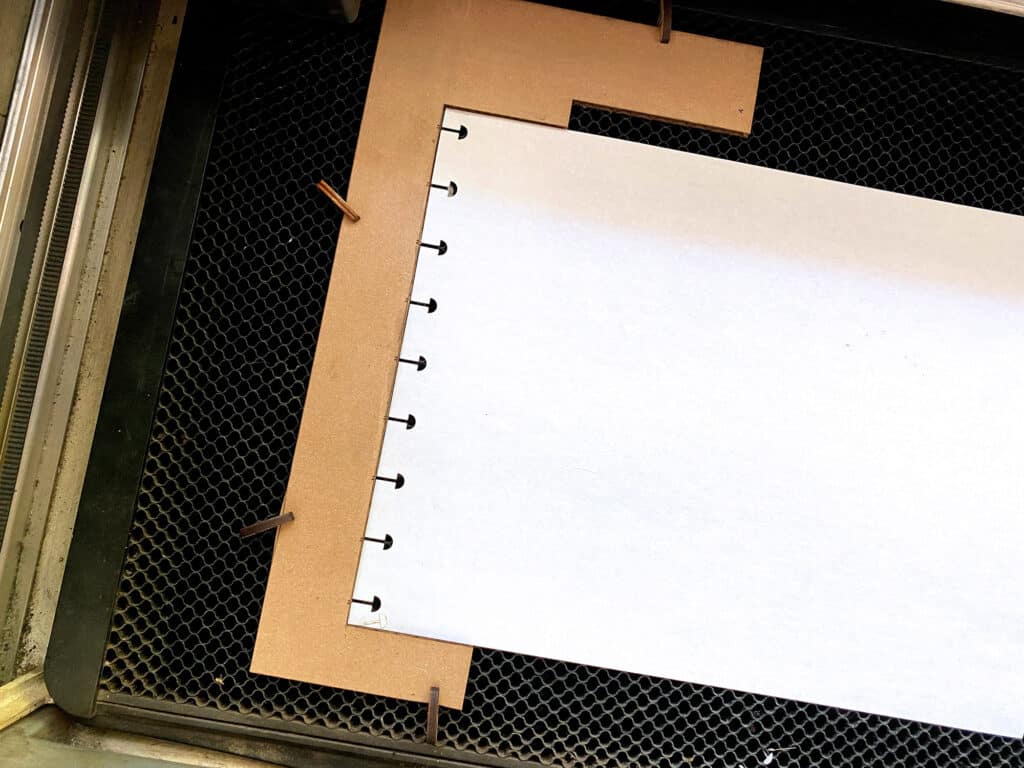
Using the Paper Cut Jig
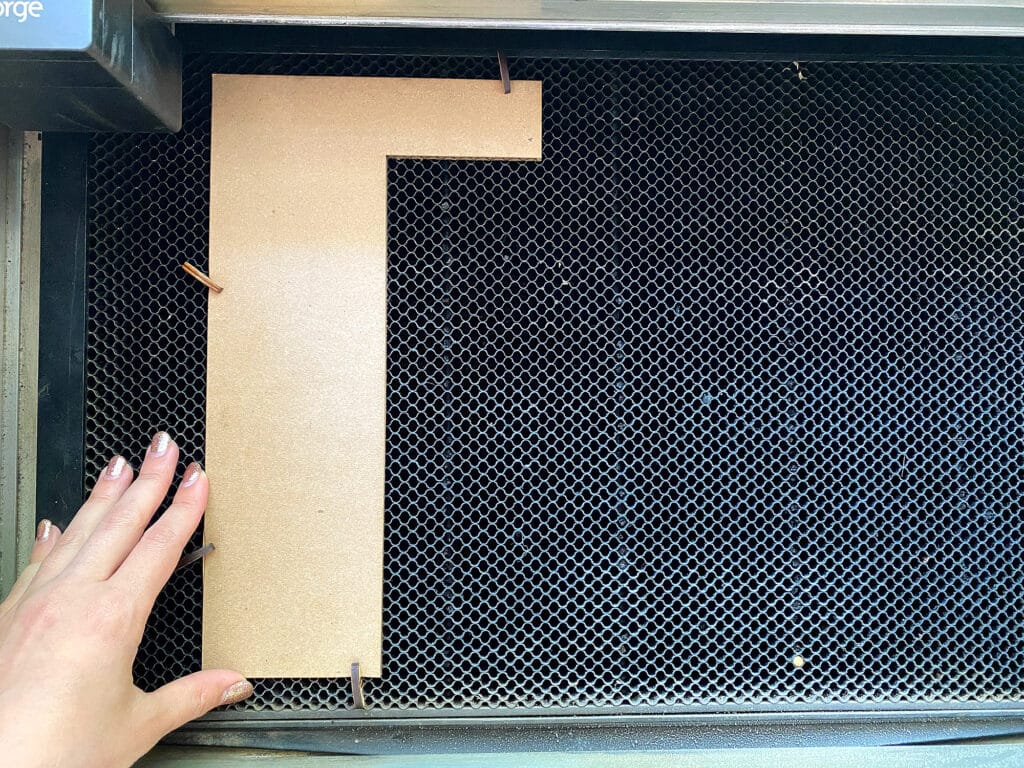
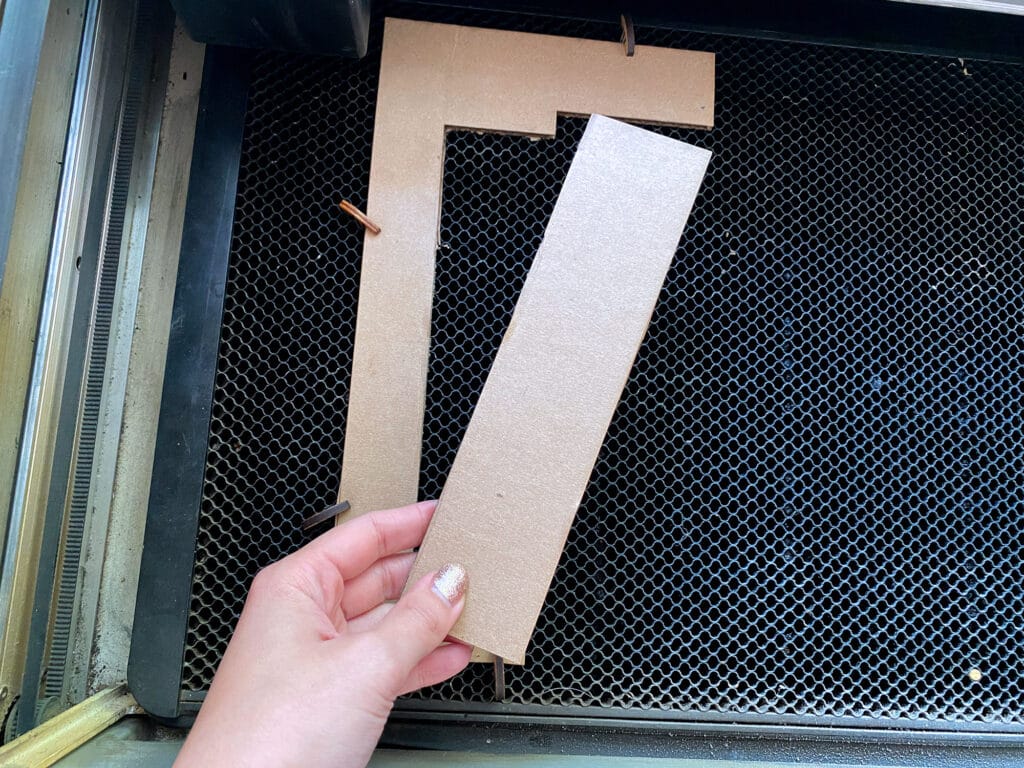
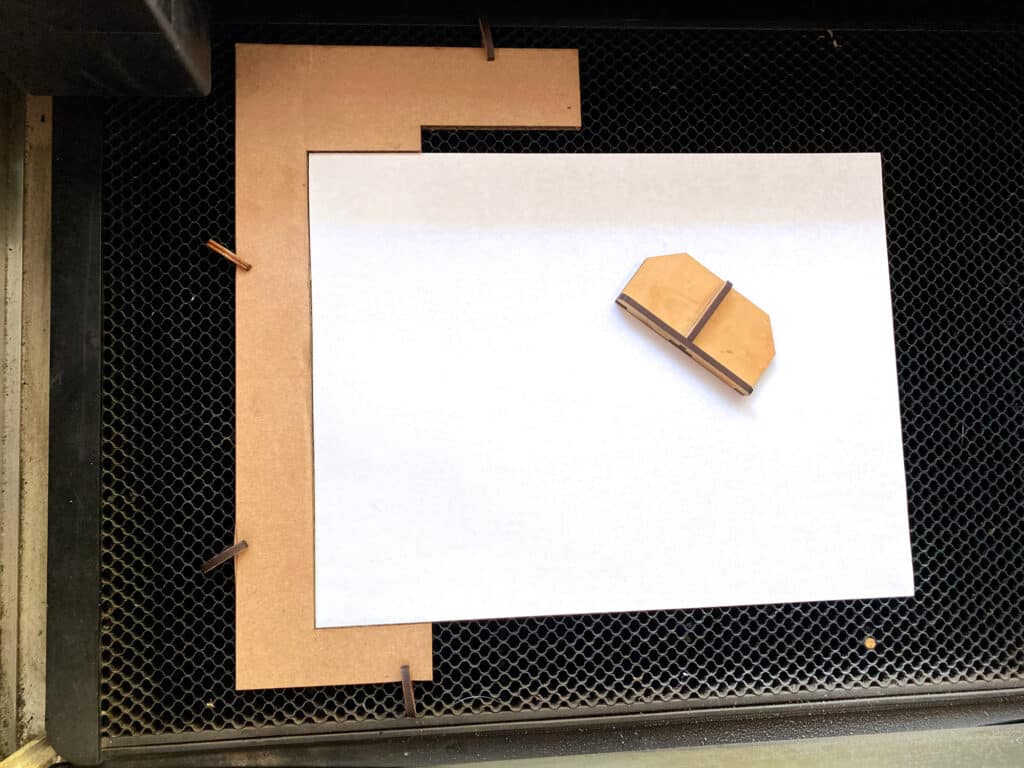
Using the paper-cutting jig is pretty simple. It’s designed to work with 8.5×11″ sheets of paper:
- Pin a piece of scrap cardboard, chipboard, or other cheap material into one side of your laser
- Align the jig in the file that is right orientation for you to cover onto the scrap material and cut it
- Open your laser and remove the cutout
- Set a sheet (or two) of paper into the cutout guide and hold it down with a magnet
- Without moving anything in the interface turn off the cutout function for the shape and turn on the keyholes
- Cut and repeat
Making the Disks
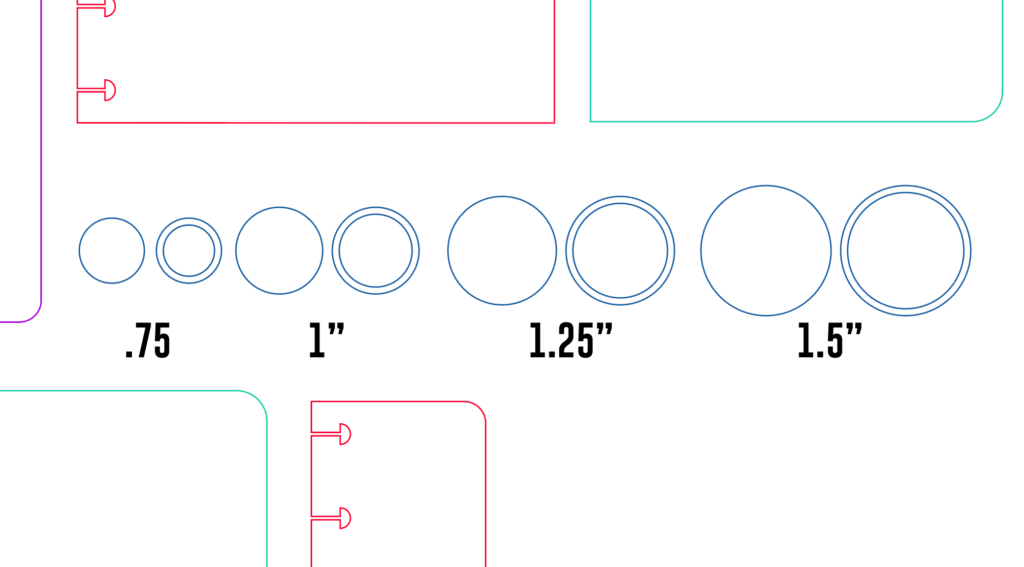
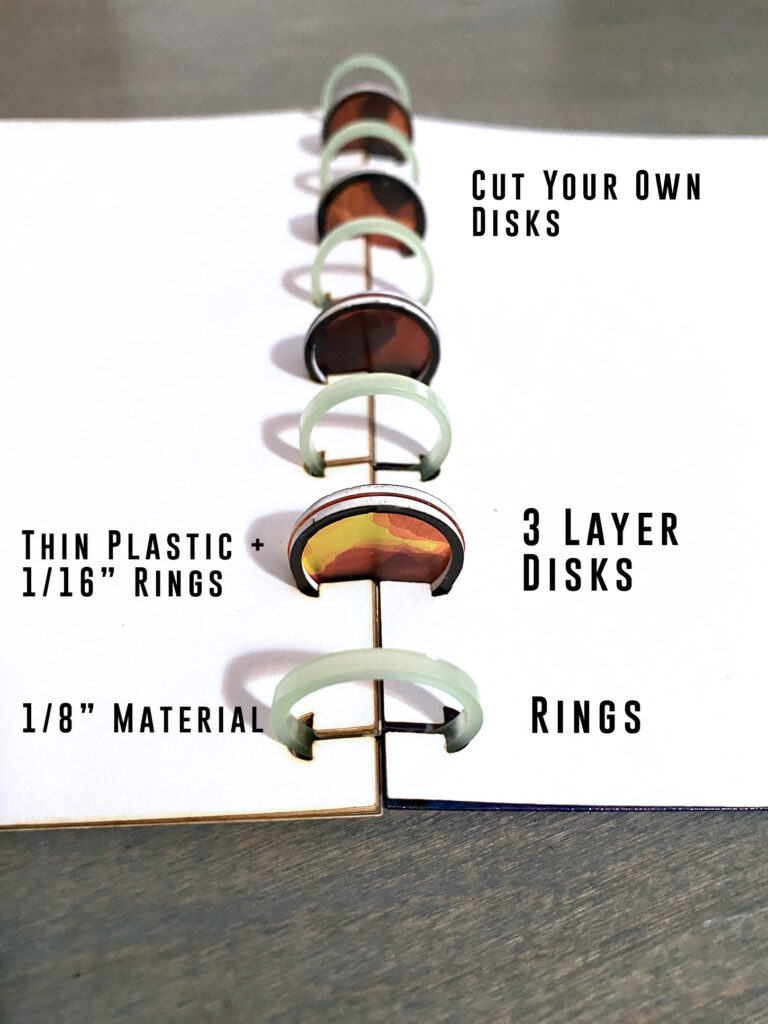
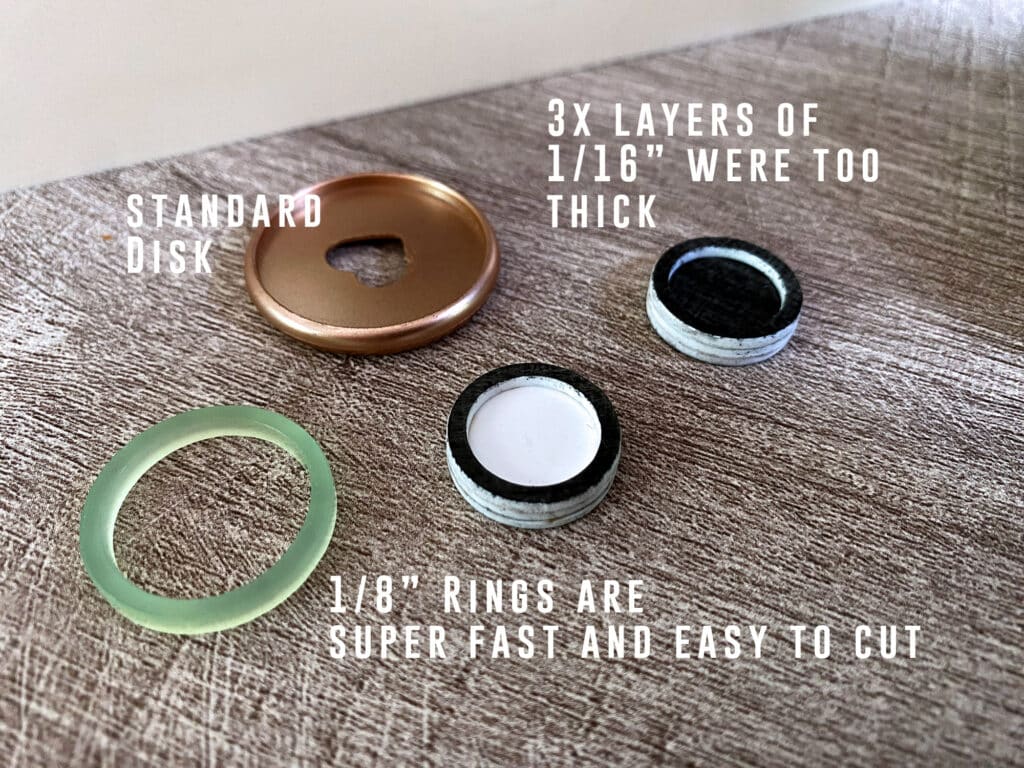
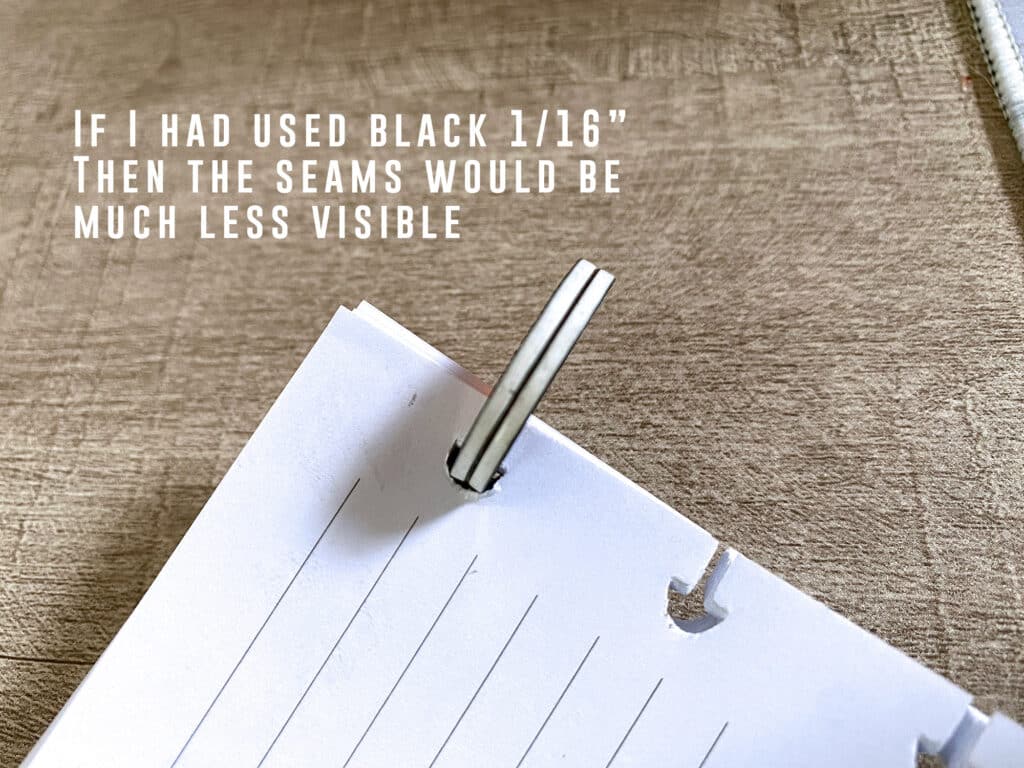
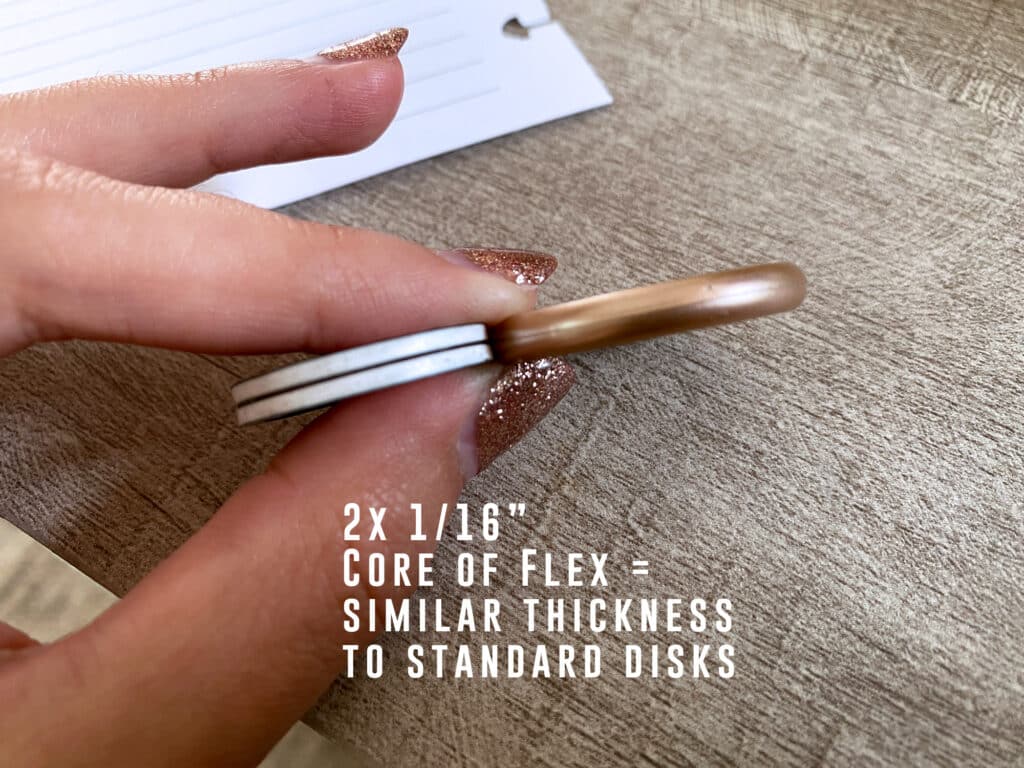
My file includes a few sizes of rings or disks you can cut. The rings are much easier to cut and very simple but they will flop around. The disks require you to use both 1/16″ material and some sort of thin transparency sheet or Flex. Don’t be tempted to use three layers of 1/16″ – it ends up being too thick and the paper won’t slide well in most cases.
Where to Get the Materials:
The two Amazon links below are affiliate links. They don’t cost you more but they do help me keep creating content.
Pastel Acrylics – I bought my sheets of pastel from Custom Made Better
- Smokey Hills Flex
- For the rings I used 1/8″ material
- Crop-a-Dile Disk Punch
- Pre-lined paper – Halft Letter Paper
- Disks
The paper and thread I used were just items I had lying around so I don’t have a link for those. I like the brand French paper for colorful interior papers or cardstock. There are so many great brands for paper it’s hard to give you an exact suggestion but almost anything will work
Great Vendors for Beautiful materials: None of these are affiliate links! I purchase materials from all of these vendors because I like their products:
Woodcraft – Exotic Veneers, 1/8″ wood
Johnsons Plastics Plus – Rowmark Acrylic, Saddle Faux leather (laser safe), Finished plywood, Flexibrass etc. Veneers (with and without 3M)
Craft Closet – Shell veneer, acrylic (Glitter for days), wood, colorboard
Cerulean Tides- So many gorgeous acrylics, glue, 3m sheets, and more
Smokey Hills – Wood, Plywood, Basic Acrylics, Patternply in Acrylic and Wood(beautiful pattern printed boards), Now they also carry leather and a thin flex material
Custom Made Better – So many fun different materials and they also release tutorials for learning new techniques
Get 50% off your first Wish.com order with my code: mfvjgnw | I buy lots of odds and ends here, so if you need some small item and don’t mind waiting, this can be a fun shop to check out.
Obligatory Glowforge Discount Code Plug
If you found this post helpful and you plan to buy a Glowforge you can use my code (https://glowforge.us/r/QHDONFXB) for a discount of $125 off the Basic, $250 of the Plus, or $500 of the Pro:
Sign Up for Blog Posts Updates
And finally, if you’d like to be updated on posts like these in the future you can sign up for my email list. You will only receive an email if there is new content, and only once weekly in that case:

