Using Deepnest.io
Project Overview:
This is a really simple post, made even simpler because if you don’t want to read you can watch a video!
- Take some time to check out the settings. There are lots of options for how to adjust the way the software nests your designs.
This software is actually really easy to use but there are some small things that are unintuitive. This quick tutorial will show you the step overviews and point out a few tips for using the software along the way.
Set Up Your File In Illustrator
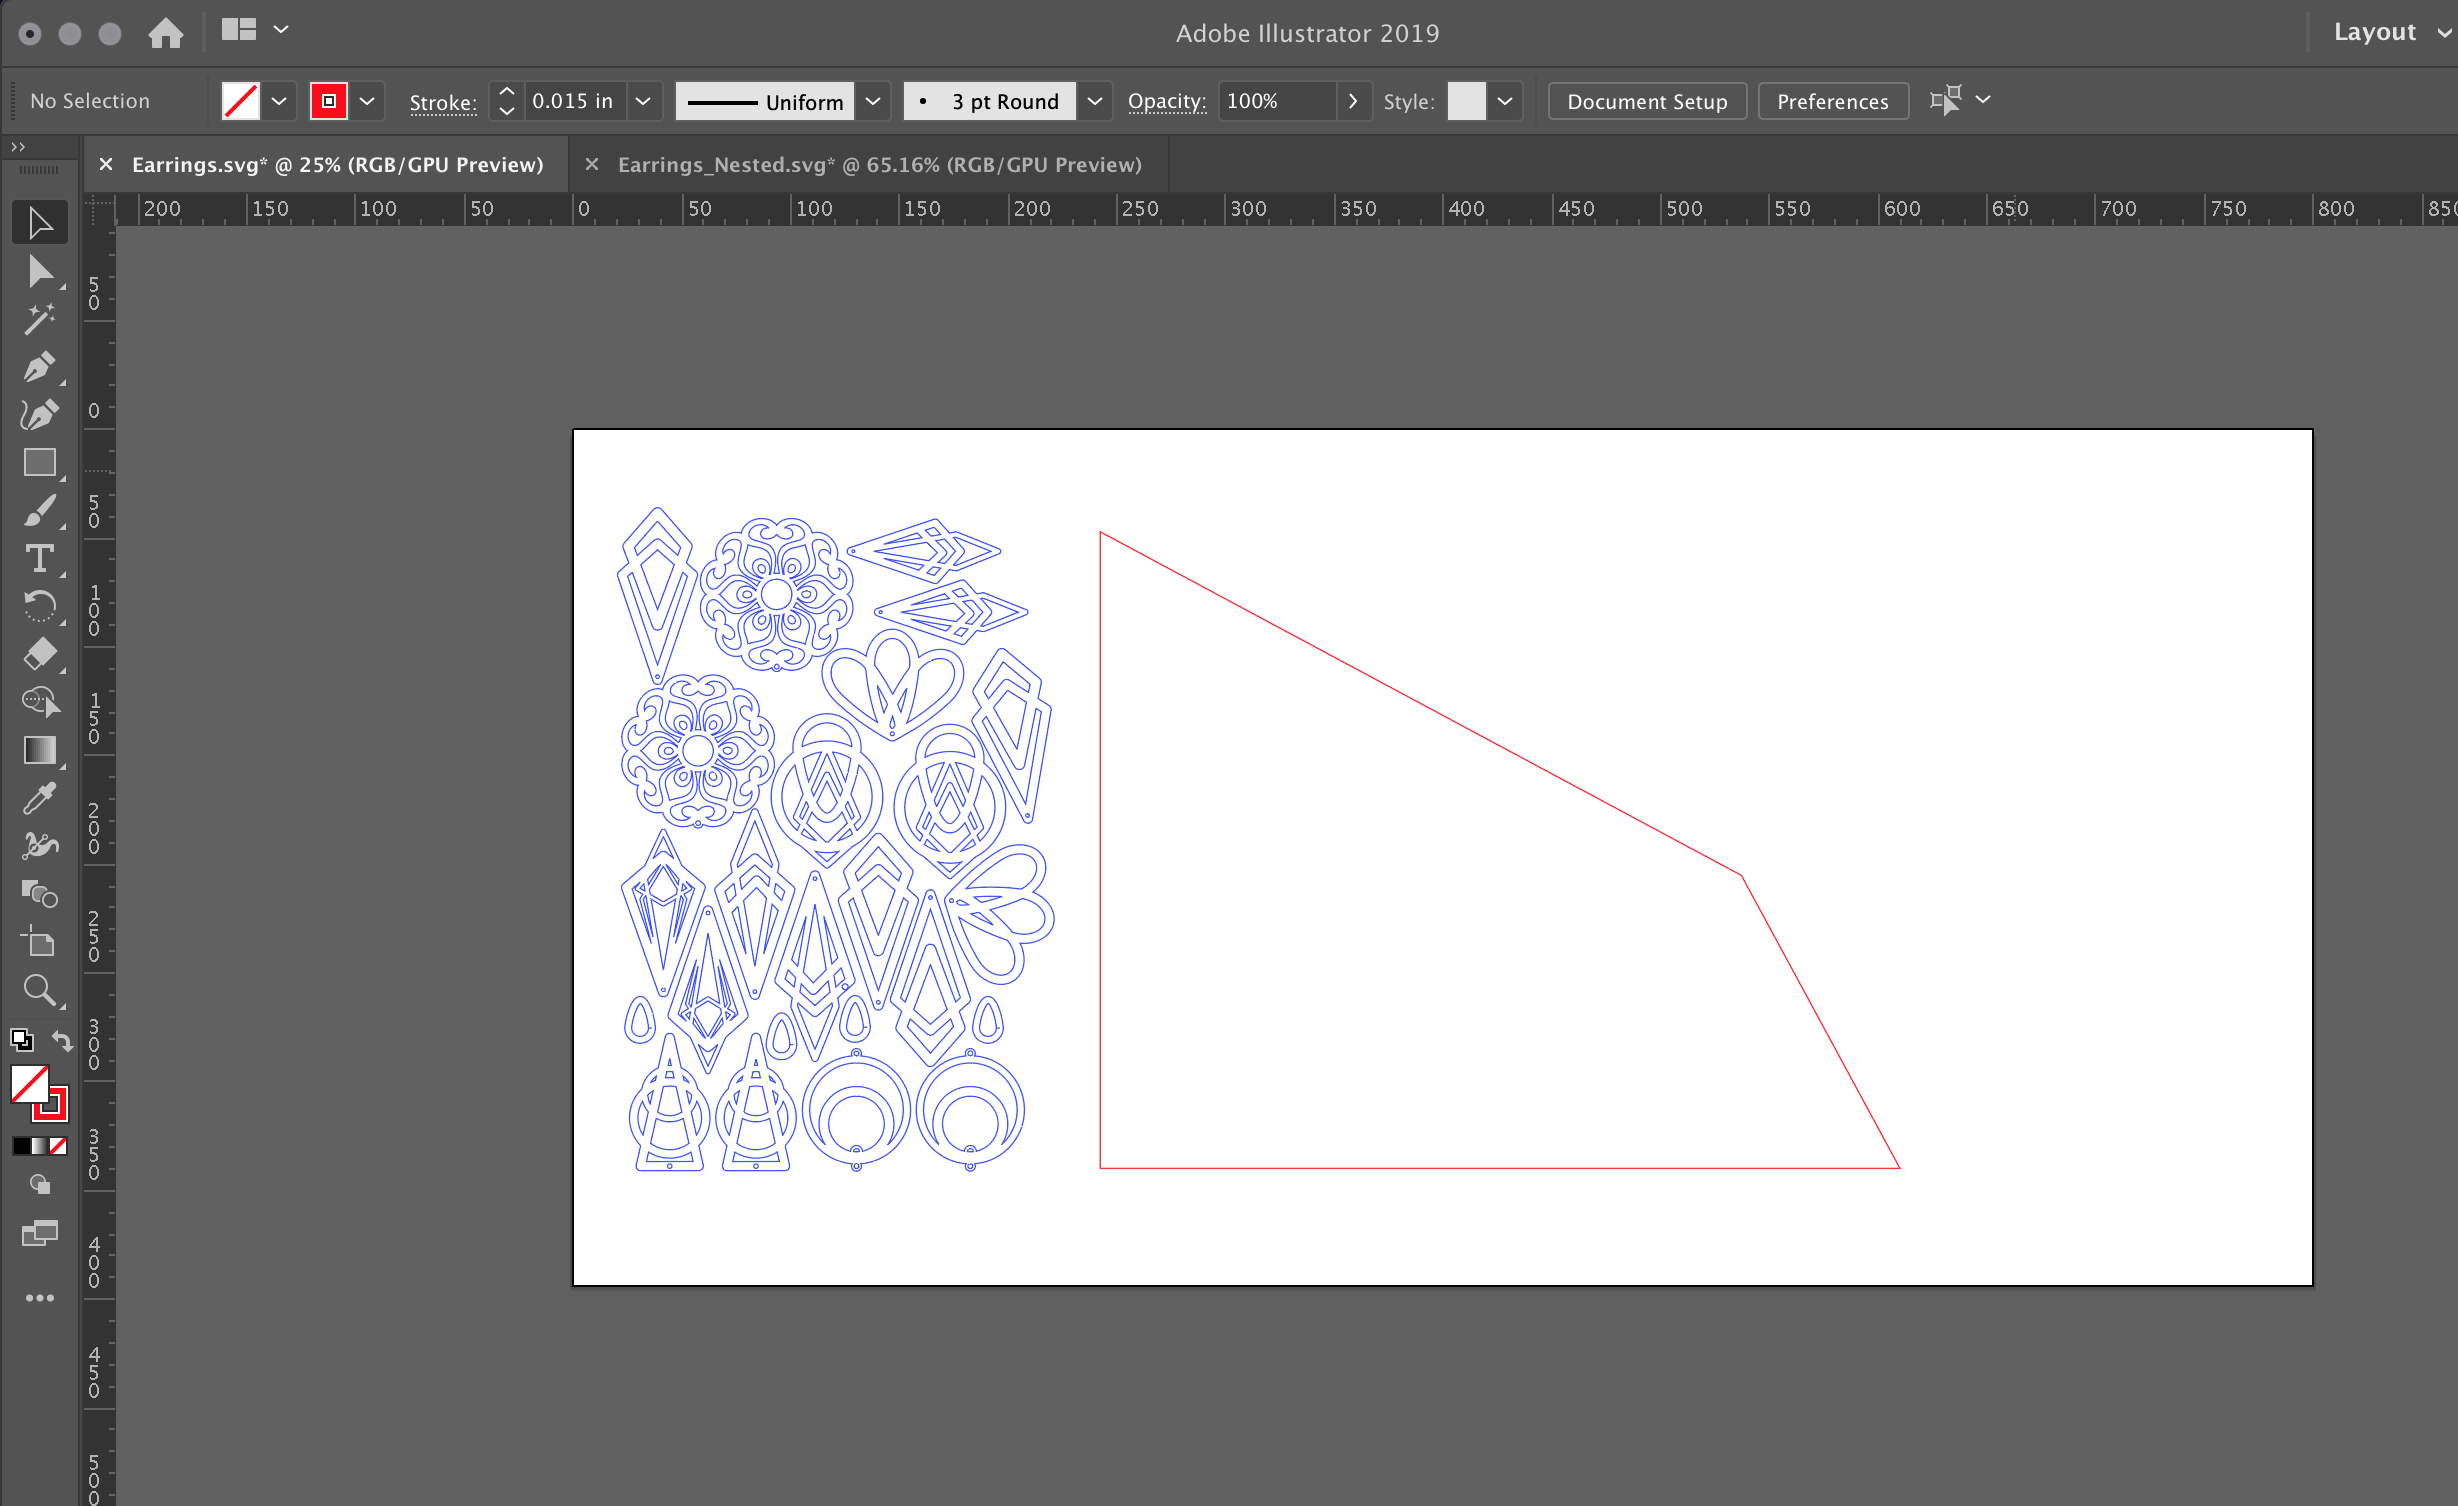
One of the best things about Deepnest is you can define what you want to nest your designs into. This means if you have an oddly shaped piece of scrap or you want to nest everything into a circle it’s easy. For any odd shapes (anything other than rectangles) you will need to draw your design in Illustrator and include it with your file.
One thing you can do is take a photo of your scrap (as flat as possible) and then trace around it Illustrator. You can then scale it by measuring the longest side and adjusting your drawing up to match that length. I’m not the kind of person to do that for some draftboard scraps, but if you’re using an expensive sheet of mirrored acrylic it may be worth it! I would imagine you could up the contrast like crazy to your photo and then just live trace in Illustrator as well.
In my case, I just draw a random shape so you could see how it worked. Hence… the parallelogram (wait… not a parallelogram, a quadrilateral).
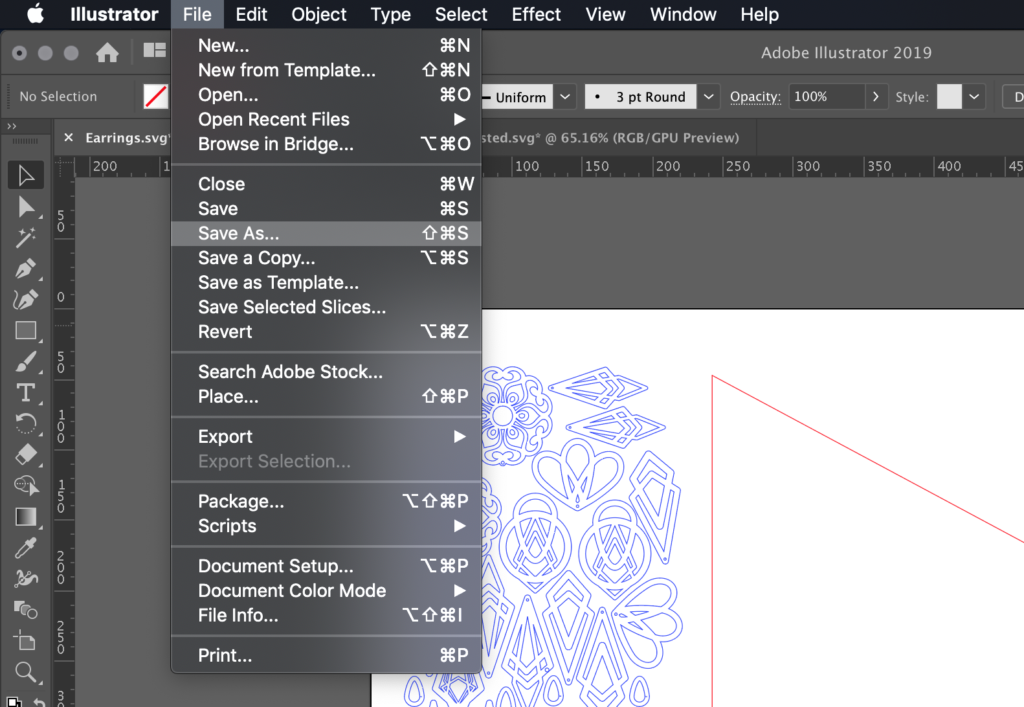
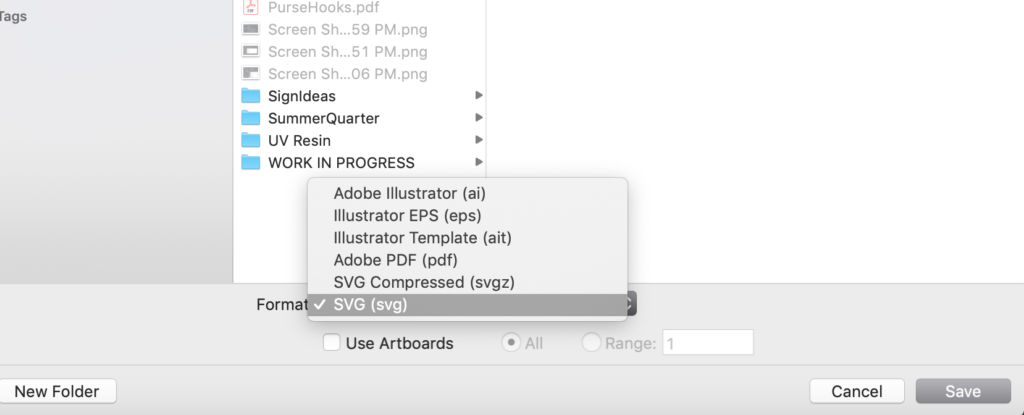
After you’ve done your drawing and have everything together in your file. Save As and select SVG.
Download and Open Deepnest.io
If you haven’t already head on over to Deepnest.io and download the freeware. Then open it up and you’ll see the very simple interface.
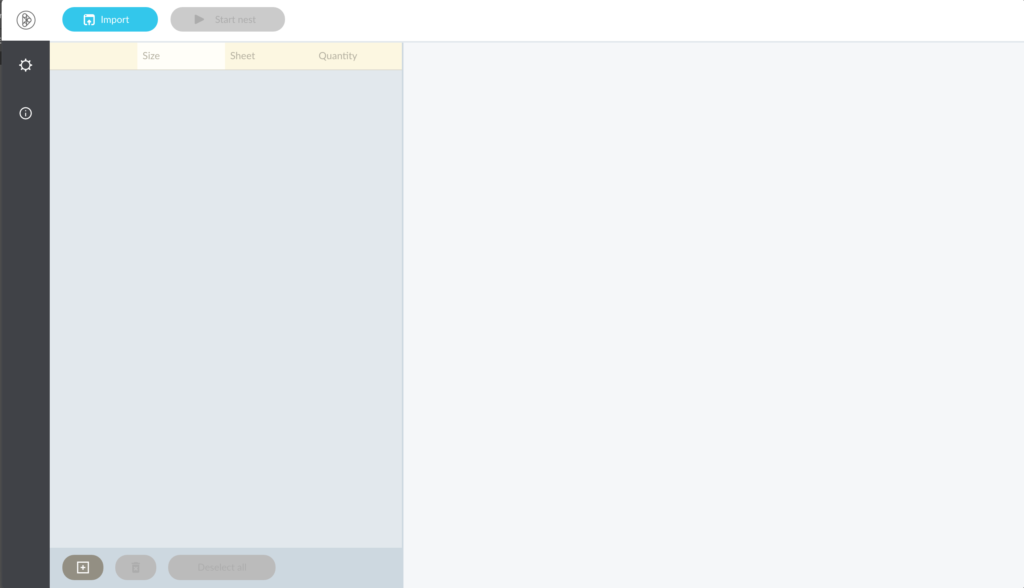
I highly suggest you play around in the settings. It will show you some helpful hints if you hover over them. I didn’t do much here. I just left it at its defaults and it worked fine for what I needed.
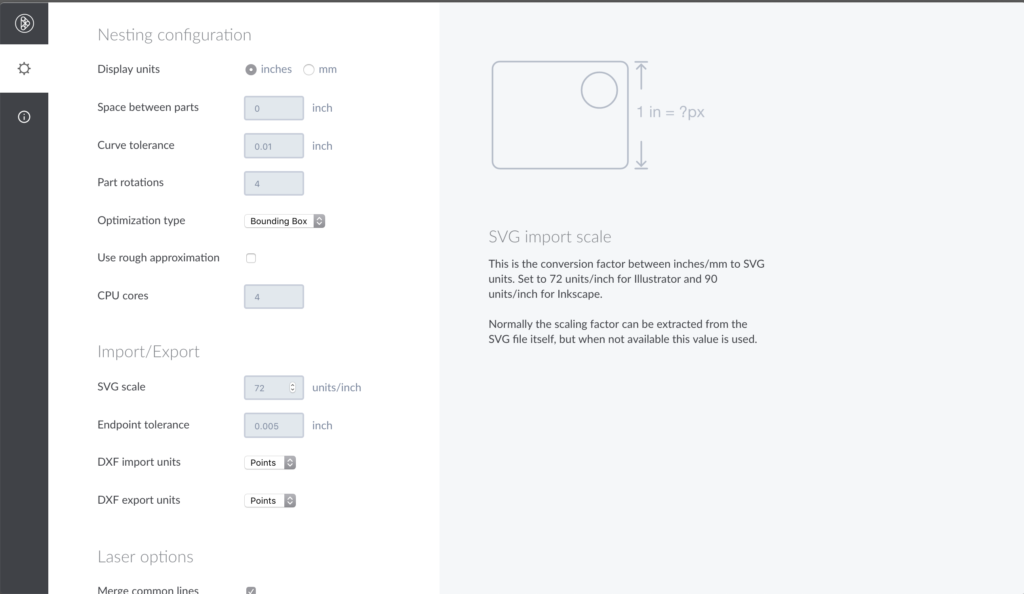
TIP
- Take some time to check out the settings. There are lots of options for how to adjust the way the software nests your designs. You can control the distance between pieces, and whether it will delete overlapping lines (to prevent the laser from cutting the same area twice and thus saving you time)
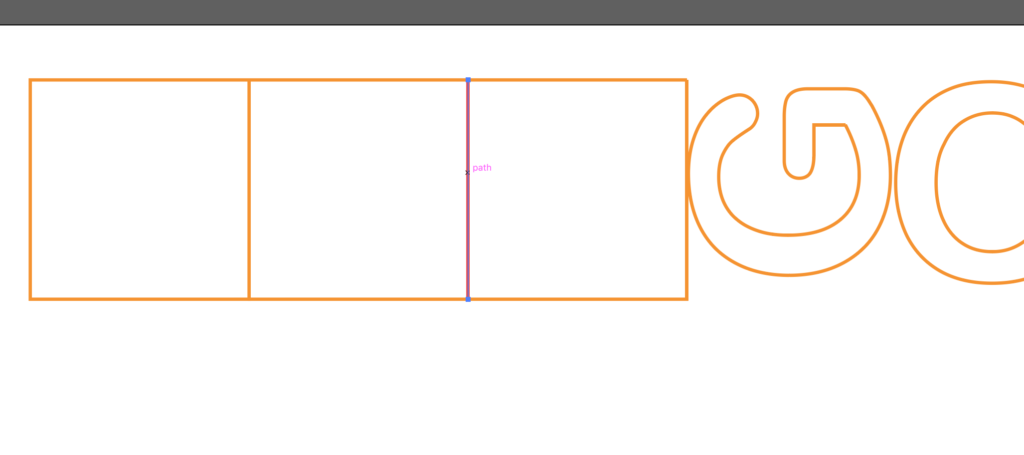
Below you can see (with a different file) that Deepnest has overlapped these three boxes and broken them apart so that there is a single (red) line between them to cut out the shape. This saves time because the shared sides only need one cut instead of two.
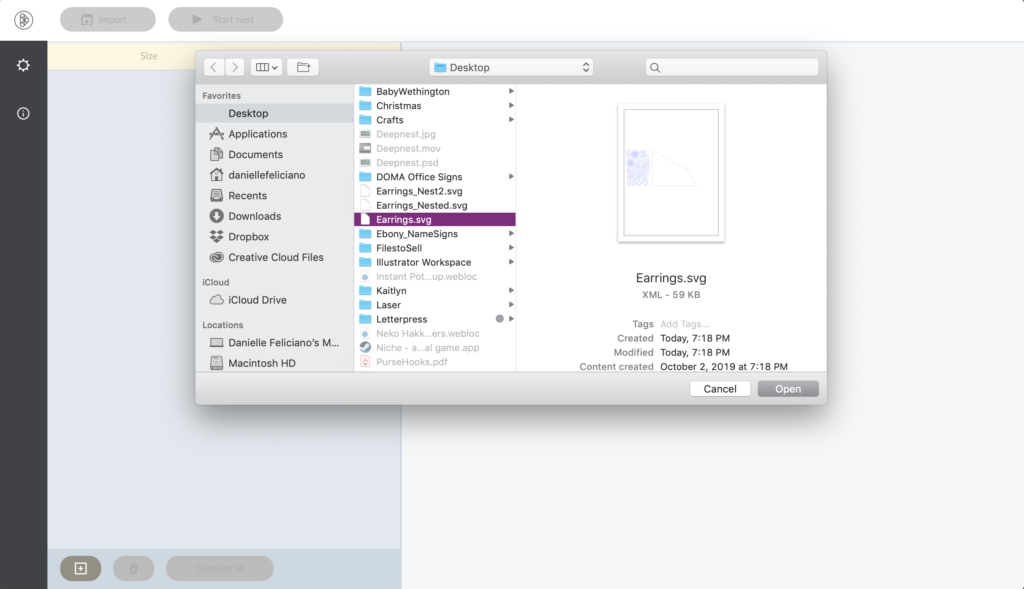
Once you are ready, import your SVG file by clicking the blue button on the top left. Below I have selected the Earrings file I am using to test Deepnest.
After it imports you will see it has grabbed everything from the file. This includes items that were outside of the artboard. SVGs are container files meaning they can have lots of different things in them. They will ignore artboards and just grab every single vector inside the file, so keep this mind.
At the top right (the plus, minus, and target) you can zoom in and out – you may not see every item at first, but they are there just scoot around your view to find them.
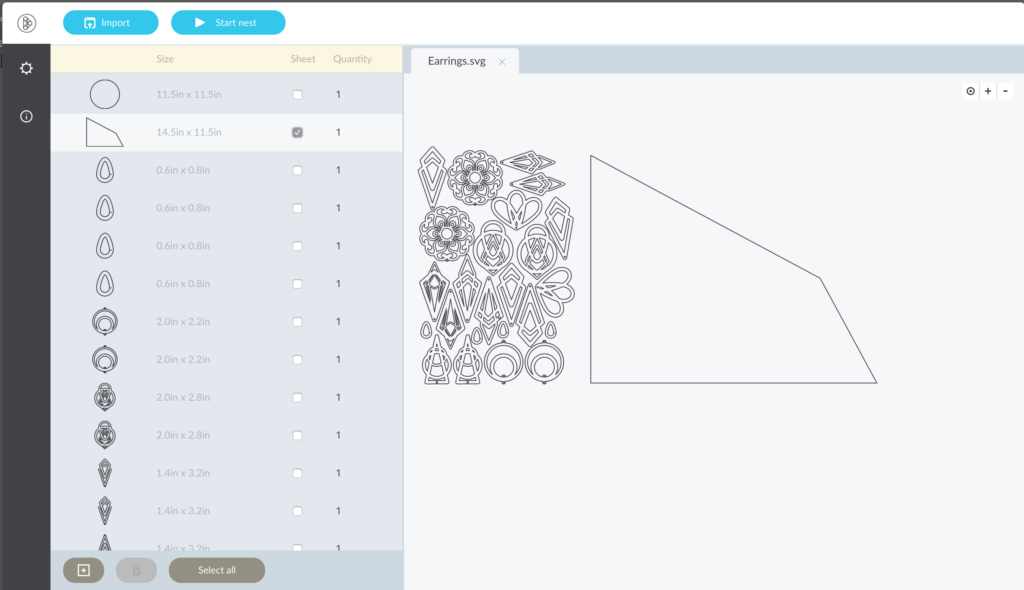
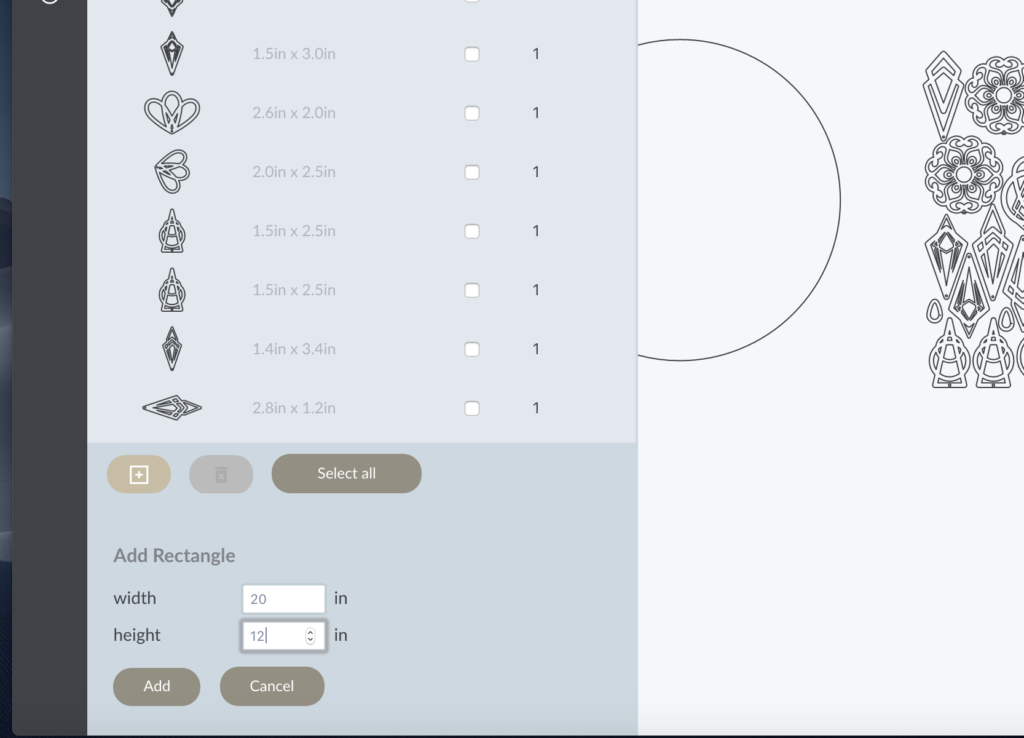
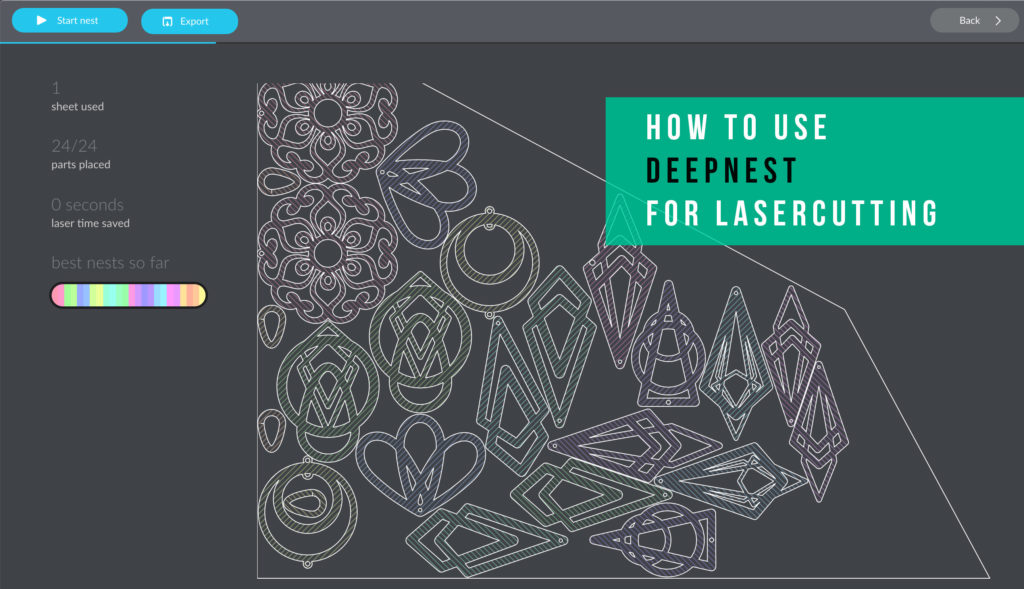
After importing you need to select what you want Deepnest to nest everything INTO. This was the part that wasn’t obvious to me. I tried checking every item in the left column and the program basically did nothing. You should only check the item (or items) you want all of the objects to nest into. They are your “sheet” according to the program. You can have more than one sheet – so if you have two oddly shaped pieces of scrap and want to spread out your items between them, this can be done easily by checking both sheets.
Some Basic Adjustments
If you just want a regular ‘ol rectangle you can add it right in Deepnest at the bottom. Click the plus and enter your dimensions. This will add a new object to your object menu and then you can select it as your sheet. One other thing to note is you can change the quantities of objects in the left menu as well. Everywhere you see that “1” you can click and enter a new quantity. That way if you wanted 50 small circles or something you can just tell it to nest 50 instead of copying and pasting 50 times in Illustrator (which would fill up your left menu with identical circles and could be confusing). You can also select and delete items. Just click them and hit the trash icon in the bottom left.
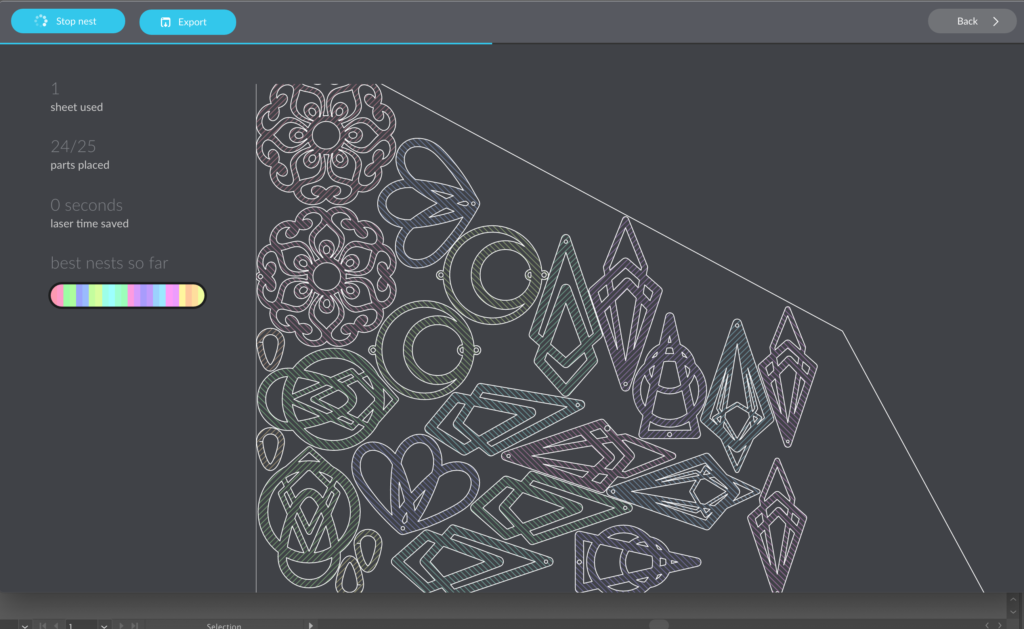
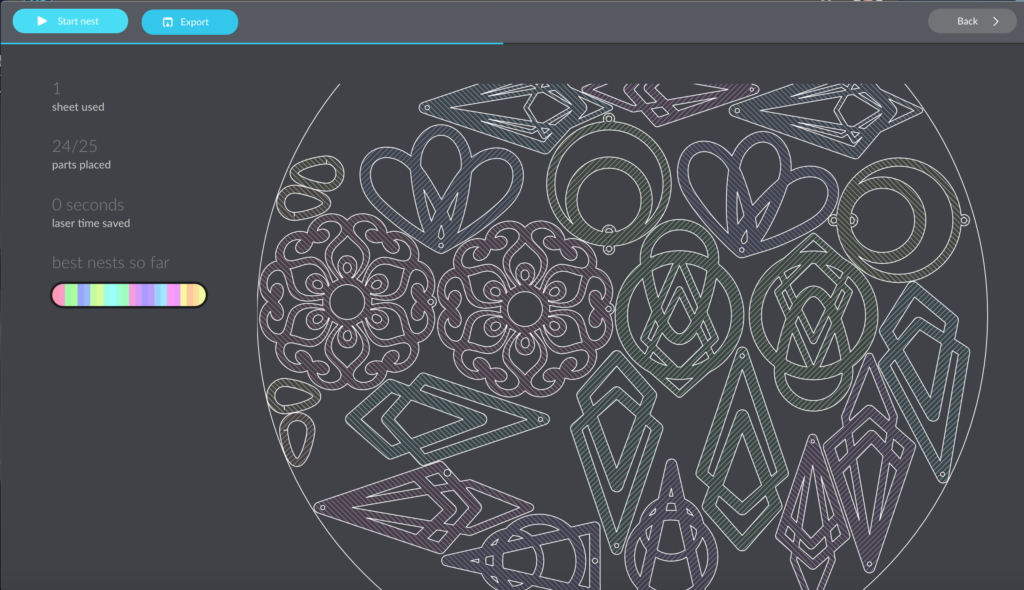
Once you have your sheet selected and have deleted any objects you do not want ( I have not found a way to exclude items other than to delete them). Click Start Nest at the top. BAM. It will start nesting your shapes. It will continue to try and figure out better configurations until you click Stop Nest. So when you’re happy just click Stop Nest. You can also go back and switch to a different sheet. Play around and see what you can do! Note: if your item is too large to nest in your sheet Deepnest seems to just ignore it. I had a large circle meant to be tested as a second sheet. It obviously would not fit my quadrilateral, so it just ignored it and it did not export with my final file.
Getting Your File Extension Right
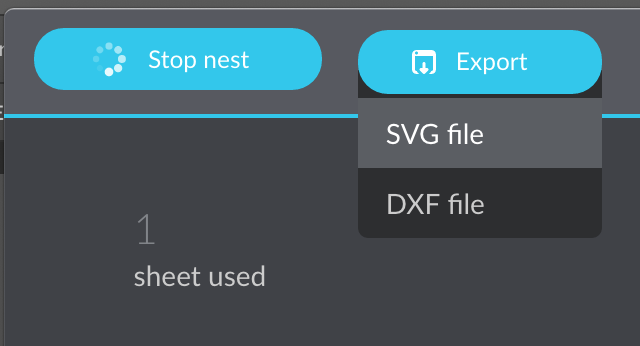
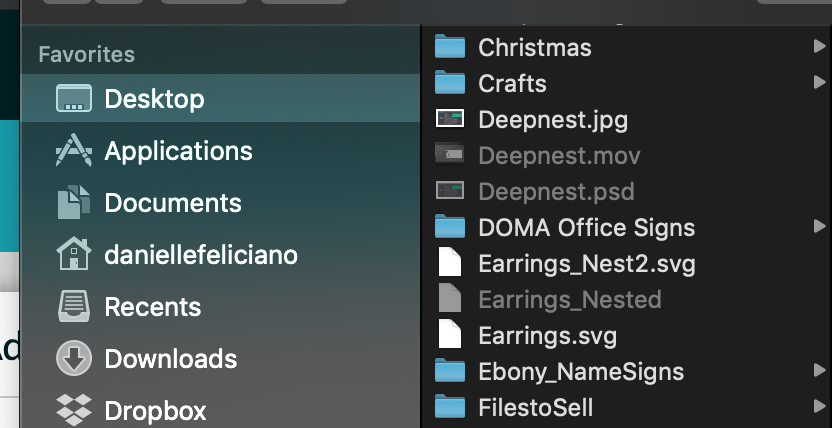
After you are happy with everything and have clicked “Stop Nest”, click Export and select your chosen file type. I am choosing an SVG. Here is another IMPORTANT tip that is not intuitive. If you ever want to open this SVG in Illustrator again, you have to TYPE in the “.svg” at the end otherwise Illustrator will read it as a text file and not render your shapes.
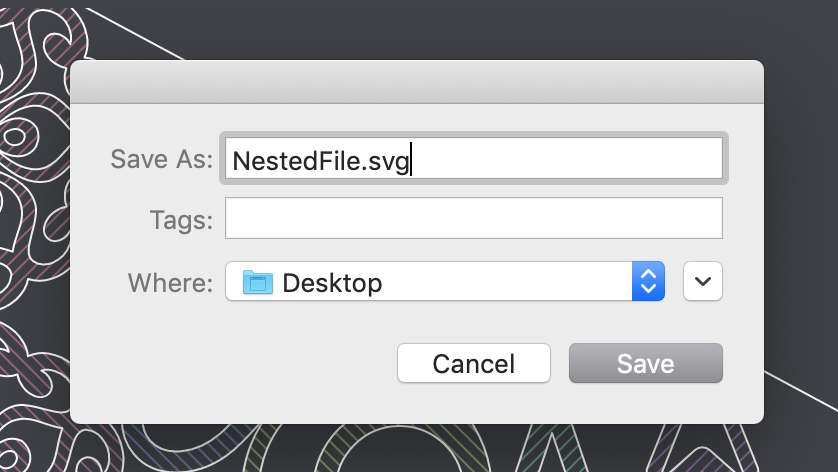
Back to Illustrator
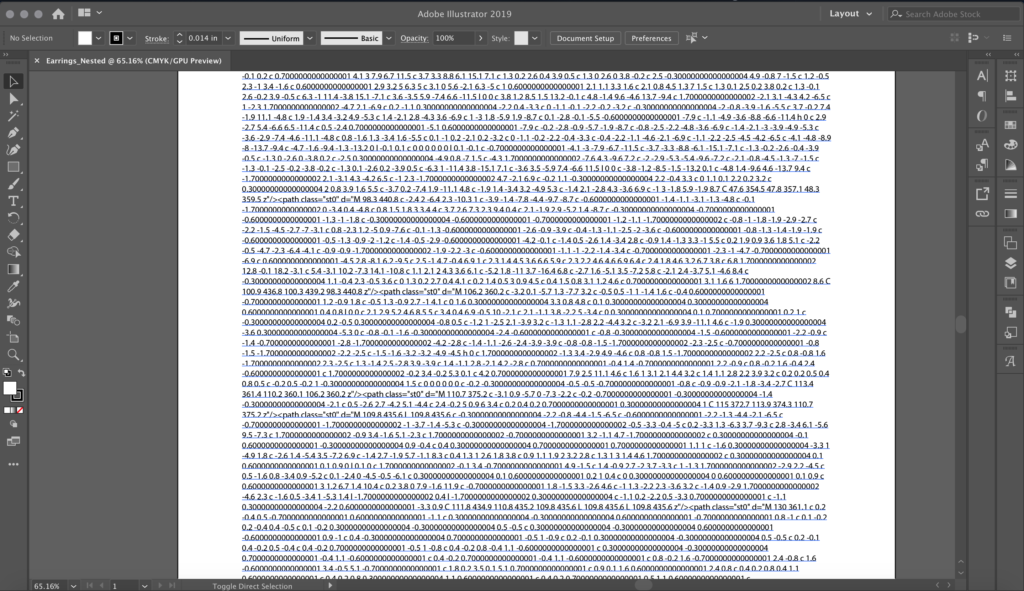
If you want to edit anything in this file in Illustrator (or perhaps combine it with something else) you have to make sure to add that .SVG to end of your file otherwise you’ll get this when you open it:
If you correctly added the file extension you’ll get this (yes this a different nest attempt not the quadrilateral one shown earlier):
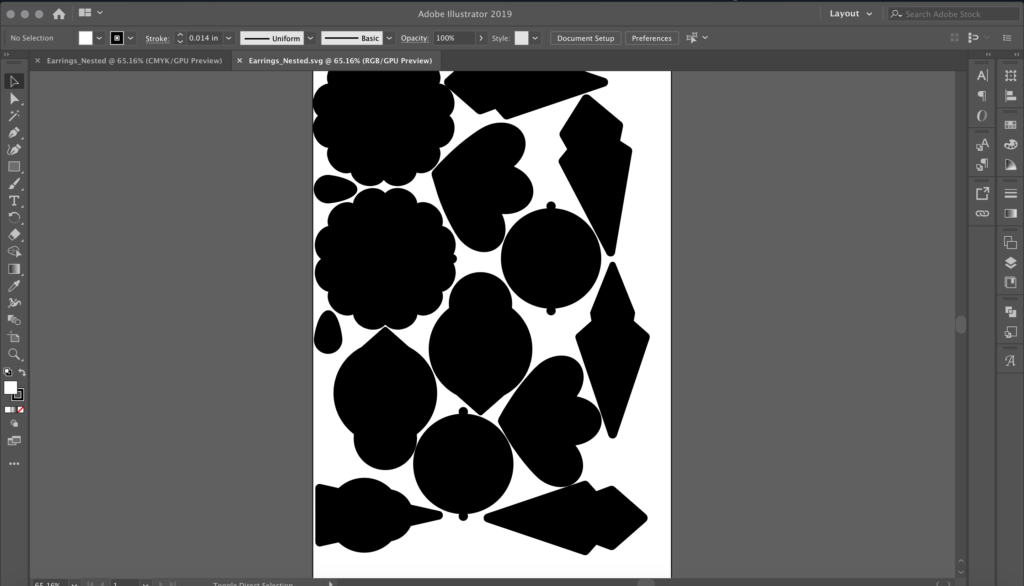
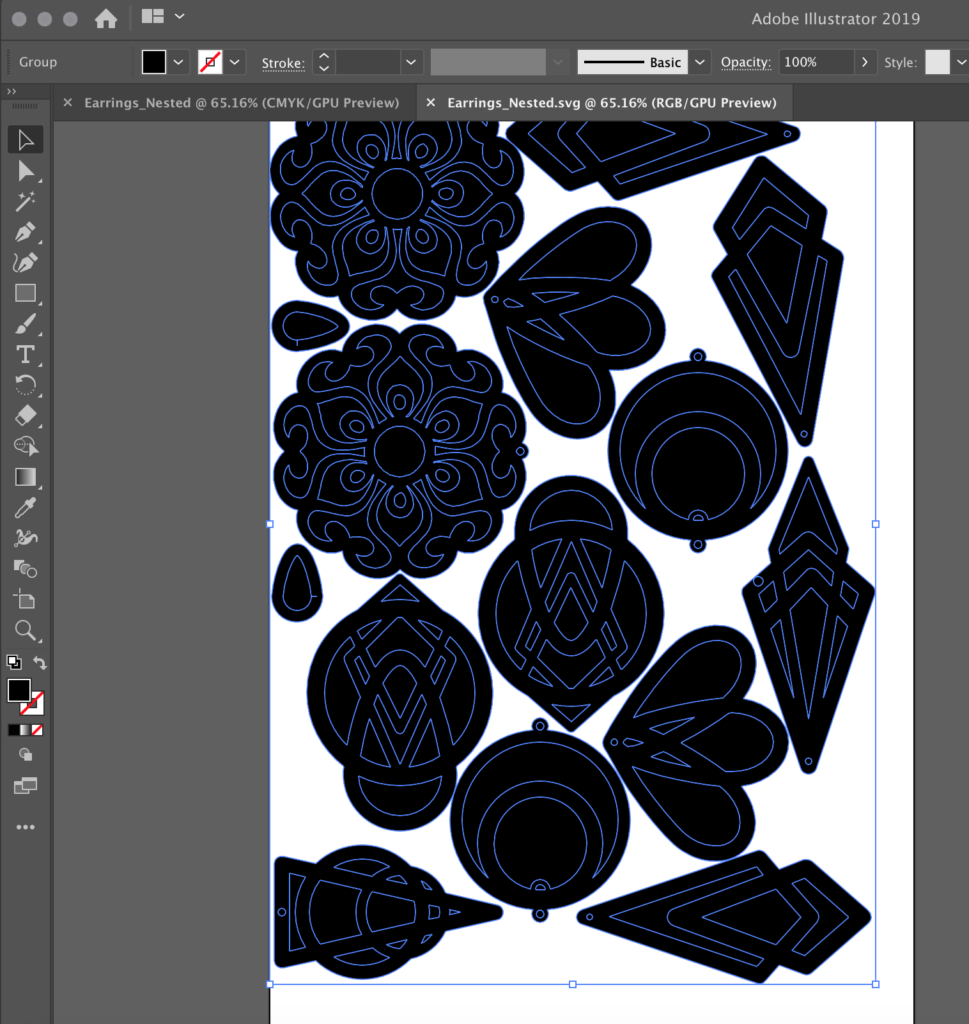
Don’t panic! All your cut lines are there you just have to swap the black fill to outlines by selecting everything and clicking the swap fill/stroke arrow in the color picker
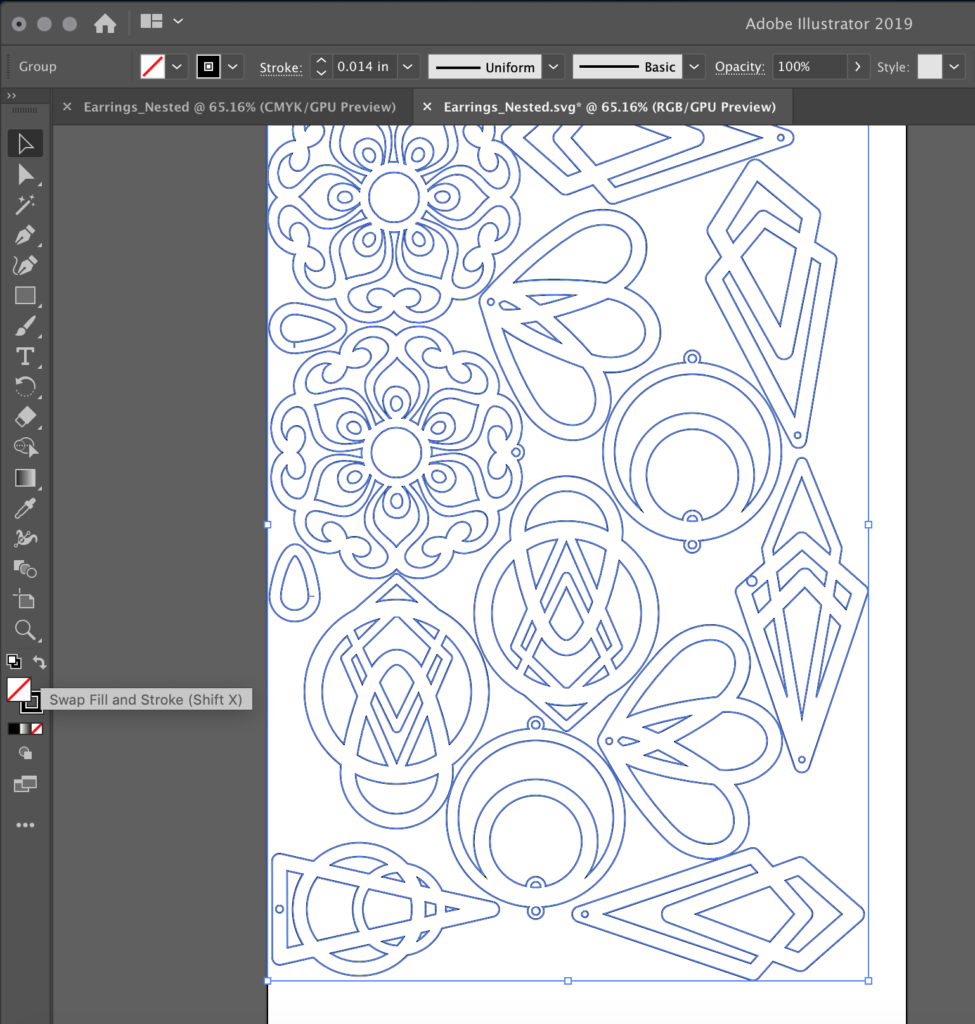
On to the Glowforge
I showed you the little bit above about Illustrator just as an FYI. You can take your .SVG that you made and go directly to the Glowforge interface. Just upload it and viola. They will come in as engraves (solid shapes) like they did for illustrator. Just swap to cut settings and they’ll be good to go!
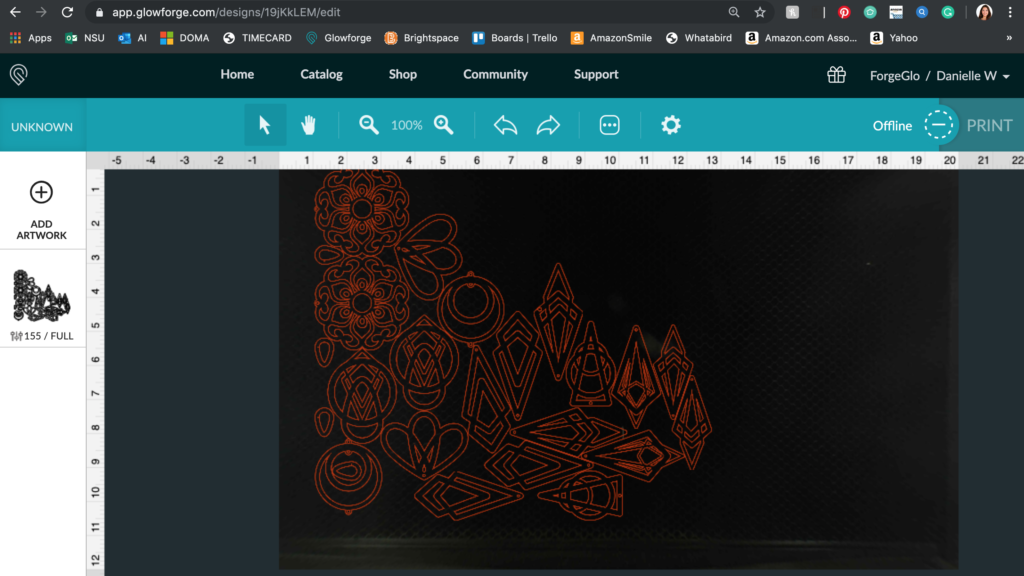
Just to REITERATE. If you do not add the .SVG file extension when saving (or after the fact by editing the name of the file directly) it WILL NOT open in Illustrator OR the Glowforge. See how my Earrings _Nested file is grayed out? It will not recognize a file without an extension.
NAVIGATE POSTS
Helpful Links
Latest Posts
Posts by Category
Explore Posts By Tags
Acrylic Adobe Illustrator Alcohol Ink Baby Room Beginner Post Book Binding BuyTheFile Christmas Felt freefiles Gifts Gilding Glowforge Holiday Jewelry Journal Kaleidoscope LED Notebook Resin Rubber Stamp Settings Sign Stamping Yupo
Get Your Own Glowforge Laser
If you have found this post helpful and would like to purchase a Glowforge of your own you can receive a discount using my referral link when you are ready to purchase:
Sign Up to Blog Newsletter
CONCLUSIONS
Deepnest.io is a great software! Saving material will help you get the most out of your Glowforge and I highly recommend you give Deepnest a try! I don’t have too much to say other than for me there were two un-intuitive things:
1. It wasn’t clear to me that I had to select just one shape for the objects to nest into. I spent like 10 minutes trying to figure out why it wasn’t working when I checkboxed everything (assuming you had to check the items you wanted to nest, not the container)
2. Not a lot of people will know they need to add the .SVG file extension. I can imagine this was frustrating for some. I knew right away what was wrong, but only from years of dumb stuff like that causing issues in web design (God help you if you were coding HTML and put .JPEG instead of jpg, capitals count and you quickly learned extensions mattered in how programs or code calls out to them).
Obligatory Glowforge Discount Code Plug
If you found this post helpful and you plan to buy a Glowforge you can use my code (https://glowforge.us/r/QHDONFXB) for a discount of $100 off the Basic, $250 of the Plus, or $500 of the Pro:
Sign Up for Blog Posts Updates
And finally, if you’d like to be updated on posts like these in the future you can sign up for my email list. You will only receive an email if there is new content, and only once weekly in that case:


Hi Danielle!
After reading your post, I decided to try this program. Unfortunately, there was a problem.
The program does not see certain elements, it marks them in red.
Or maybe you’ve had a similar problem? I will be grateful for your help.
Regards Krzysztof
I’m not an expert, but you might have to bring the completed file back into Illustrator to ensure the objects are properly setup for lazer. Also, make sure to check that the “artboard” you select in Deepnest is large enough for all your objects. I have not encountered that problem personally you may want to take screenshots and post in a laser Facebook group to get more help.