Creating a Glowforge Jack-o-Lantern
Project Overview:
I really waited until the last second to do this post, and as of now it’s not really finished, however I wanted to share in case anyone wanted to expand on this idea and give it a go. So I’ve seen some other people engraving their pumpkins and I thought I’d give it a try! Let’s start with what you really want to know – settings. Then I’ll walk you through my process and offer a few things I learned.
Engraving
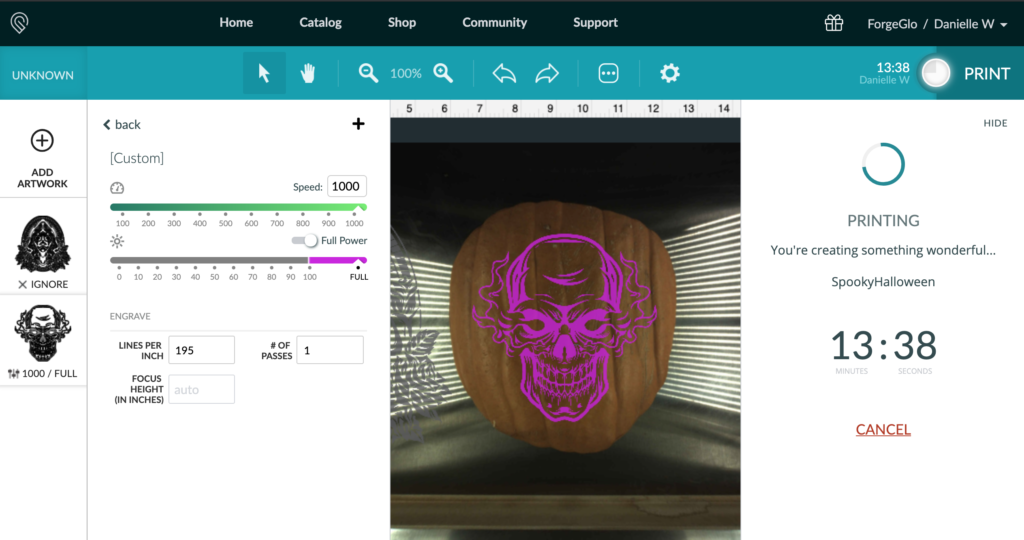
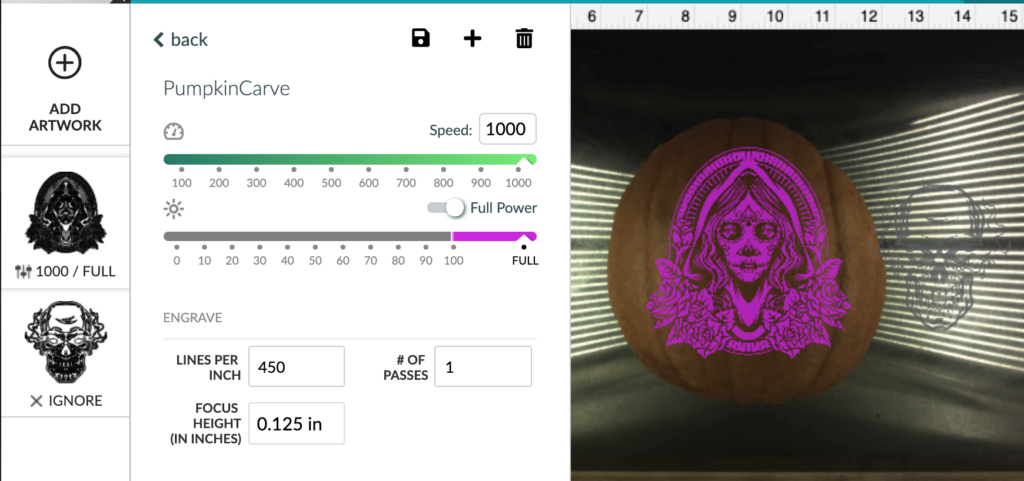
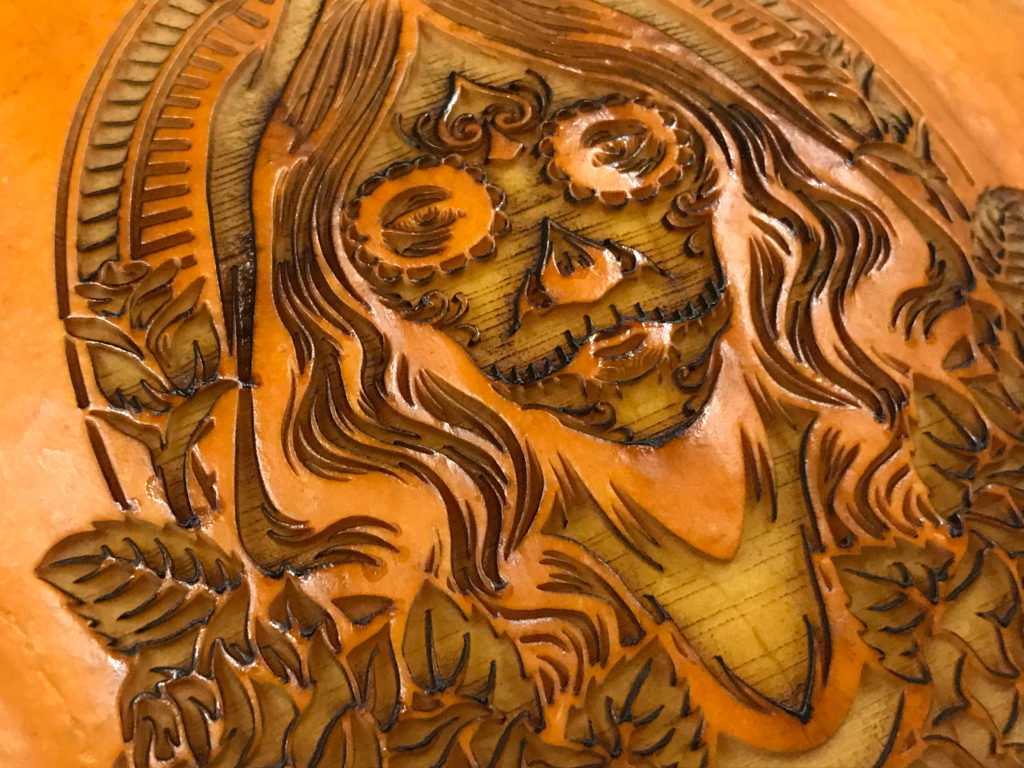
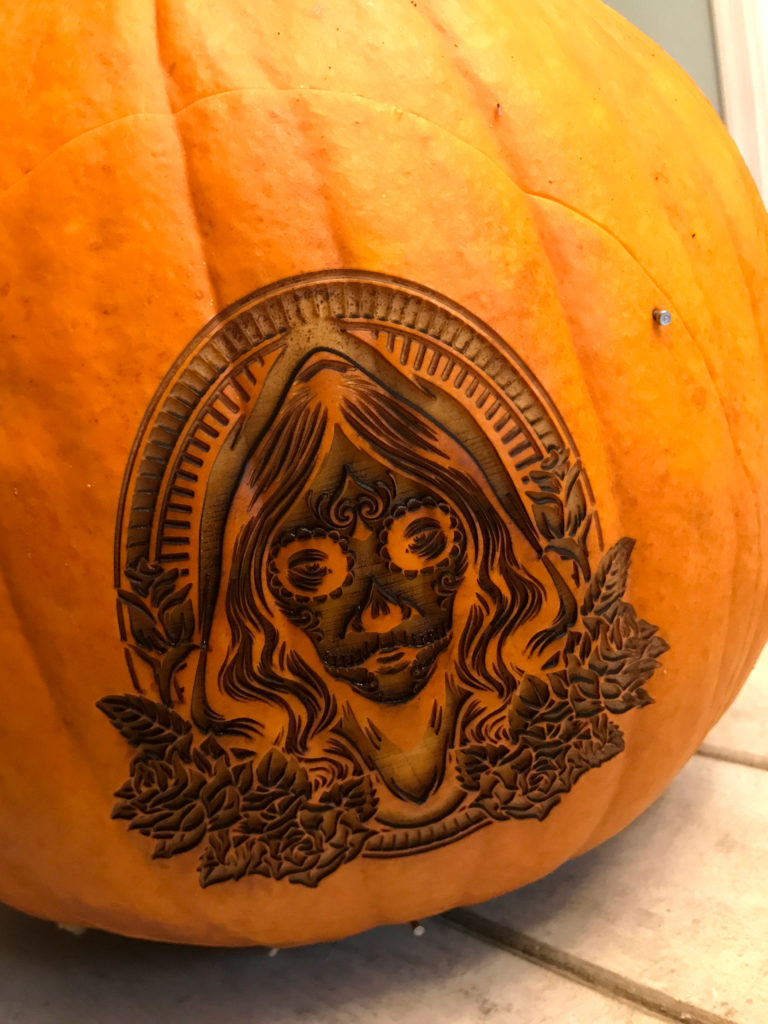
ENGRAVE | No need to overthink this. For engraving I just put the pedal to the metal. Max speed, max power. I dropped the LPI to 195, because really who is trying to nitpick the engrave on a dang pumpkin – next time I might bump it up though so that I could get a deeper engrave.
Cutting
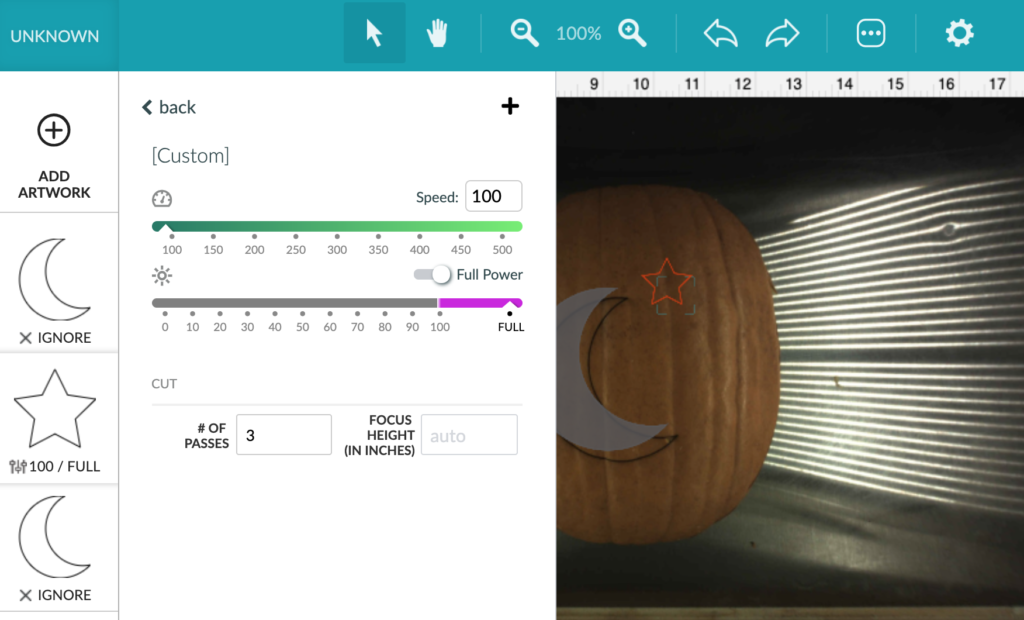
So something I haven’t seen done before is actually cutting the pumpkin. I only did one quick shape, but it does seem possible and it did work, though I have yet to try it on a full design. Minimum speed, max power, and three passes just worked. The thickness of your pumpkin slice may change these settings. *WARNING: going this slow with this much power can be dangerous. DO NOT leave it unattended. I could really see the pumpkin steaming when I did this, I think the moisture of the pumpkin helped prevent a fire, but no promises.
Pumpkin Prep
Any good Jack-o-Lantern starts with the worst part – gutting the pumpkin. As a highly efficient (lazy) person there was no way I was going to sit there and saw though it. So I went for the jigsaw. My husband and I cut through 3 pumpkins in no time and it worked great.
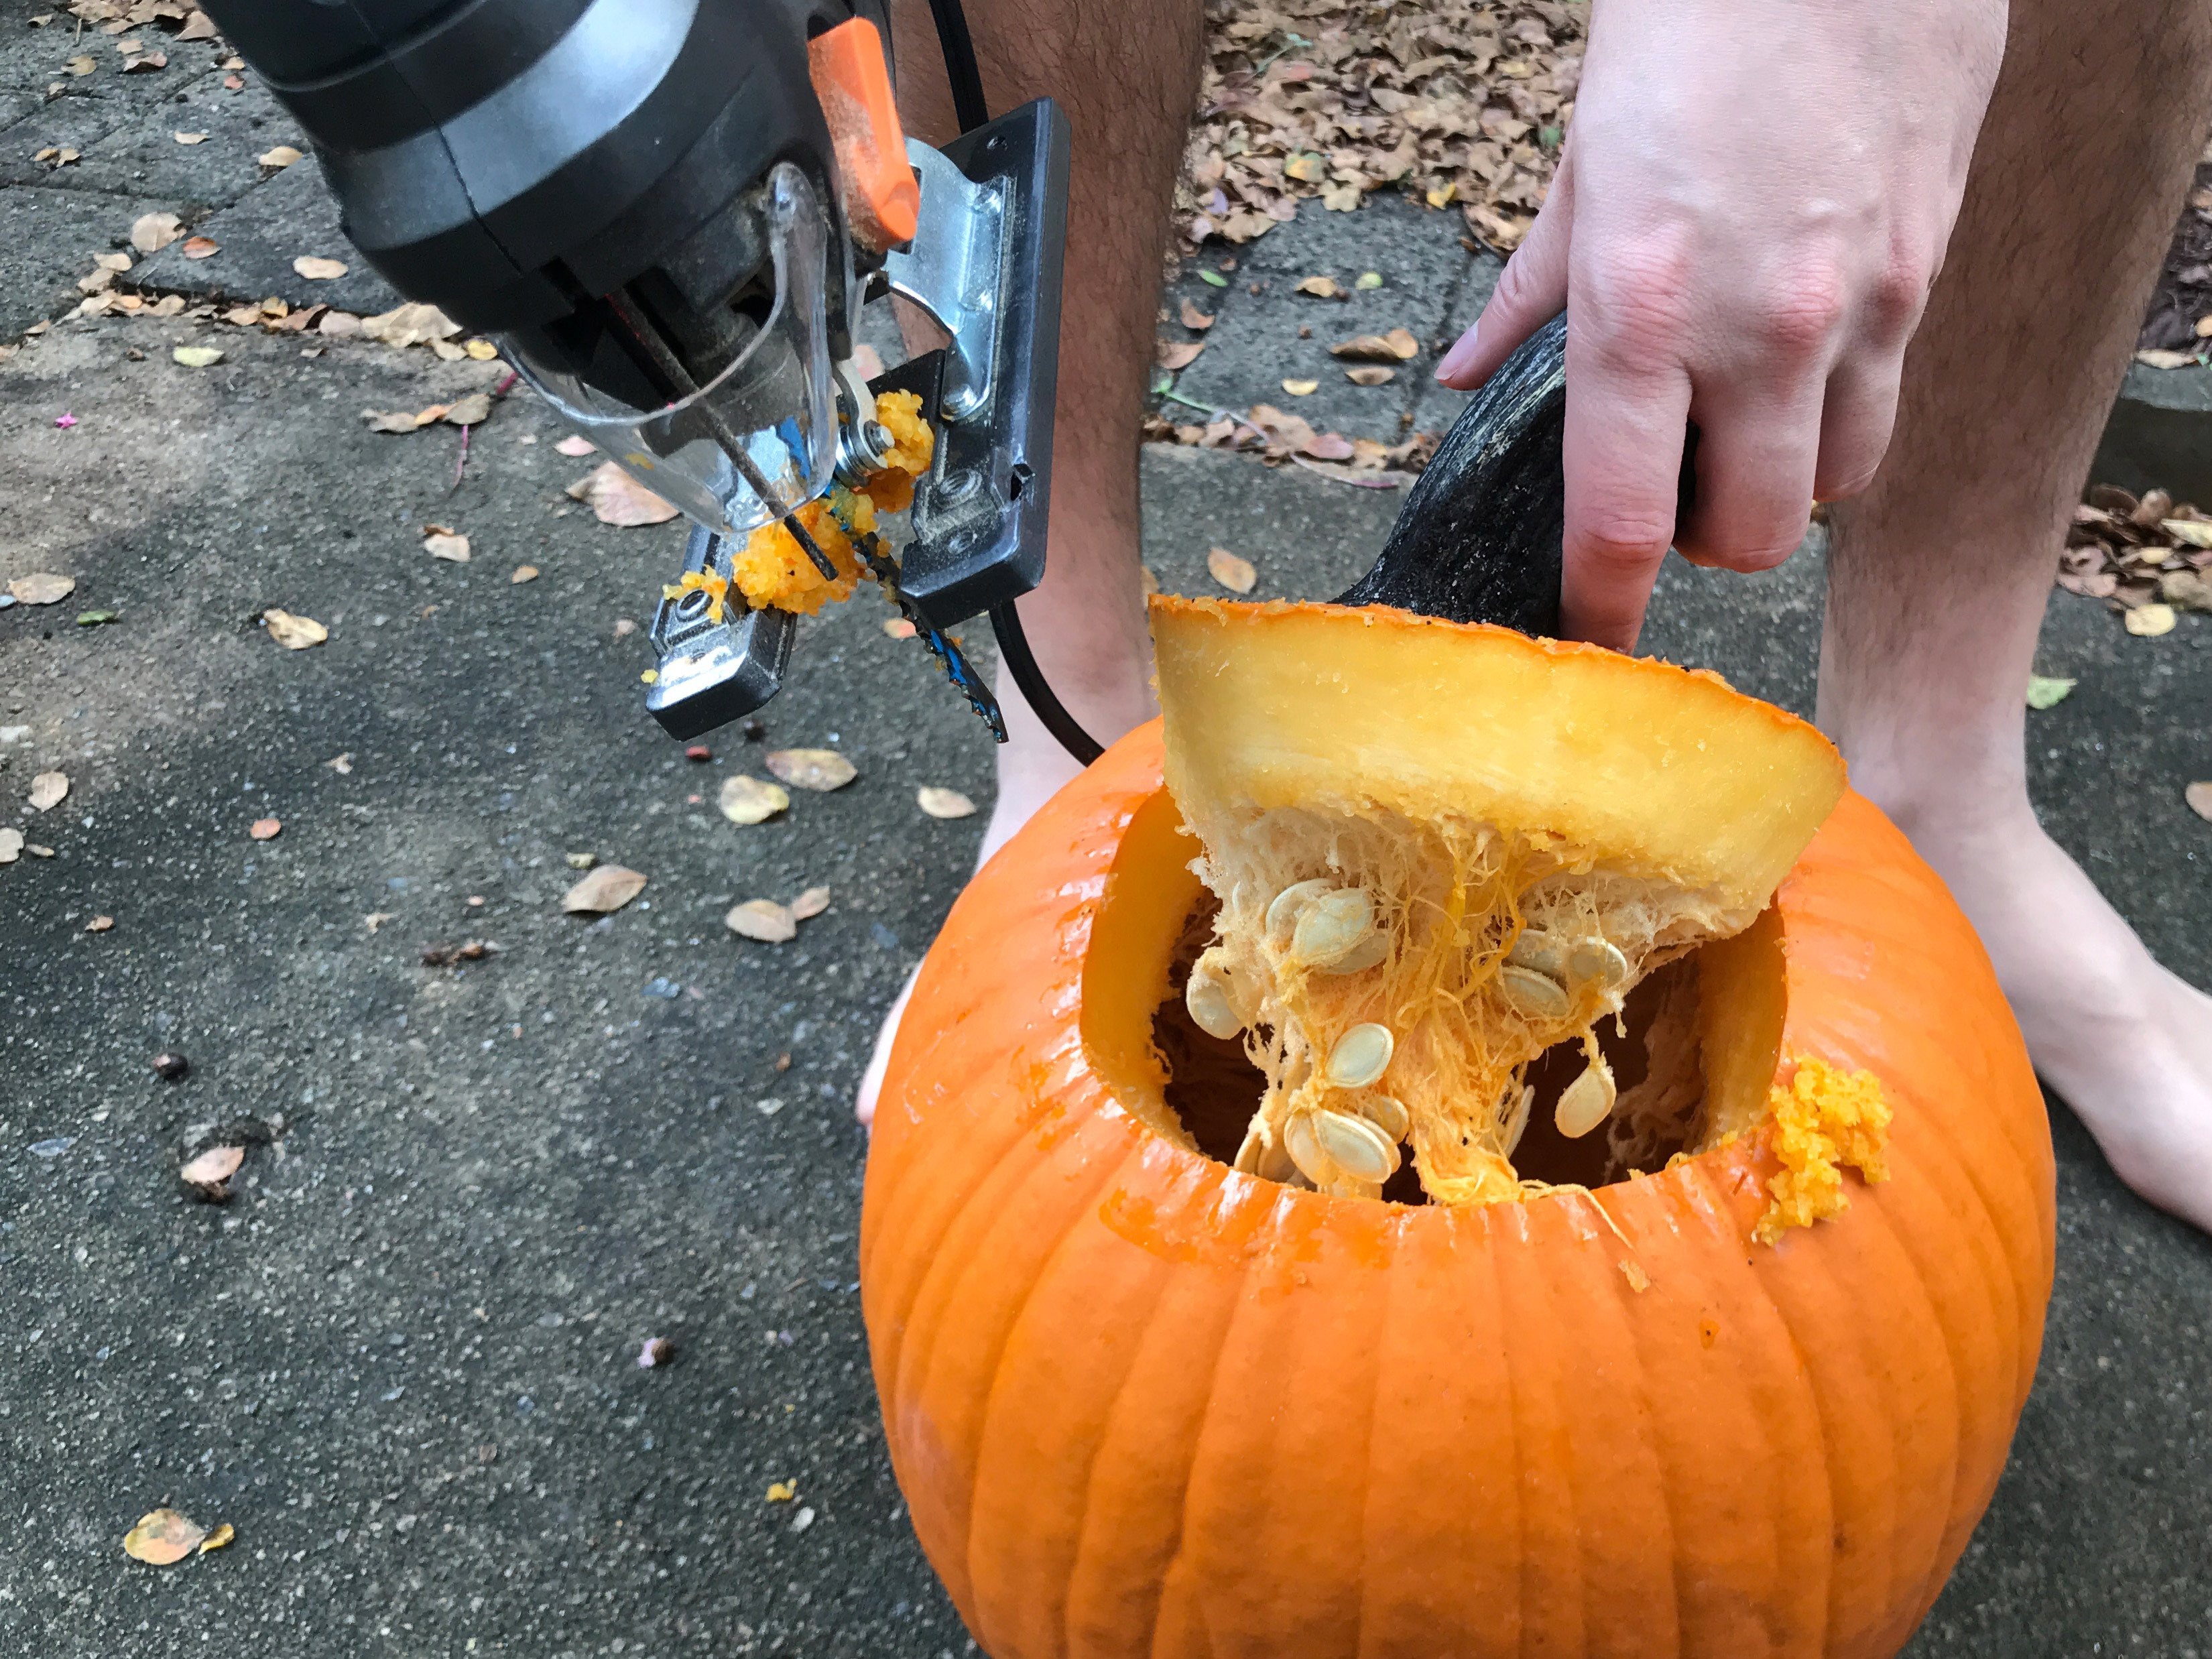
Remember to save the pumpkin seeds for roasting! Ok, so next step. This big ass pumpkin was not going fit in the Glowforge (duh). So I had to cut a “face” that would fit in the machine. Now had I been smart, I would have just sliced off a thin slice like I was cutting cake – this would have ensured the thinnest piece possible – which matters since we can’t fit anything thicker than about 1.8″ in the forge. However, I wanted to use the jigsaw because it was faster so instead I cut out my shape as shown below.
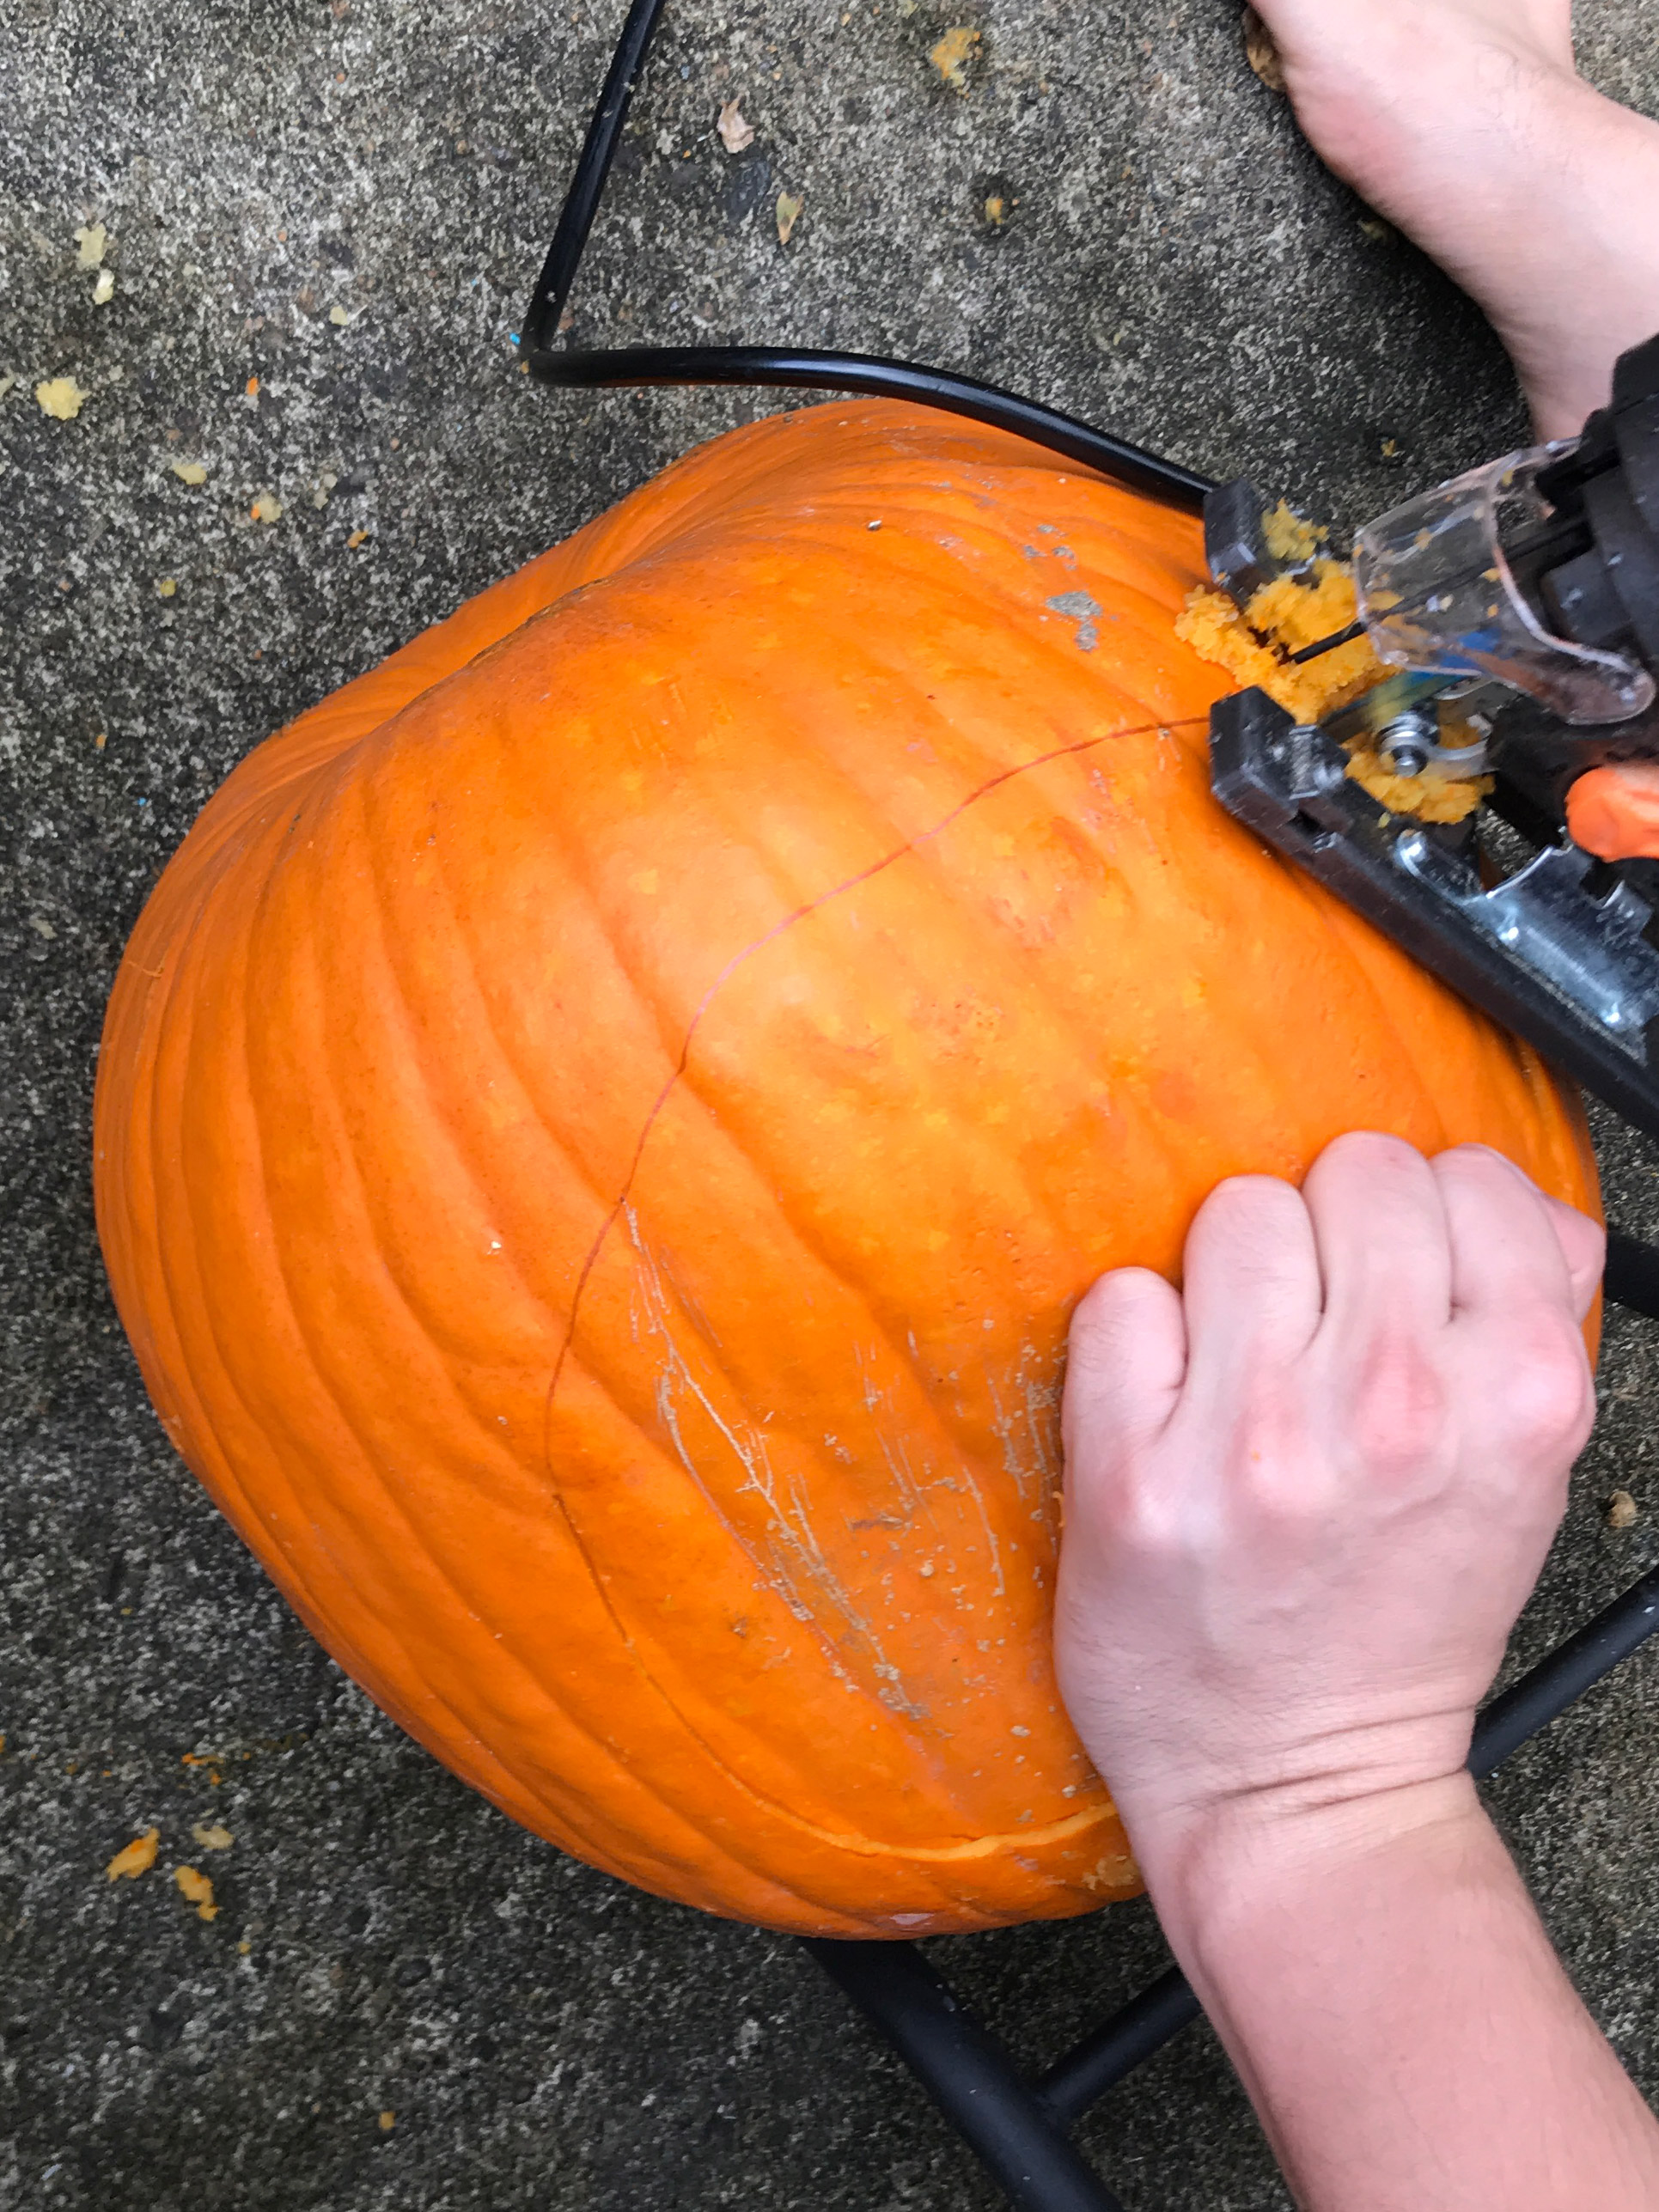
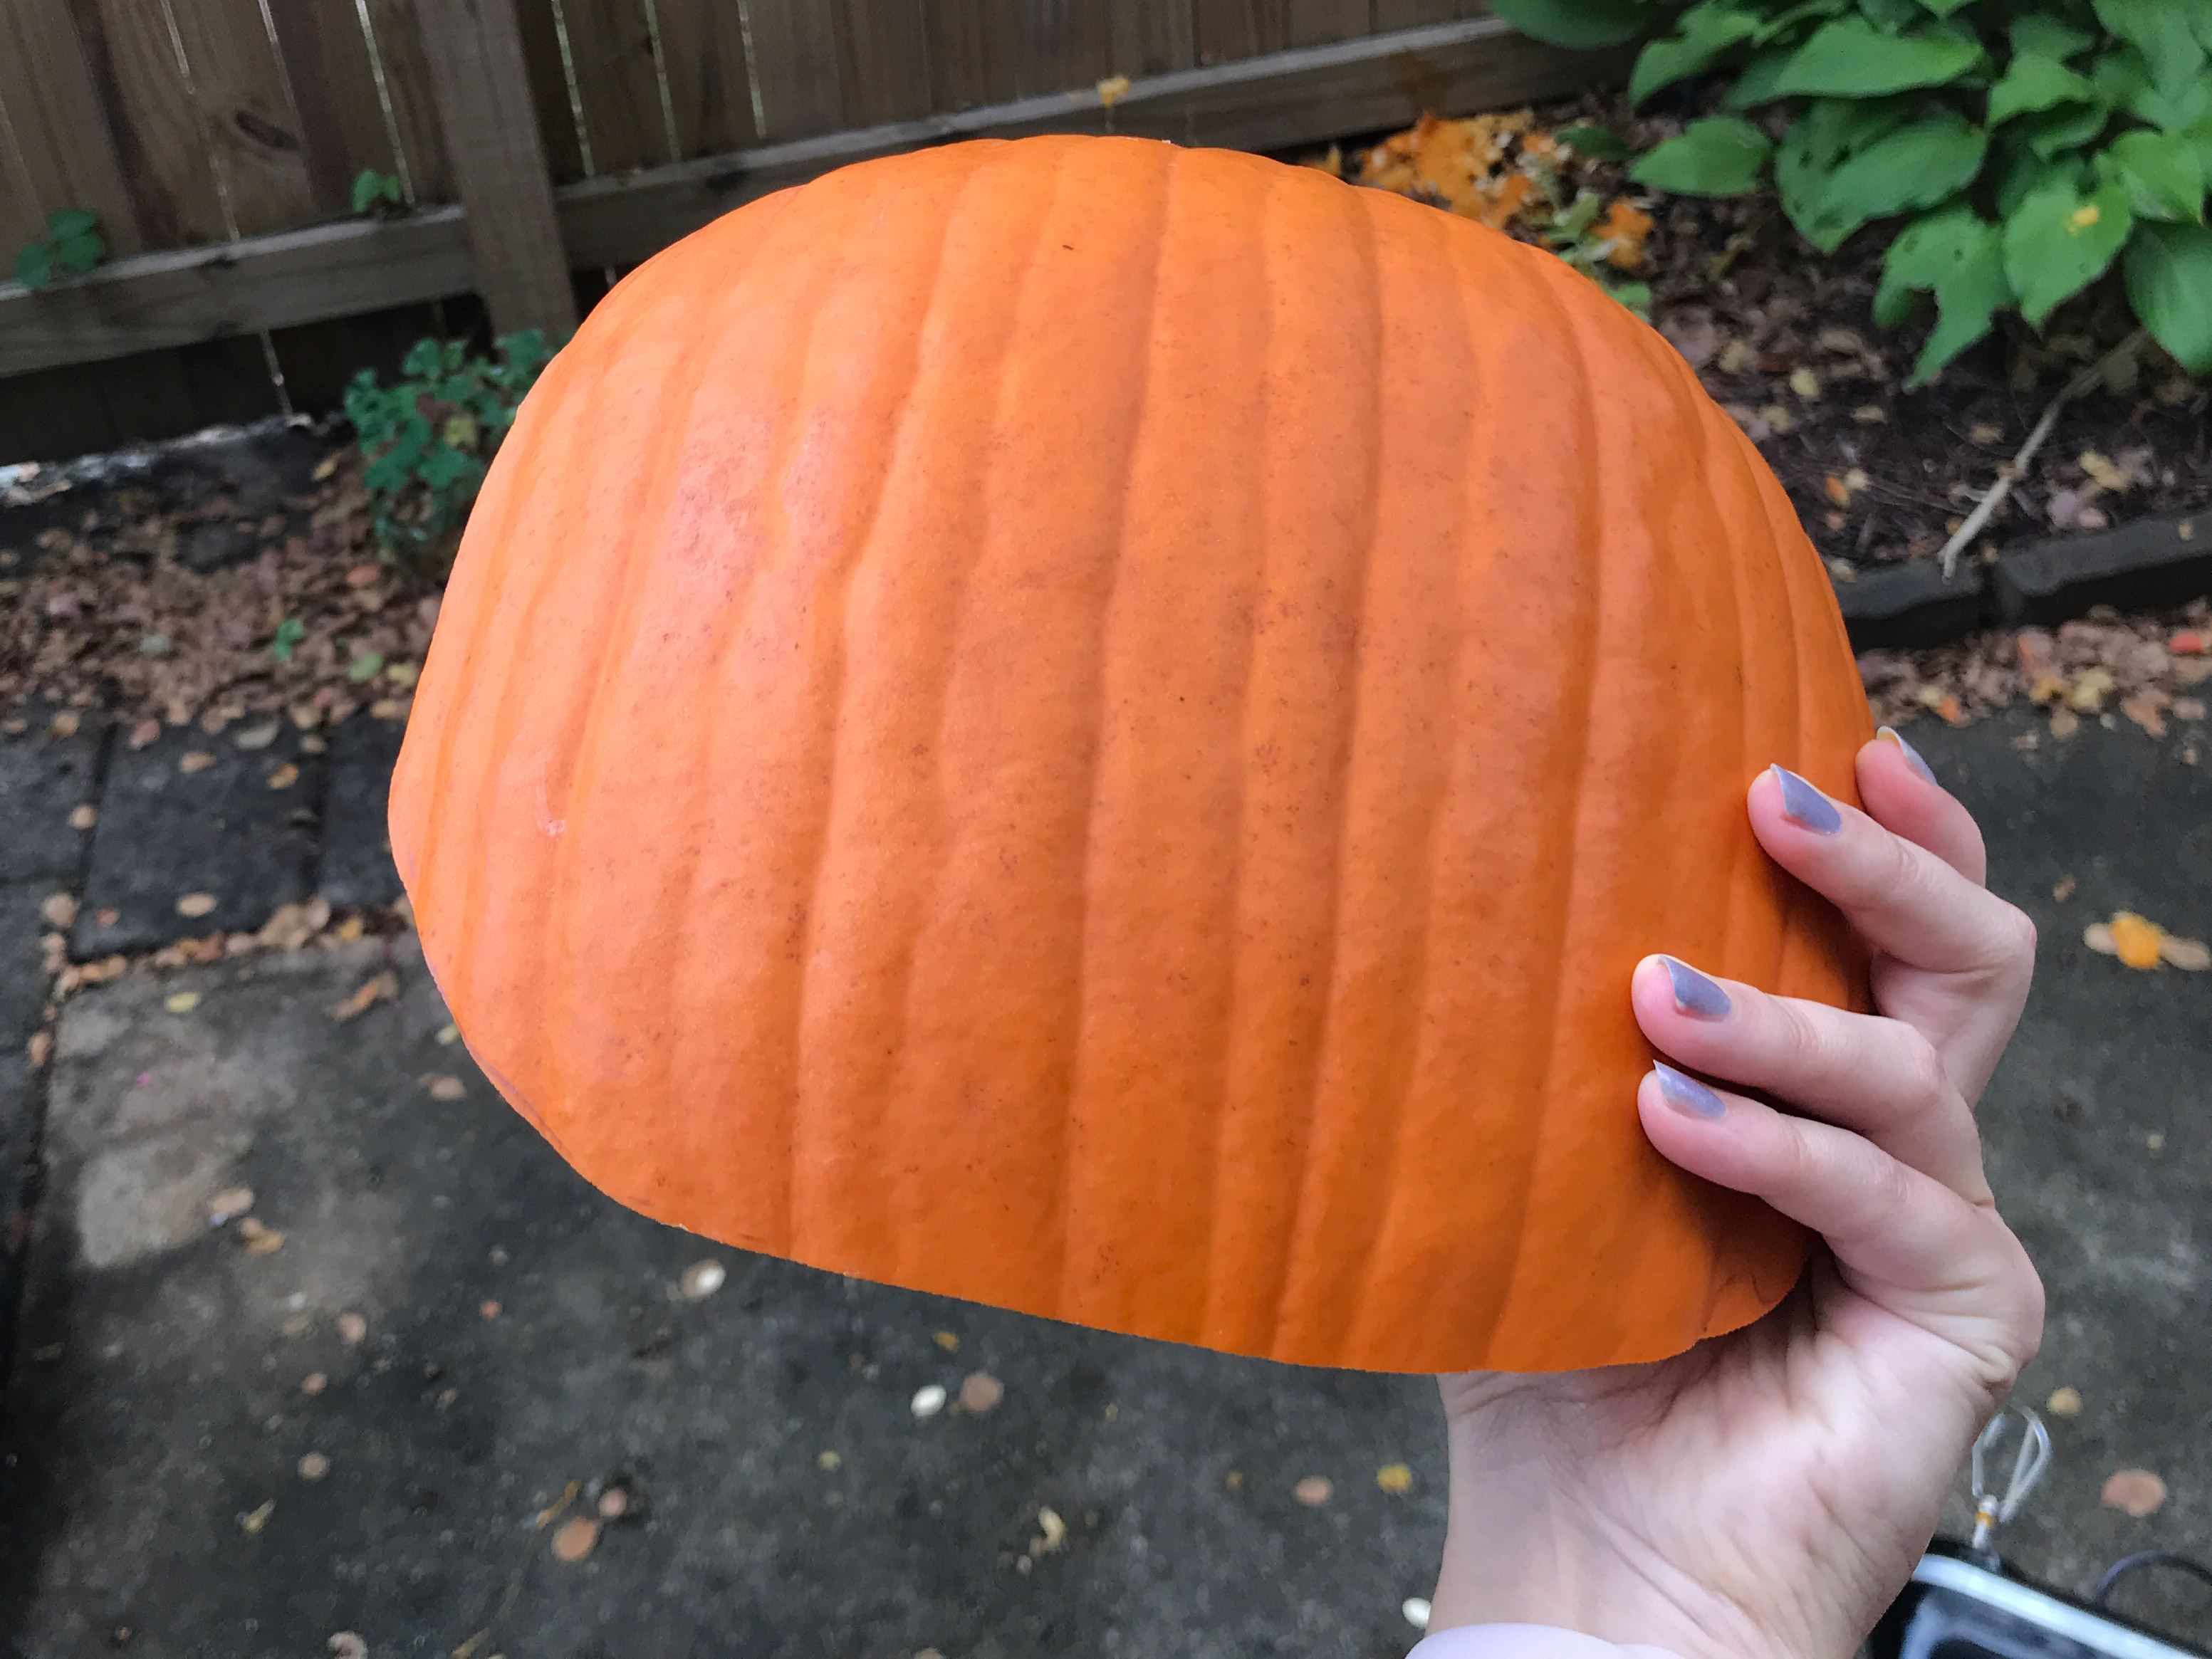
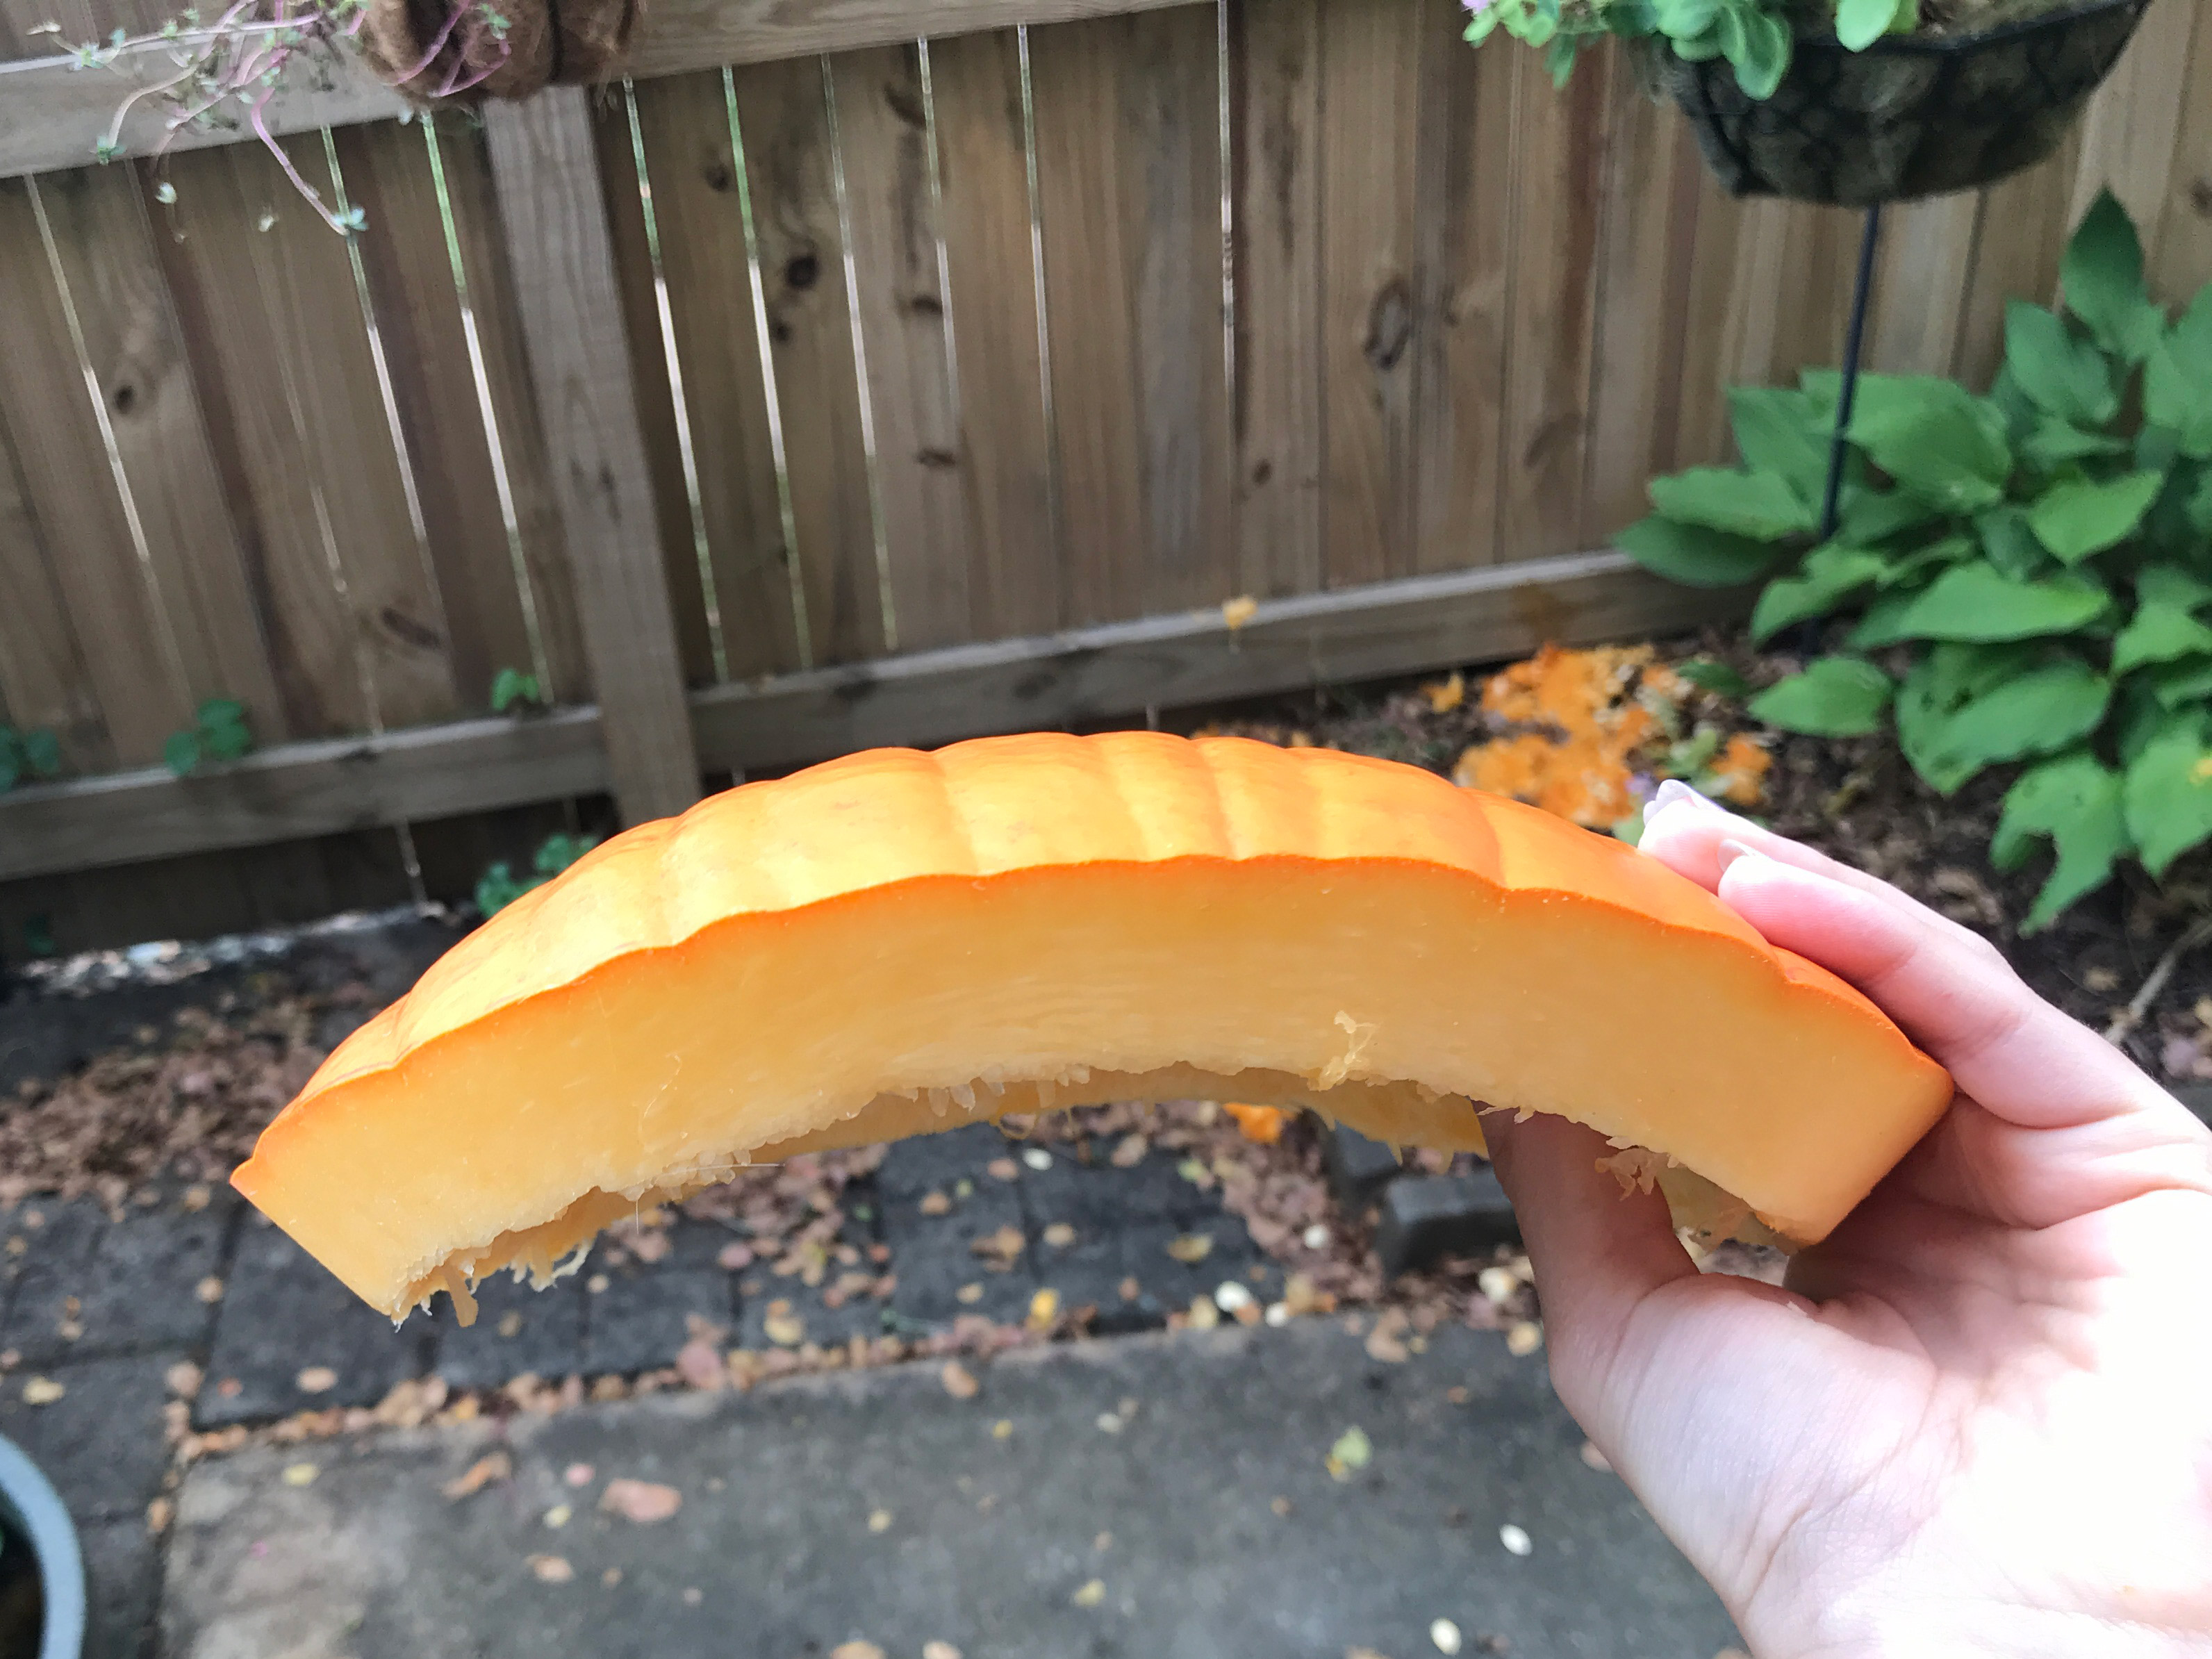
Waaaaaayyyy too thick. I used a knife to cut it thinner and set it on a towel while slicing away the inside wall to keep it from slipping (which was easy – the inside cuts nicely, it’s the rind which is tough to cut), For obvious reasons my hands were not free to photograph that but this is what I had after. I ended up having to keep shaving it down, which eventually became an issue because the edges got so thin (due to the curve of the pumpkin) that I had to cut them off. In the end, I ended up going to the other side of the pumpkin and slicing off a new smaller piece.
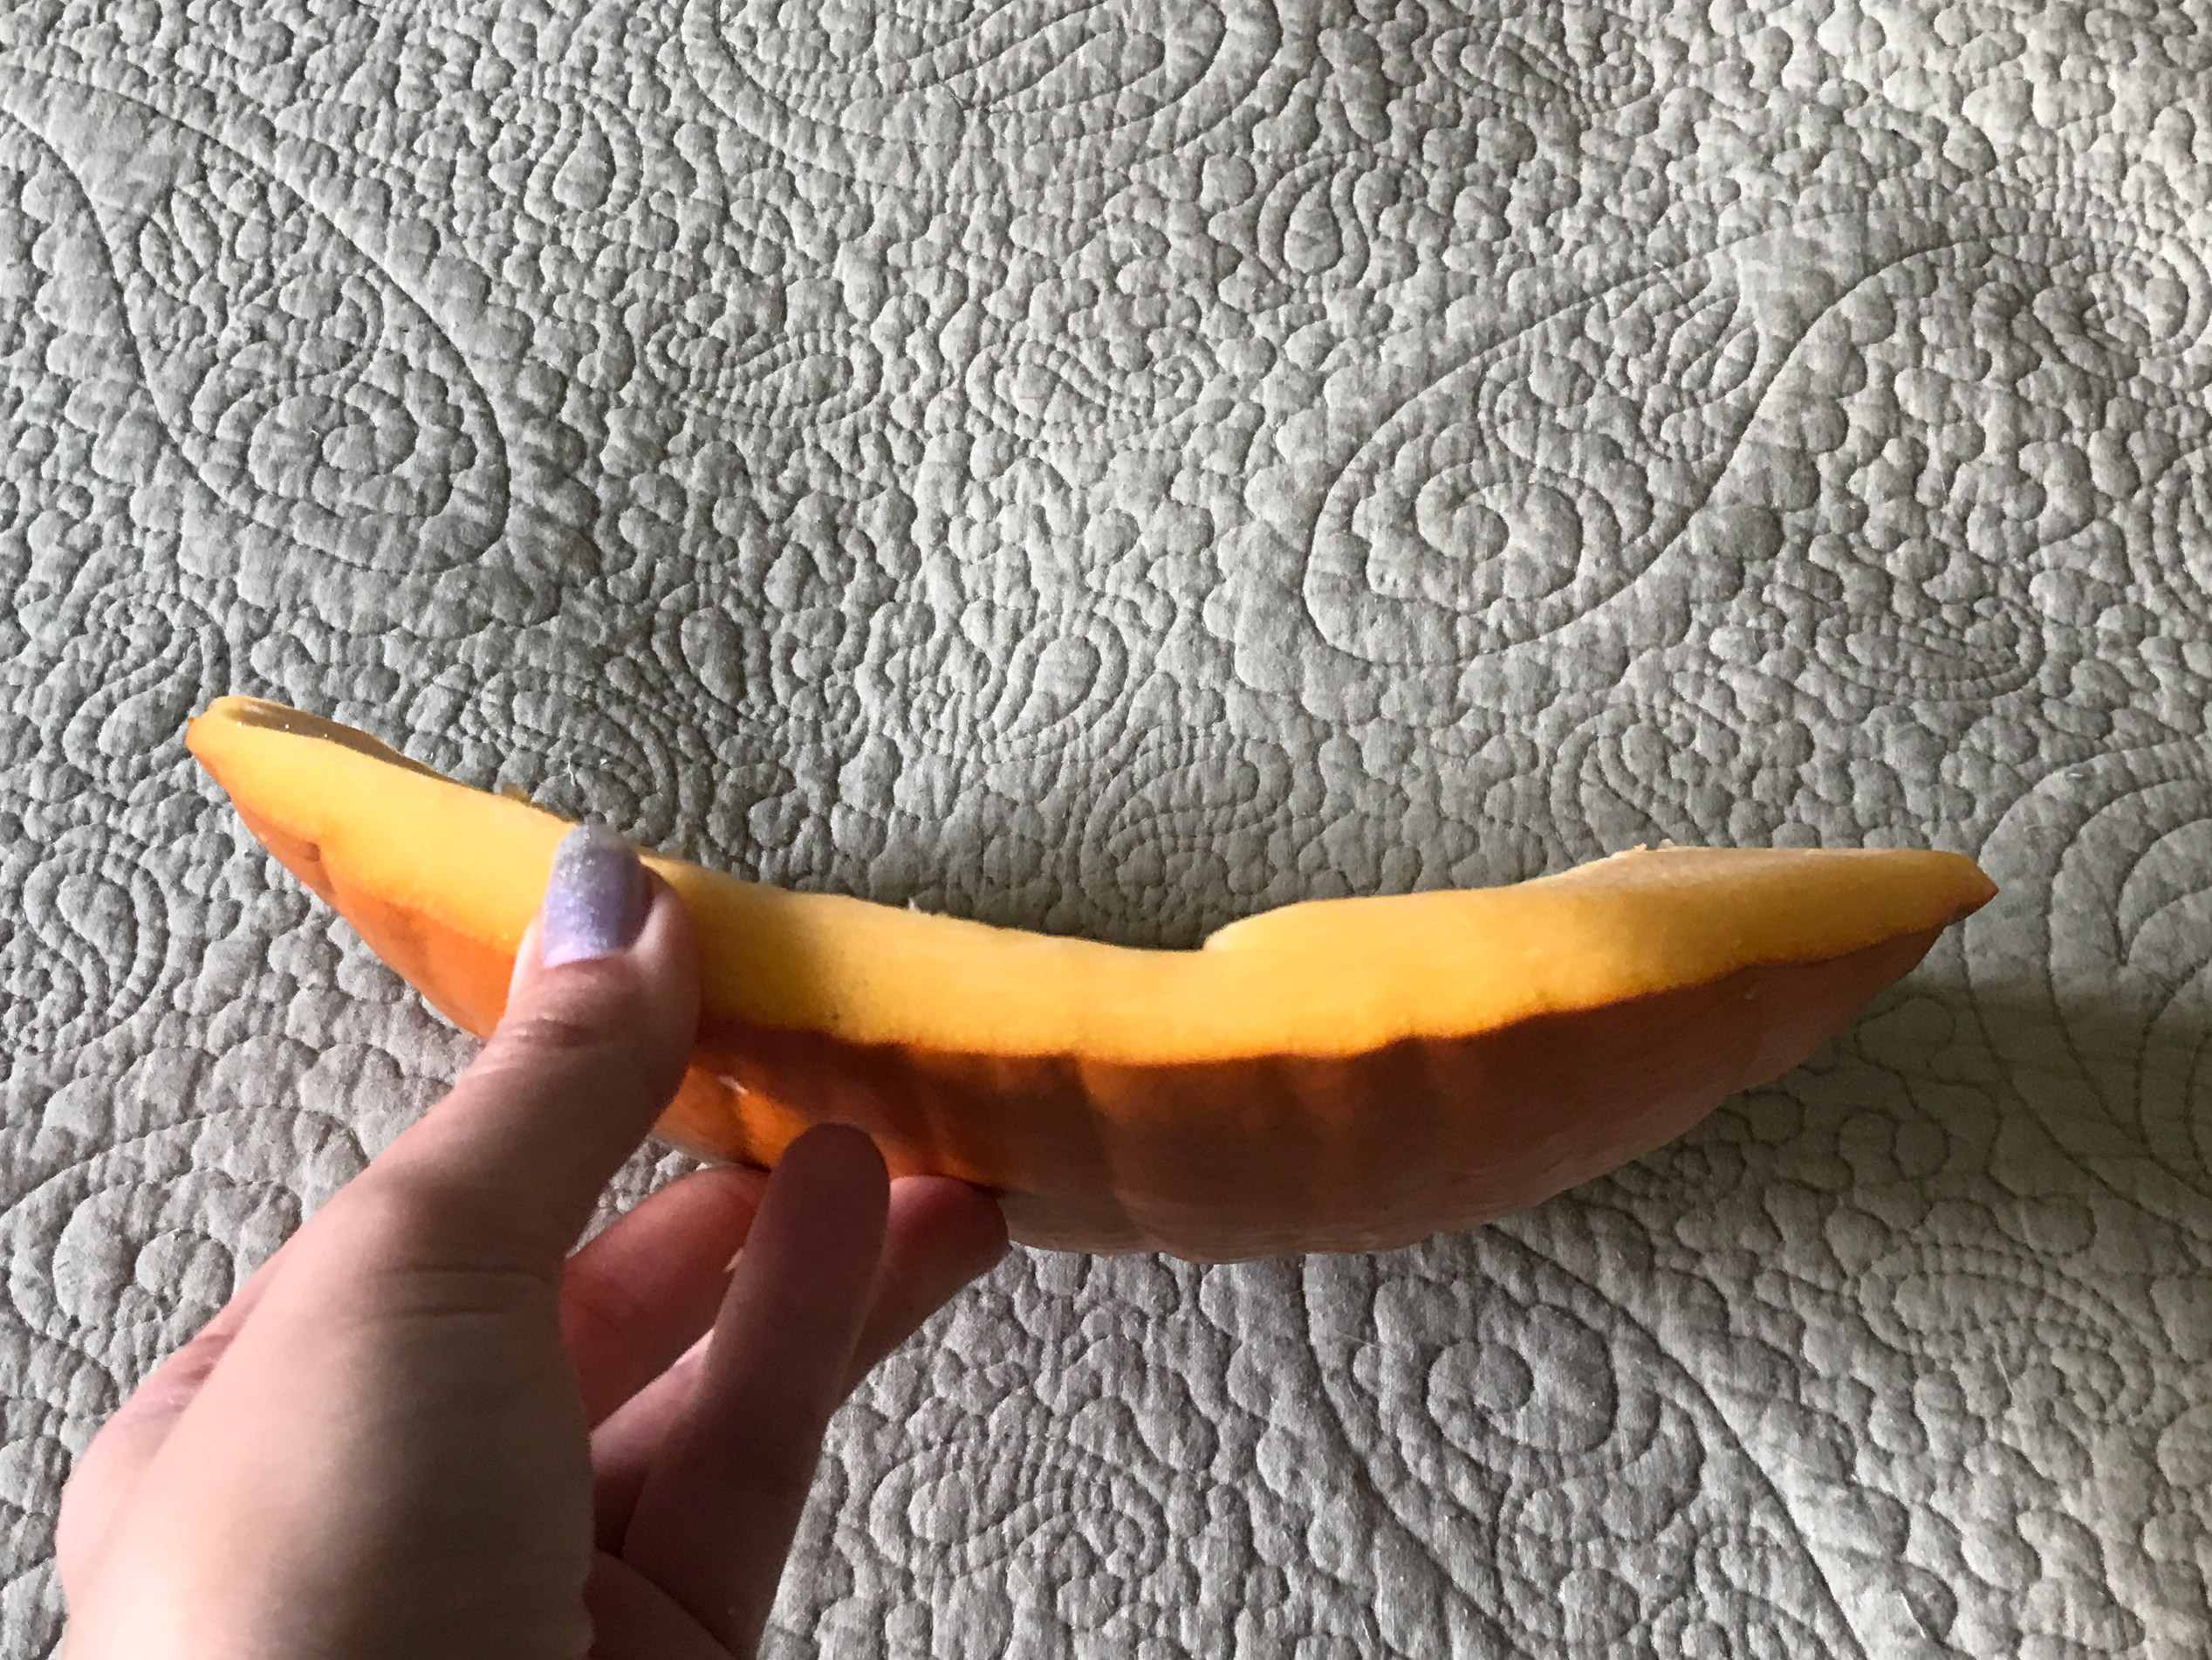
How I Should Have Cut It.
I made a second attempt to cut my pumpkin face after seeing this post which showed a better way to cut a slice off with a saw. You need a saw or long bladed knife – neither of which I actually had (so I struggled through with a butcher knife). You could easily widen the hole left behind after cutting to allow more light to shine through. The thinner your slice the better.
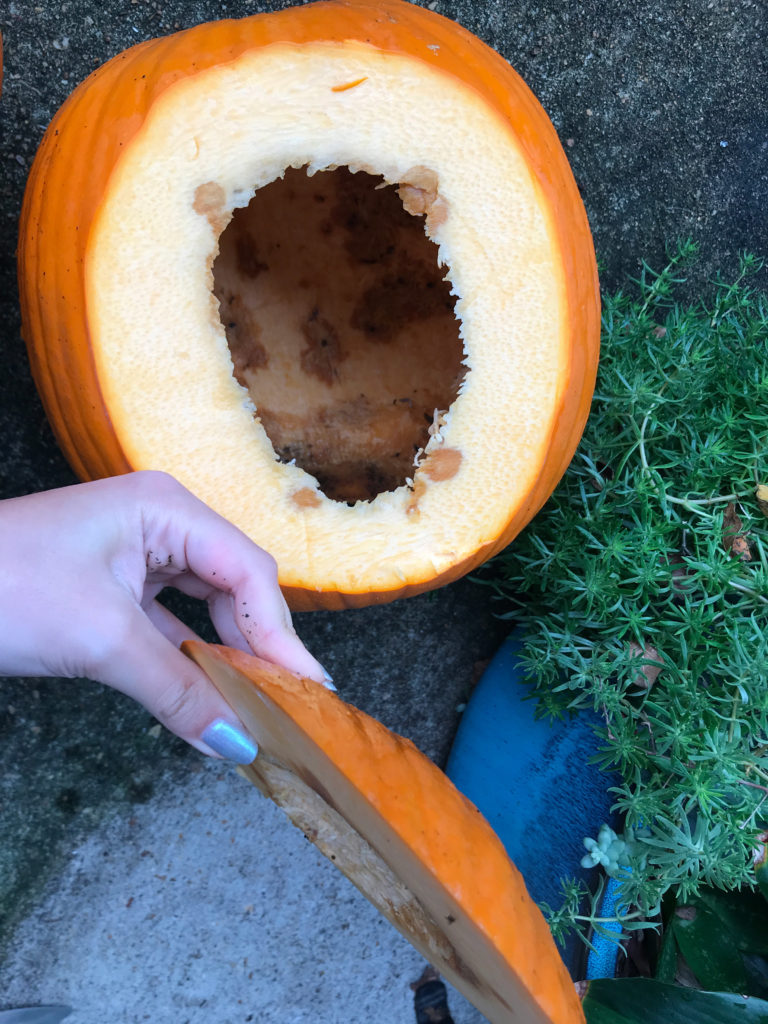
After slicing you may find you didn’t make it all the way into the pumpkin, just cut out a hole for the light and you’ll be fine.
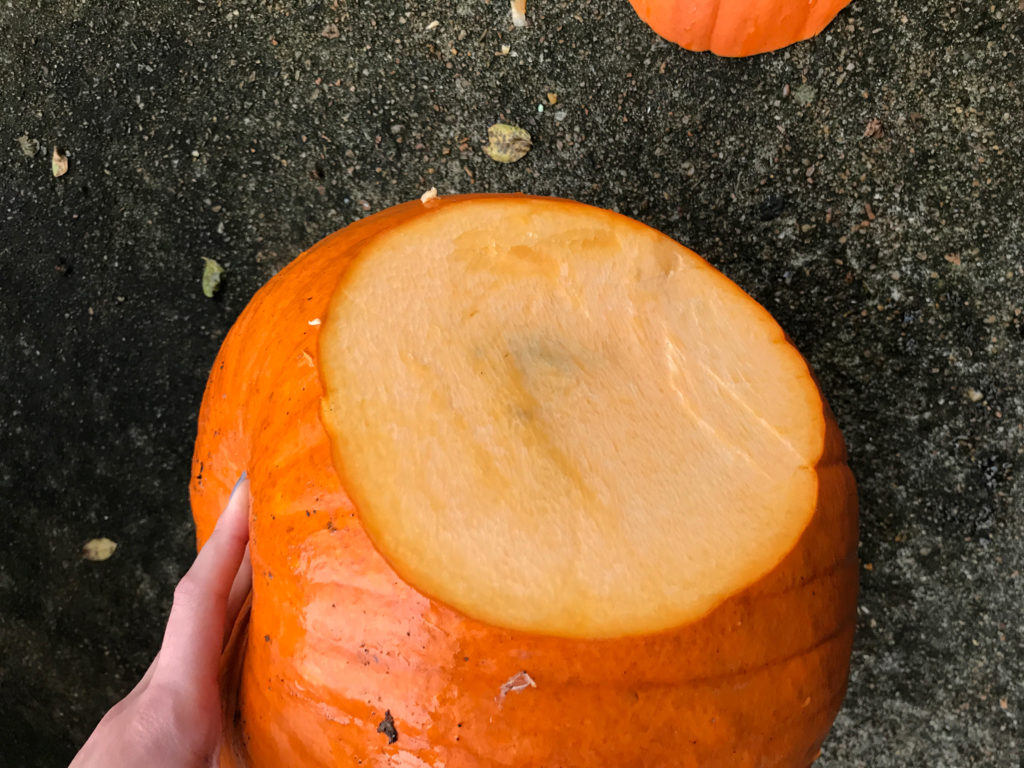
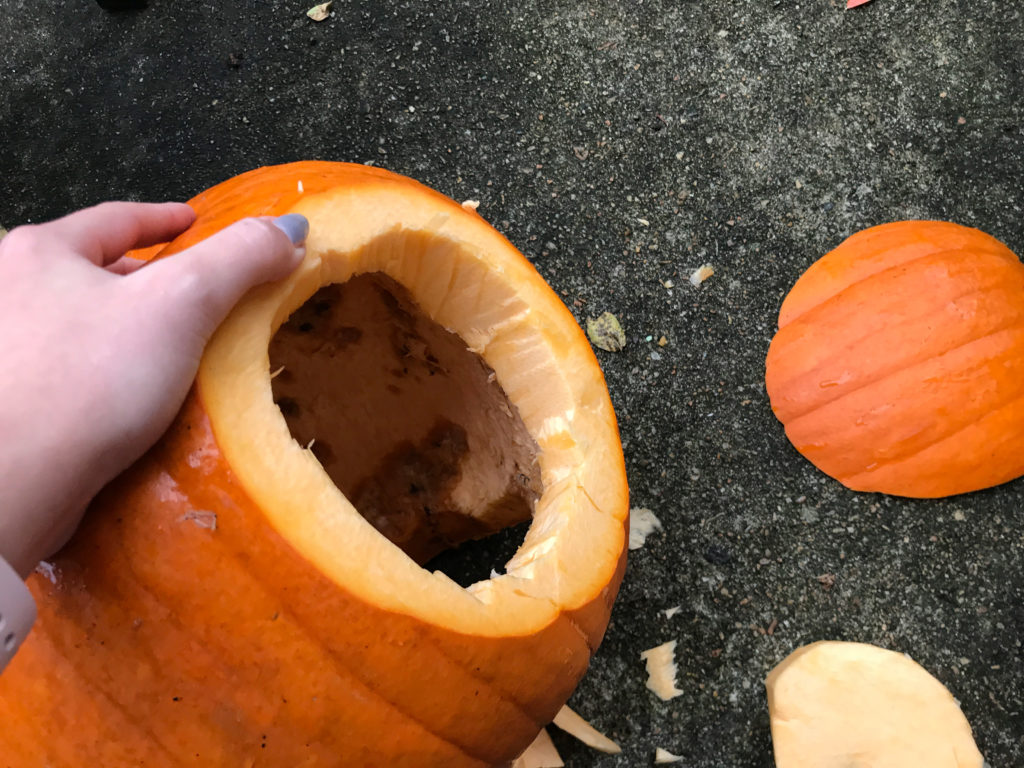
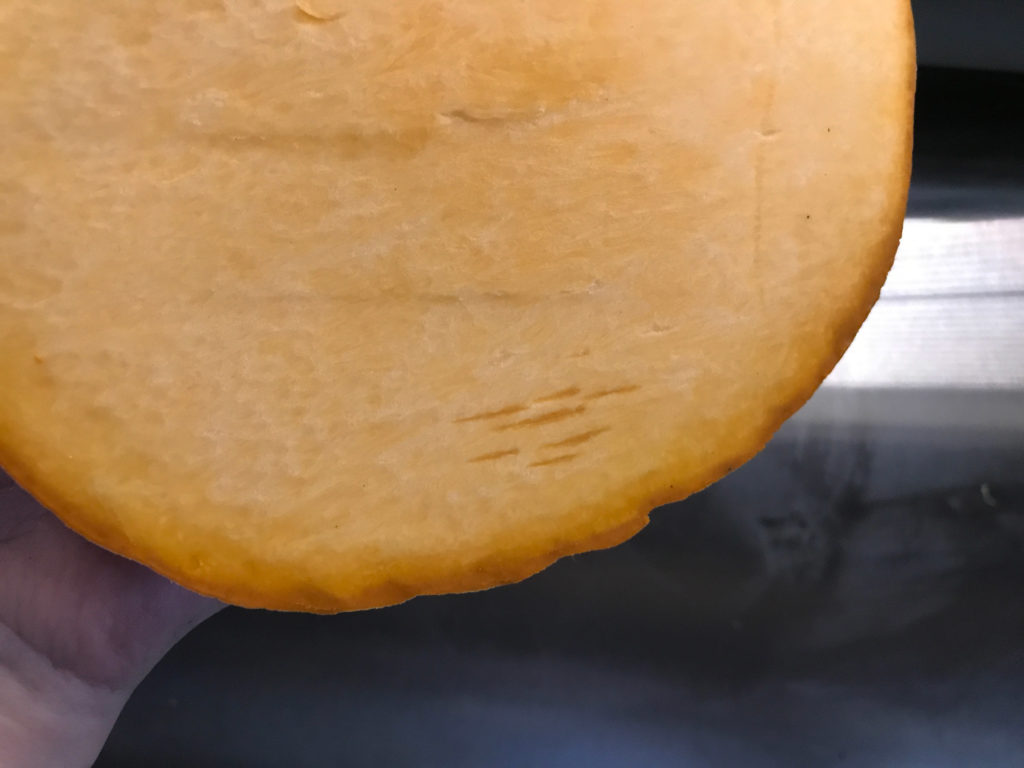
After cutting make a few stab marks on the back of your pumpkin slice. This will help you remember which way is up when you put in the forge. It would definitely be annoying to spend 30 minutes engraving it only to find out you put the slice in upside down.
Figuring out the Height
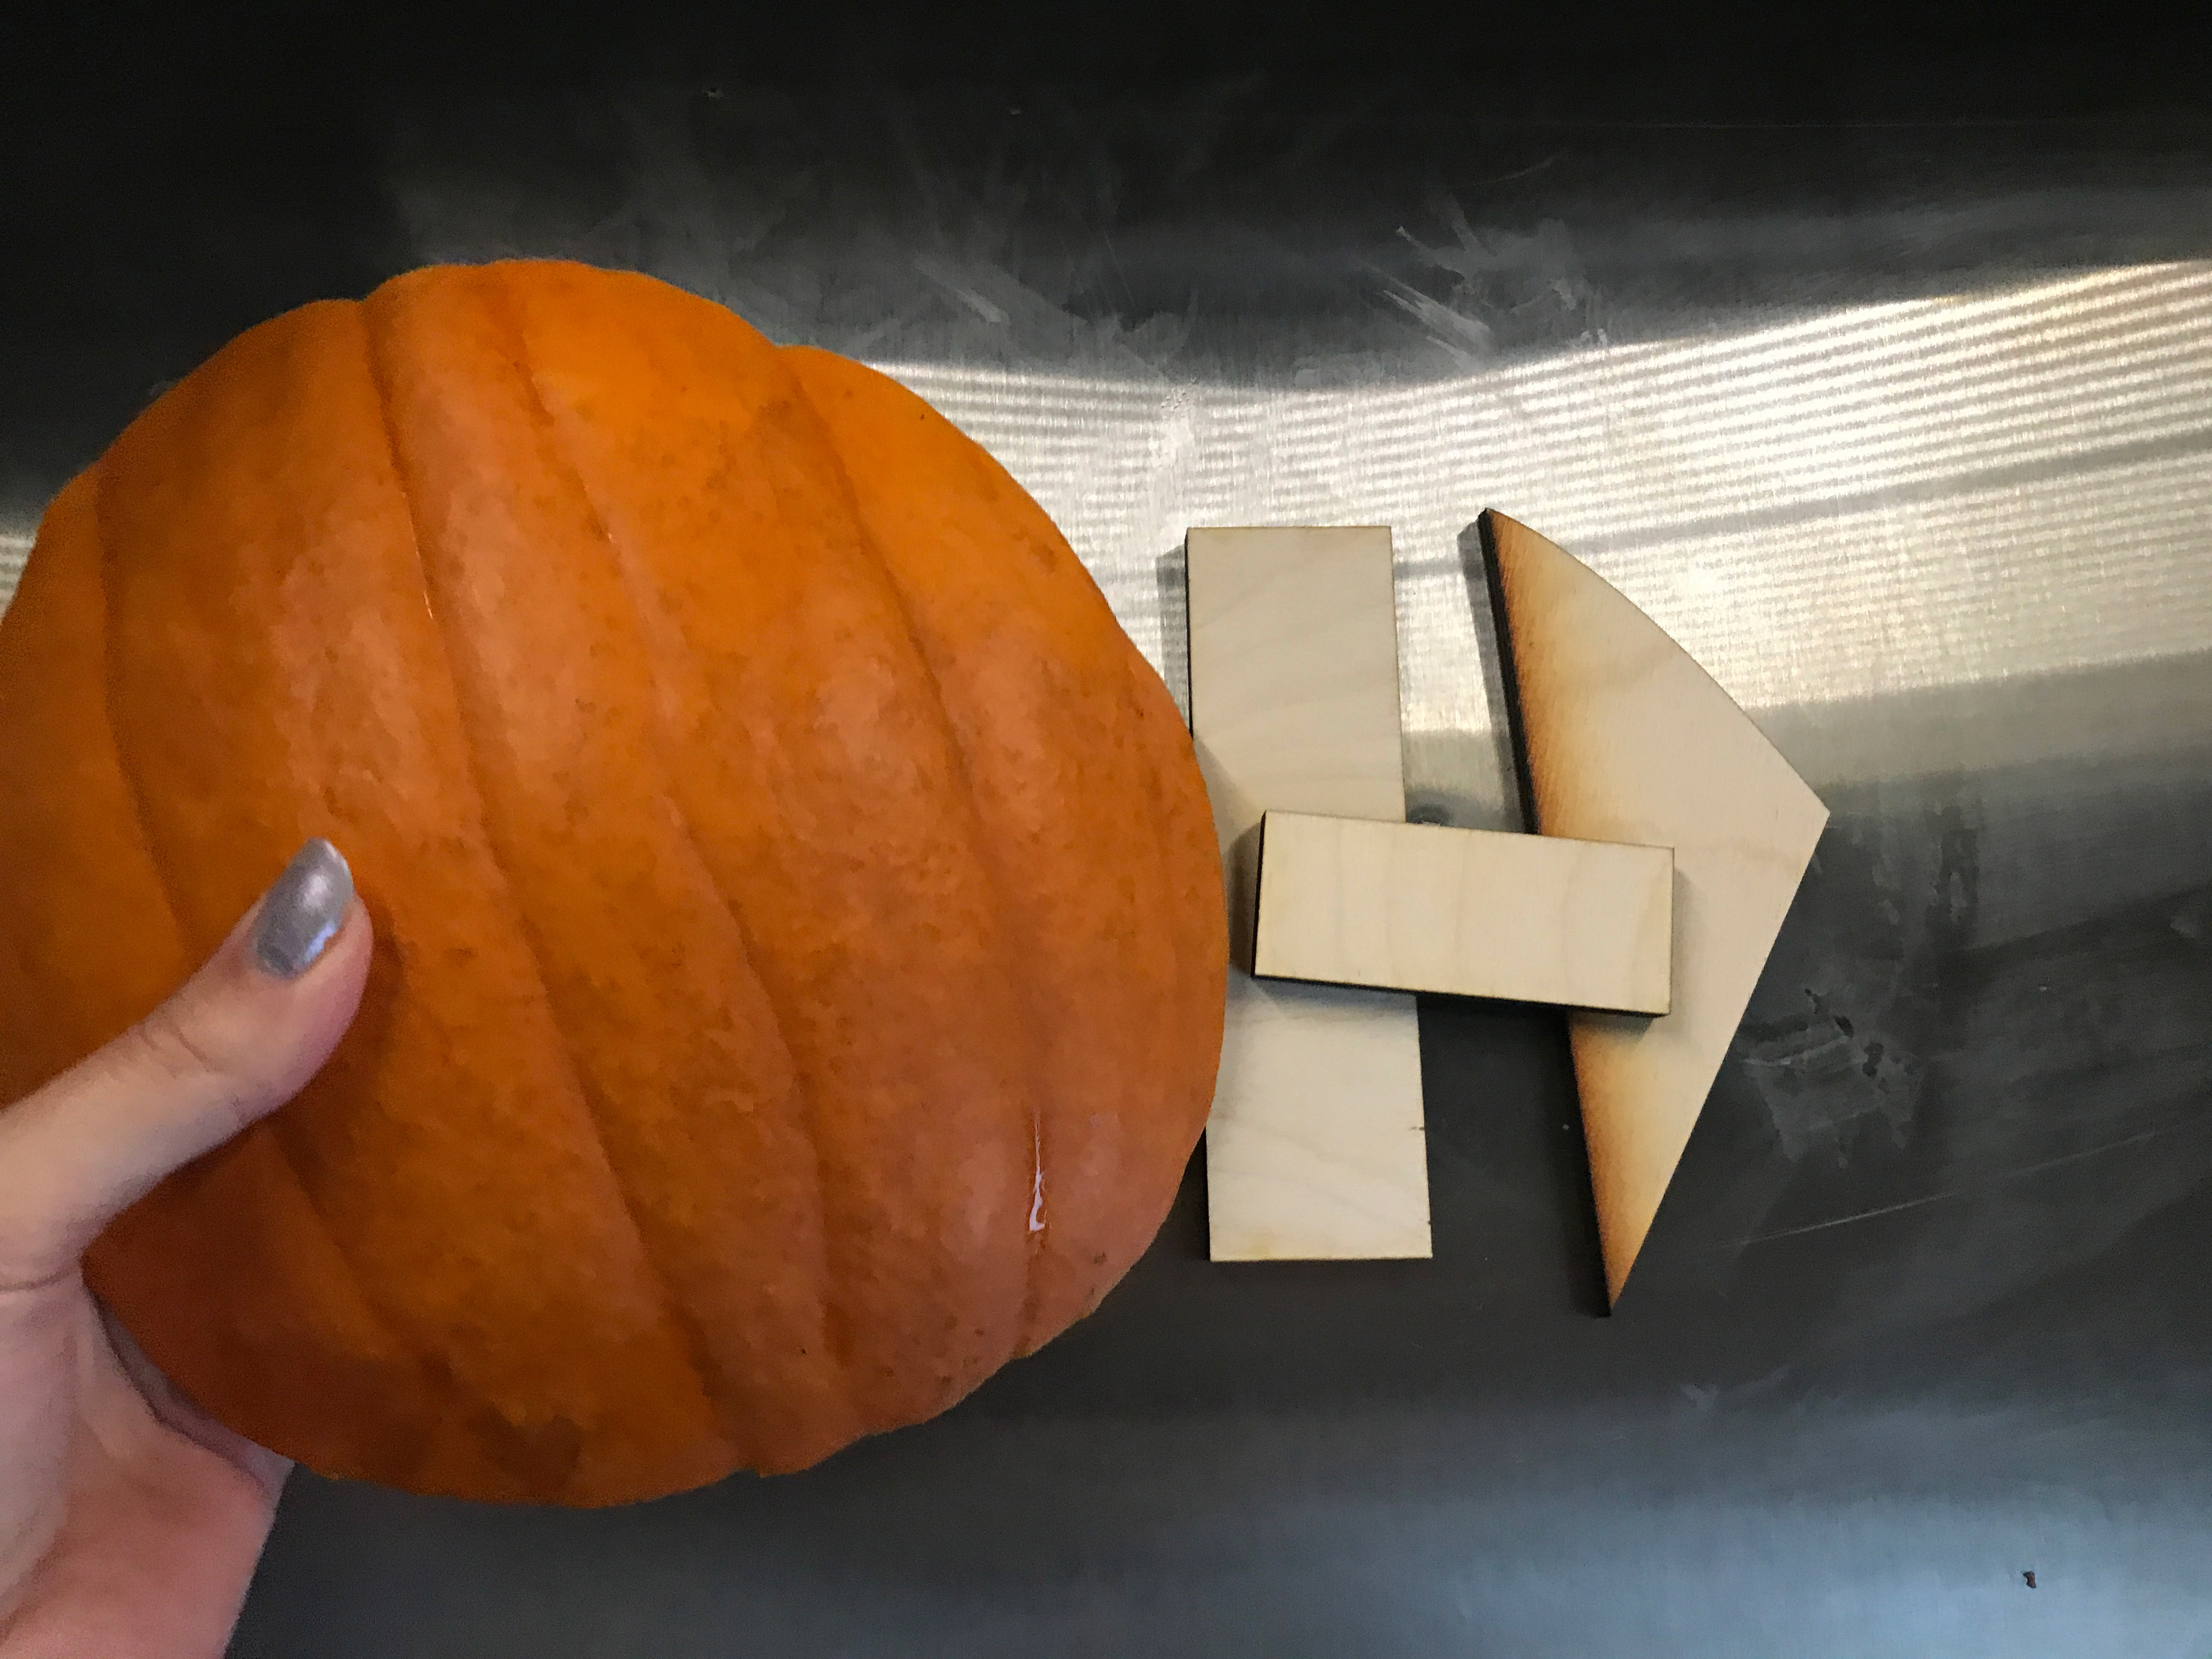
There are a few ways you can check if your item will fit in this case, but for my method you’ll need to cut a handy little tool. Now obviously I couldn’t get calipers around this – the curve meant that the center of the shape was higher than the base/edges. Measuring the thickness of the wall itself was thus worthless. So instead I cut out a no-math height tool used to determine if the object will fit within the focal height without the crumb tray. Your object must sit between those two lines or it is out of focal range. If it is above the top line, then the gantry/laser head will hit it, which is a major no no. You can get the focus height no math ruler here.
To be honest, next time I’ll extend the top “arm” on this ruler tool. Due to the curve, I had to use a ruler to see where the center of my pumpkin slice hit. Still, way too tall, so I had to keep thinning until it was in range. This is why it was better for me to just slice a piece straight off the pumpkin instead of cutting it out around a contour with my jigsaw.
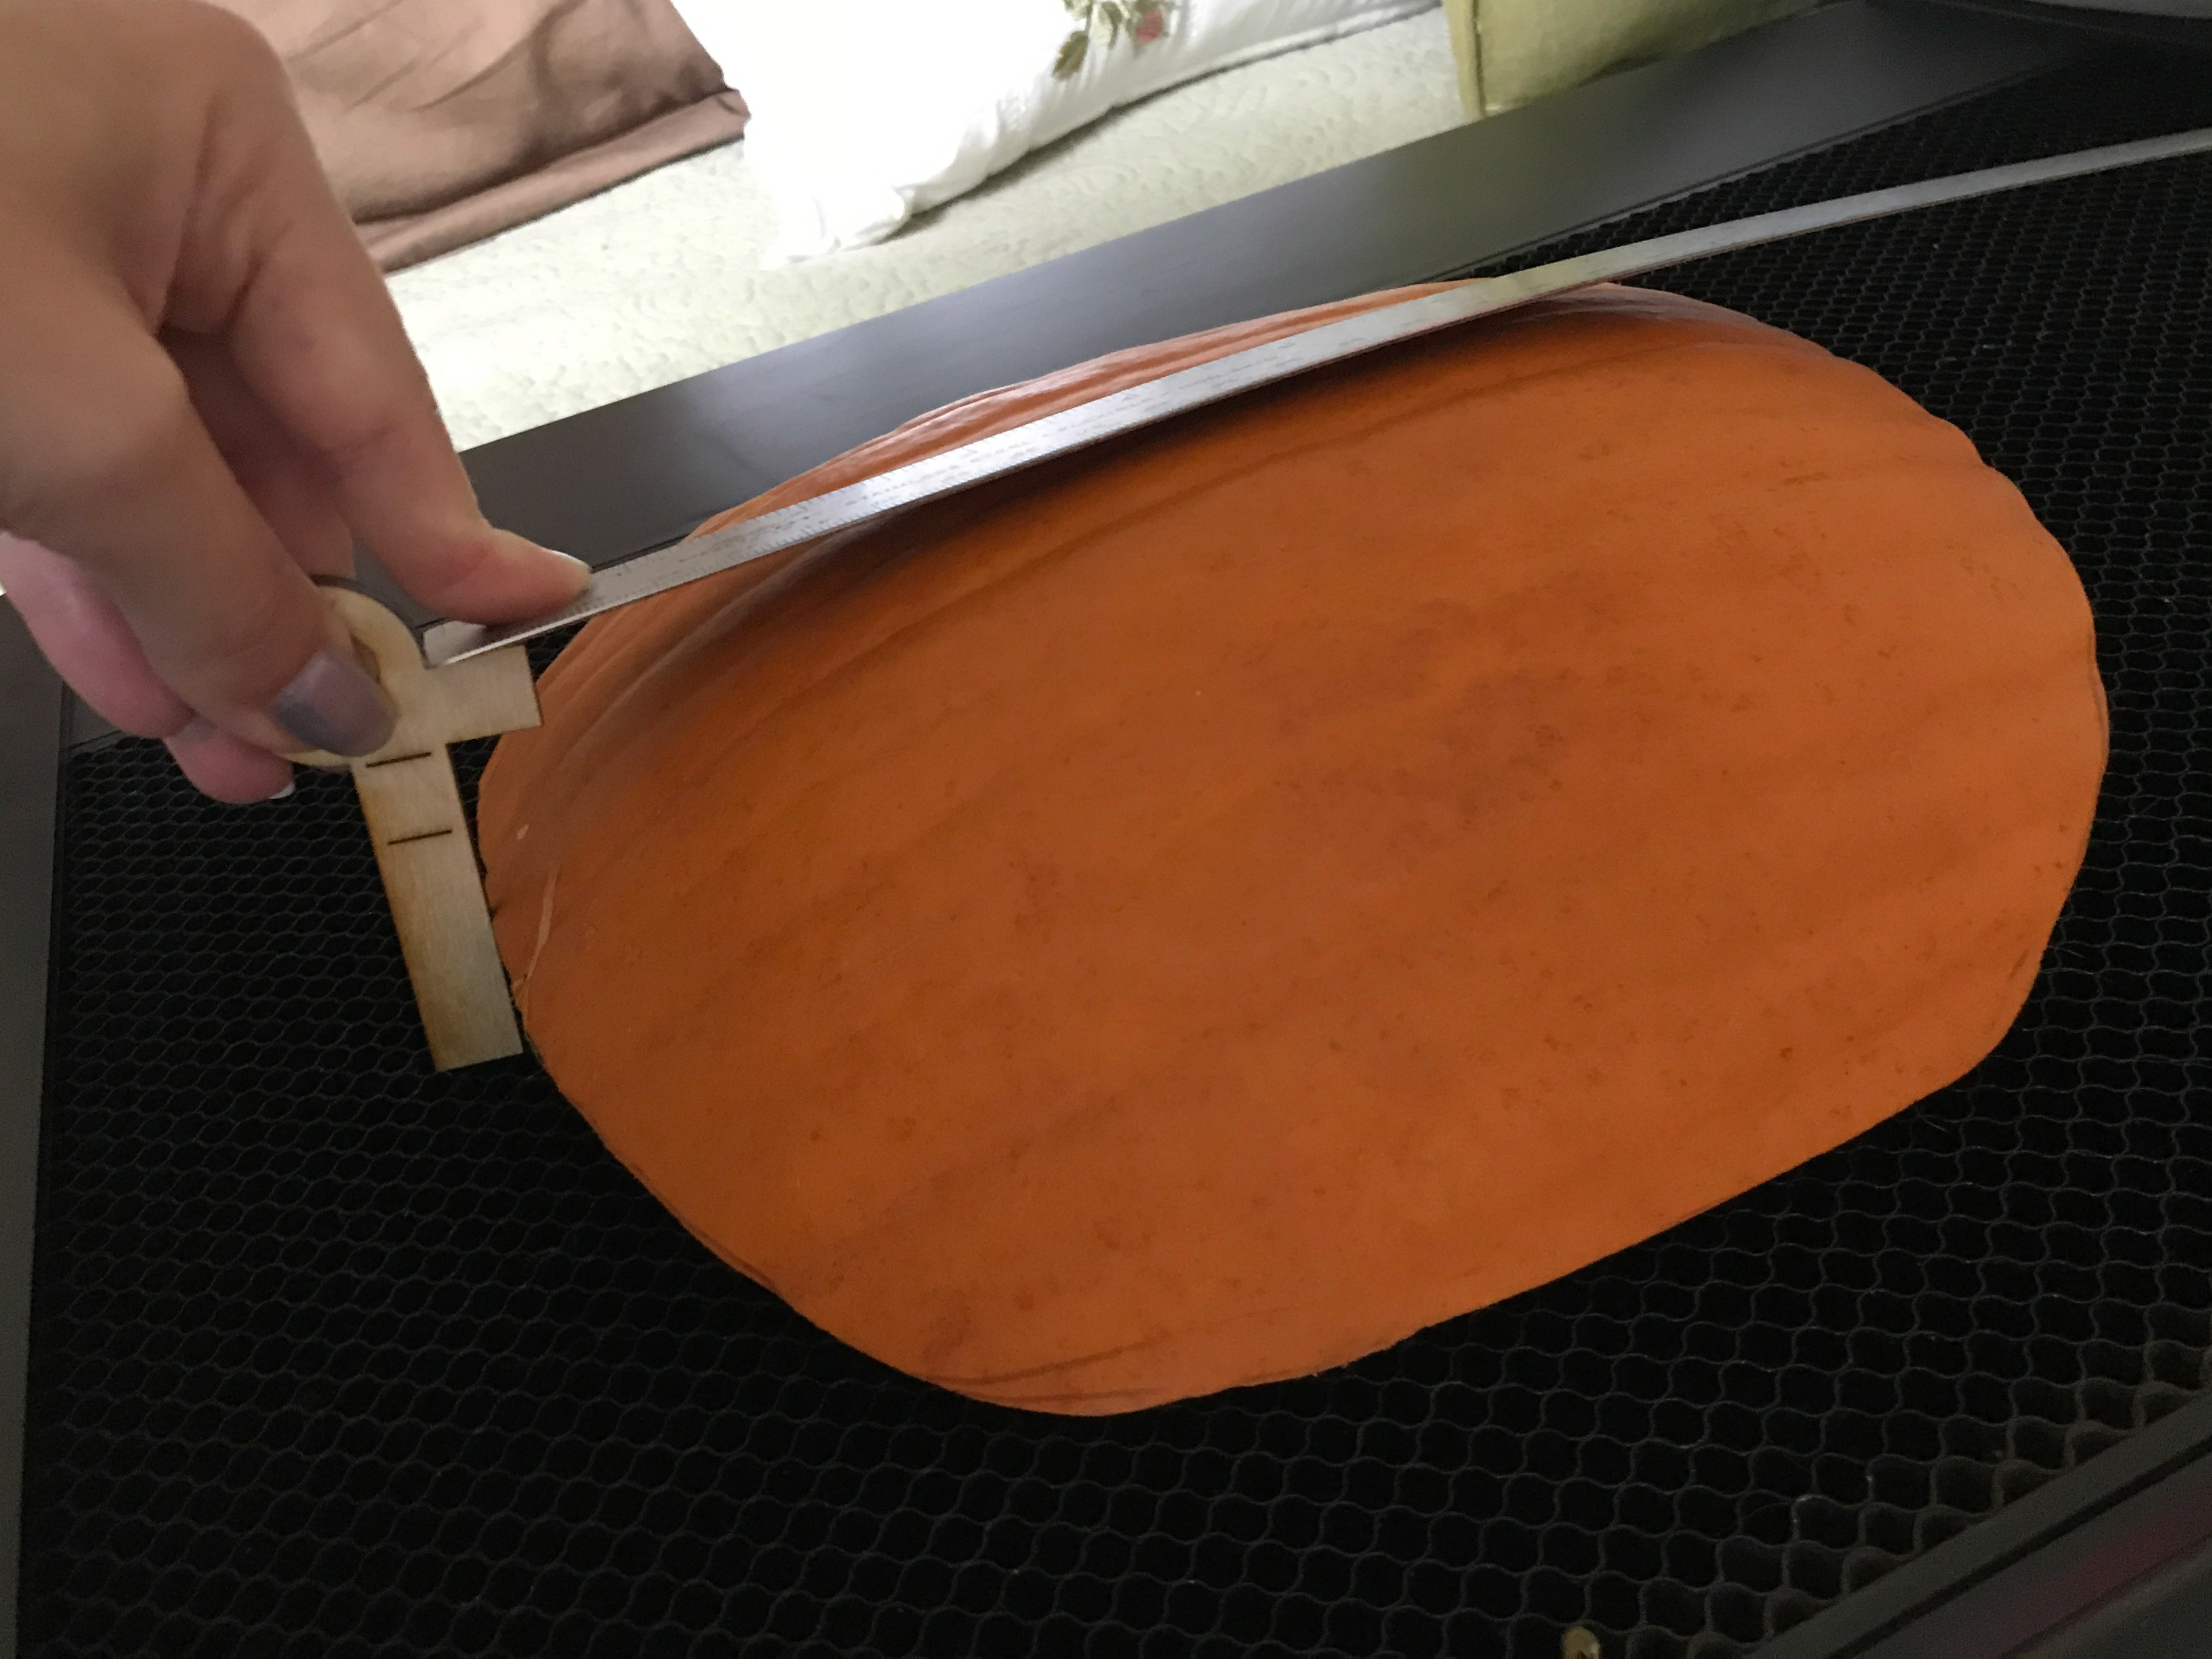
When you’re trying to check the height in the forge with a slice that has a mostly flat back a good tip is to flip the pumpkin onto the curved side. It makes it easier to see whether it’s in the lines on your focal height tool. Just drop the front door of the Glowforge and look at it straight on.
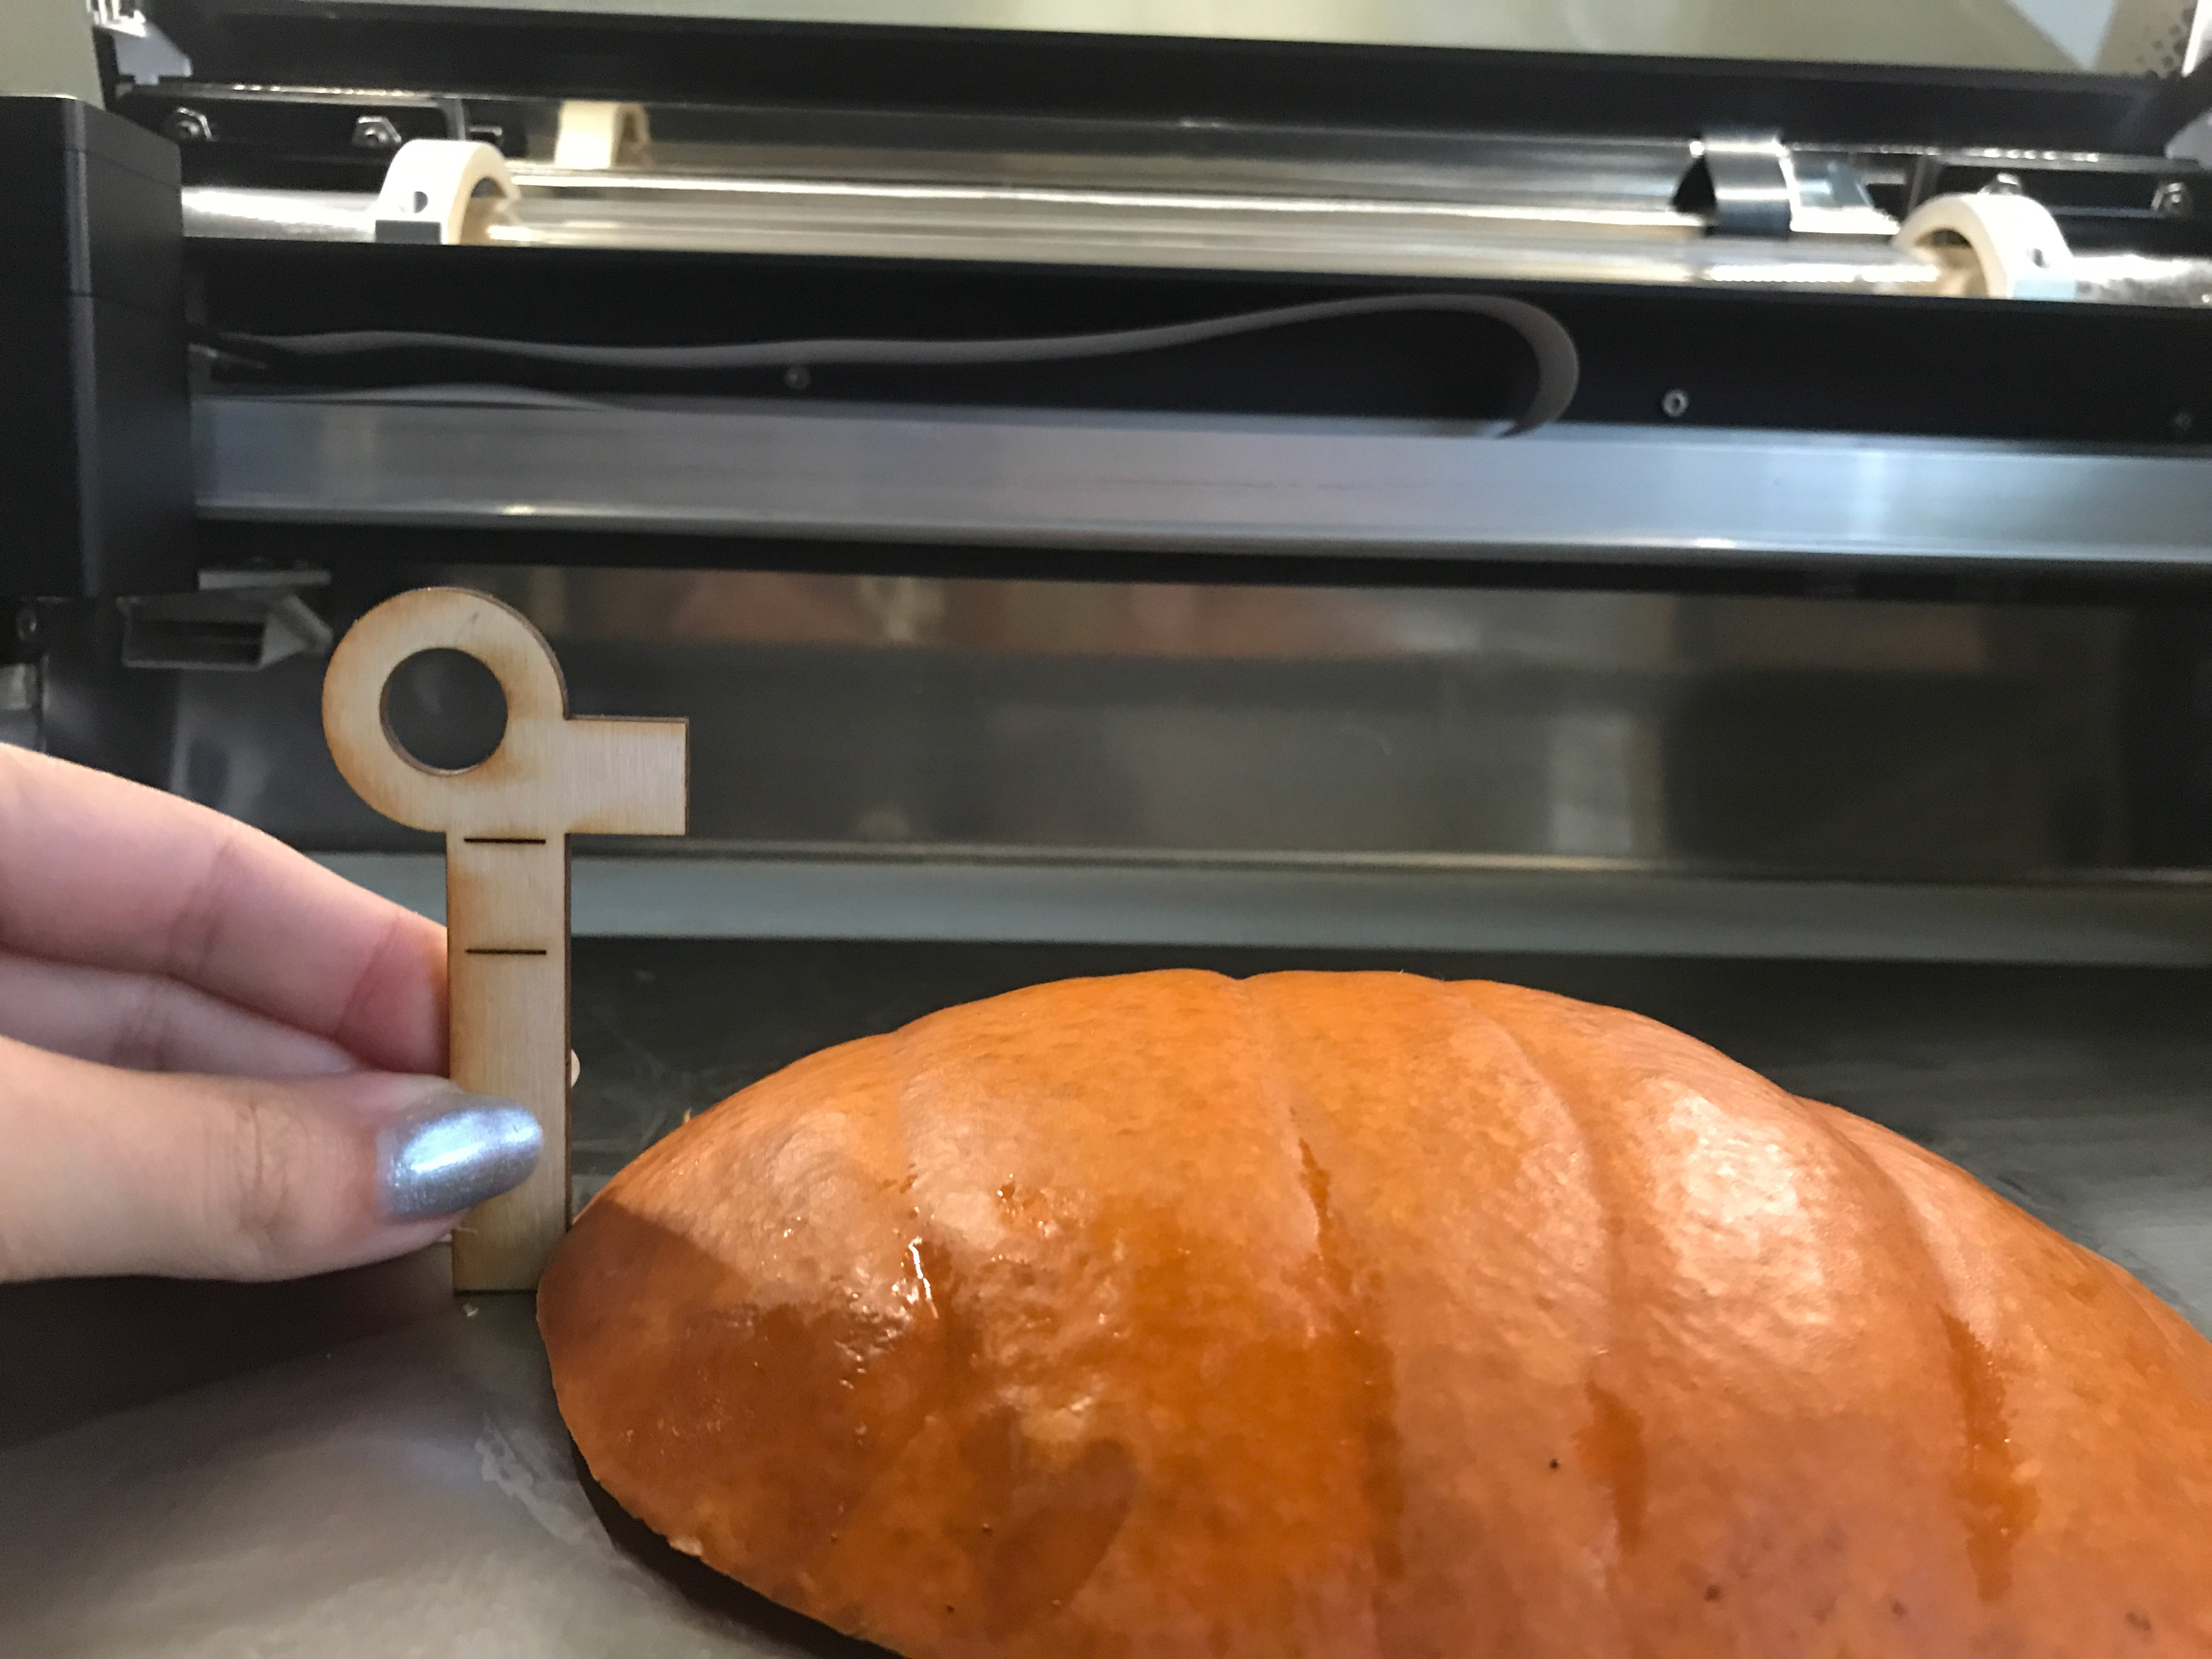
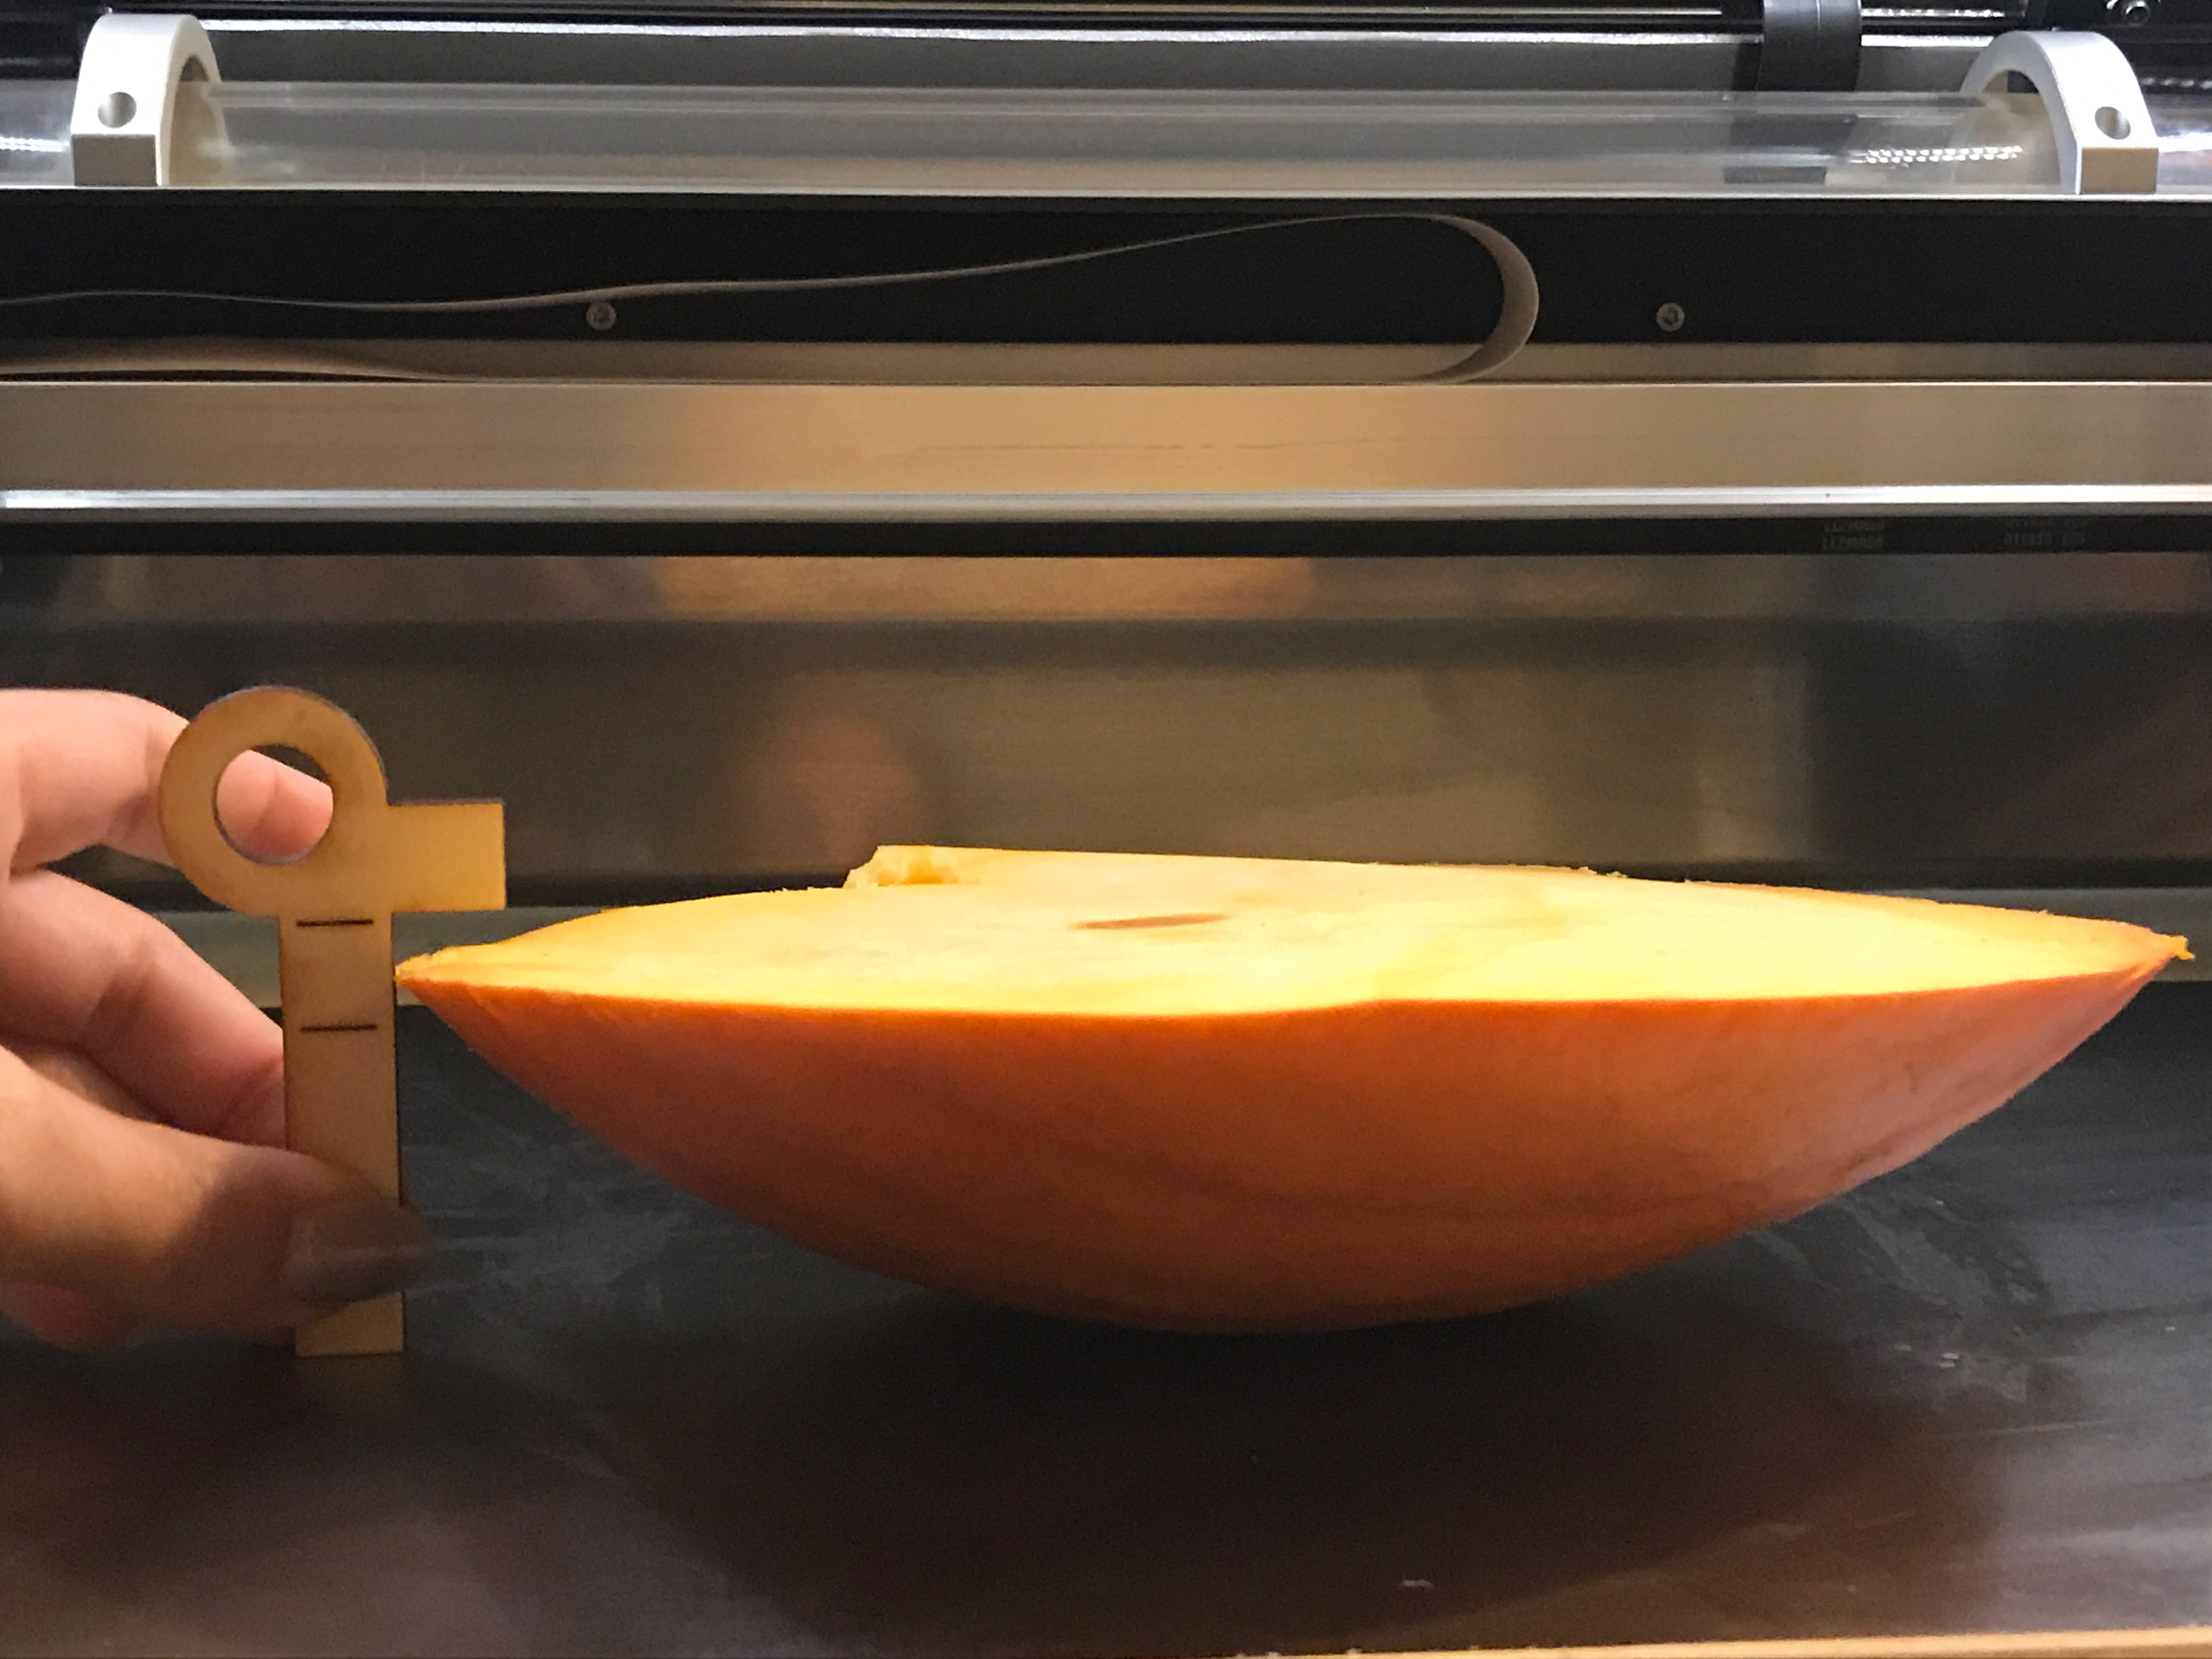
If your pumpkin is too low you can prop it up. Only use a flammable support like these wood scraps if you’re engraving. Be careful if you’re trying to cut the pumpkin since whatever you prop it up with could catch fire if the laser makes it through to your support.
Actually Engraving
Once I had my pumpkin cut down properly I placed it in the forge. Make sure to gently check that it will fit under the print head by sliding your pumpkin over to it and dropping your head to see that the fan will clear it. Always double check but I wouldn’t manually move the print head over to it with the machine on – this might jack your centering/calibration up and then you’ll have to restart the machine.
*WEIRD THING – for some reason when I try and turn on the Glowforge WITHOUT the crumb tray in, sometimes the reflective surface of the base plate will cause the GF to get stuck in the focusing or centering. I had to restart like 10 times after putting the crumb tray back in to get it to start working. It is best practice to always let the Glowforge start up with the crumb tray in, and then remove it after.
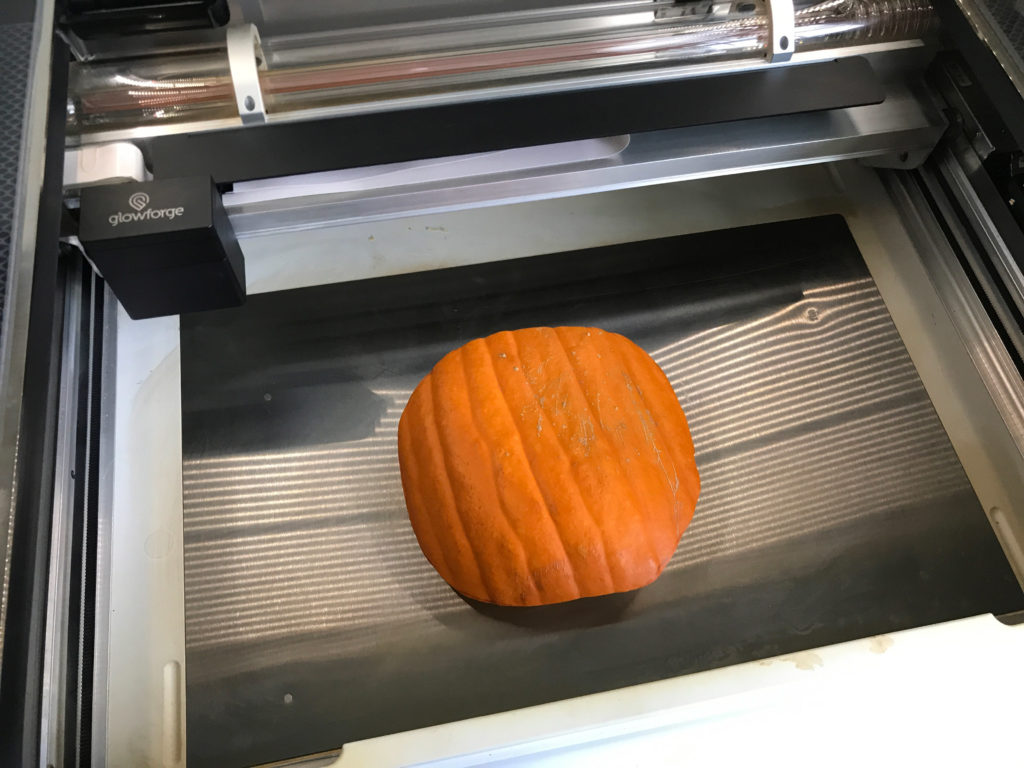
Remember when you set up your design, the areas you are engraving will be illuminated (they will be the light parts of your design, where the negative space on the pumpkin will be your shadows), so choose a design accordingly, You may want to reverse it to get the look you’re going for. Again, here are the settings for my first attempt- for my next one I will slow it down a bit to get a deeper engrave:

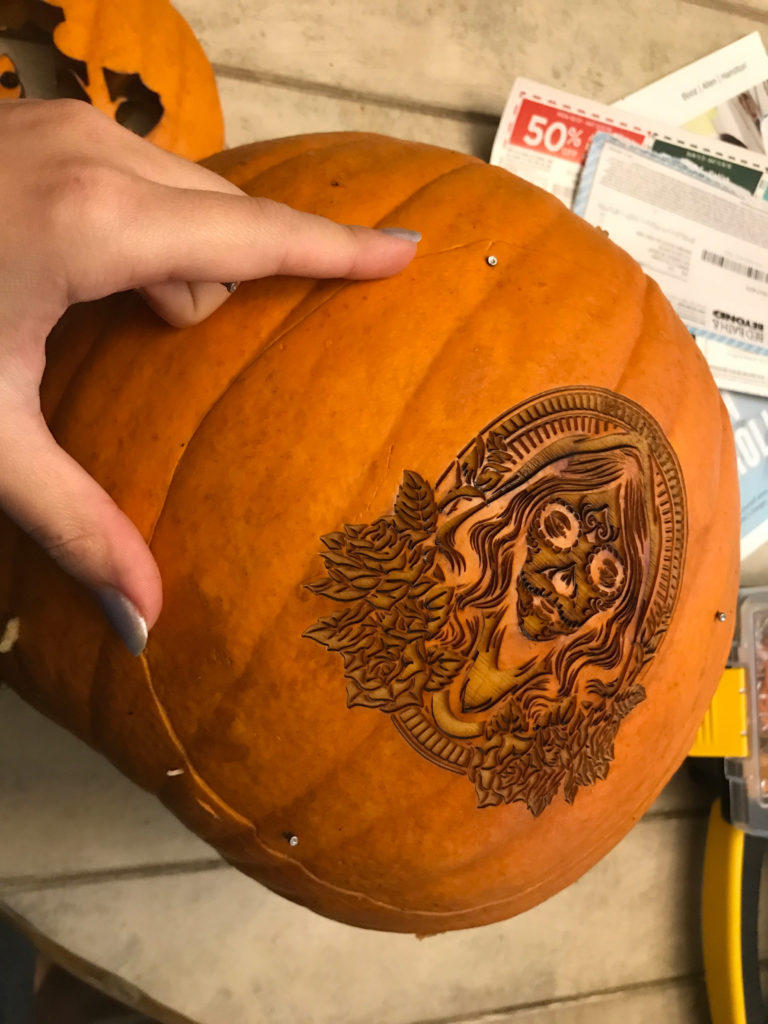
After engraving just use toothpicks to reattach your pumpkin slice and done! It started raining and I never got a picture of this one illuminated, but it DID work. This pumpkin ended up going bad very fast with the slice seeming to shrink and pull away from the sides, so these are best made the week of when you want them displayed.
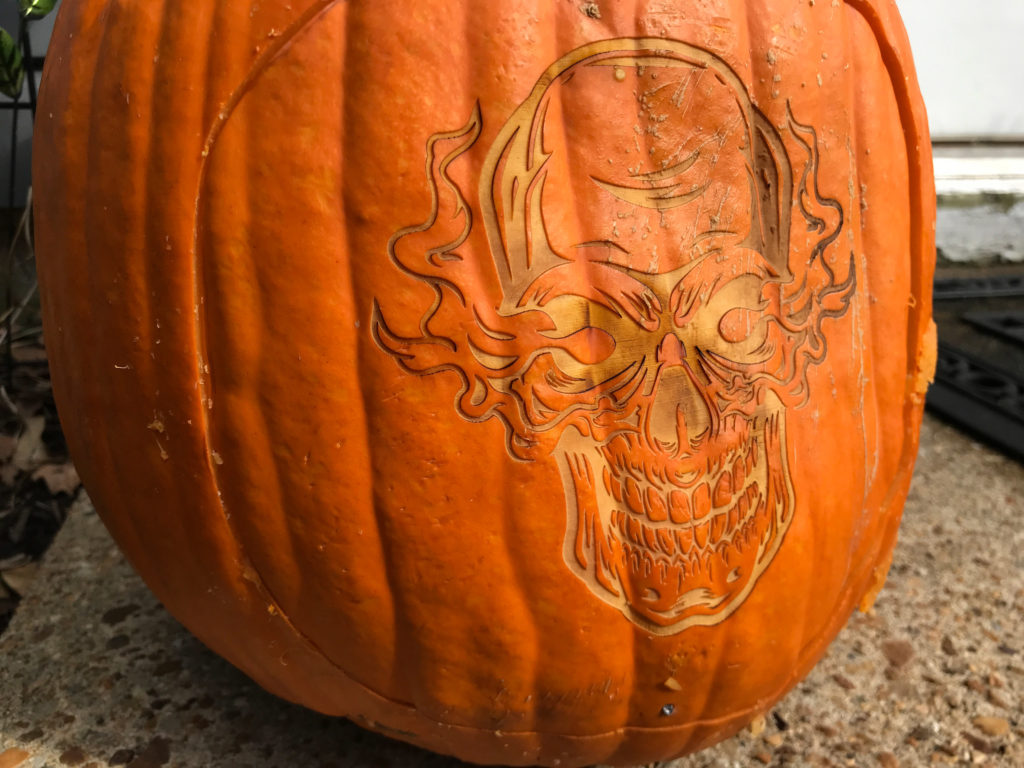
I did a second pumpkin face using a higher LPI (450). This was the settings and result – a deeper, darker engrave.
Cutting a Pumpkin?
So I wanted to try something I has NOT seen before – a laser CUT pumpkin. Obviously, every pumpkin is different and the thickness of your slice and curvature of your pumpkin will make a huge difference in if this will work. At a minimum you may have to knife through a few stuck parts or dig them out (you’ll see). I would also stick to simple designs for this – think traditional jack-o-lantern. If you could cut it by hand, it’s probably straight forward enough to work.
Warning:
So I’m going to say it again. I have no idea how safe all this is. There are lots of laser engraved pumpkins out there, but with weird materials like this, take your time, observe, and be ready to intervene if needed. There may be a reason I’m the only post out there (maybe?) talking about cutting a pumpkin. There may be an unforeseen danger here.

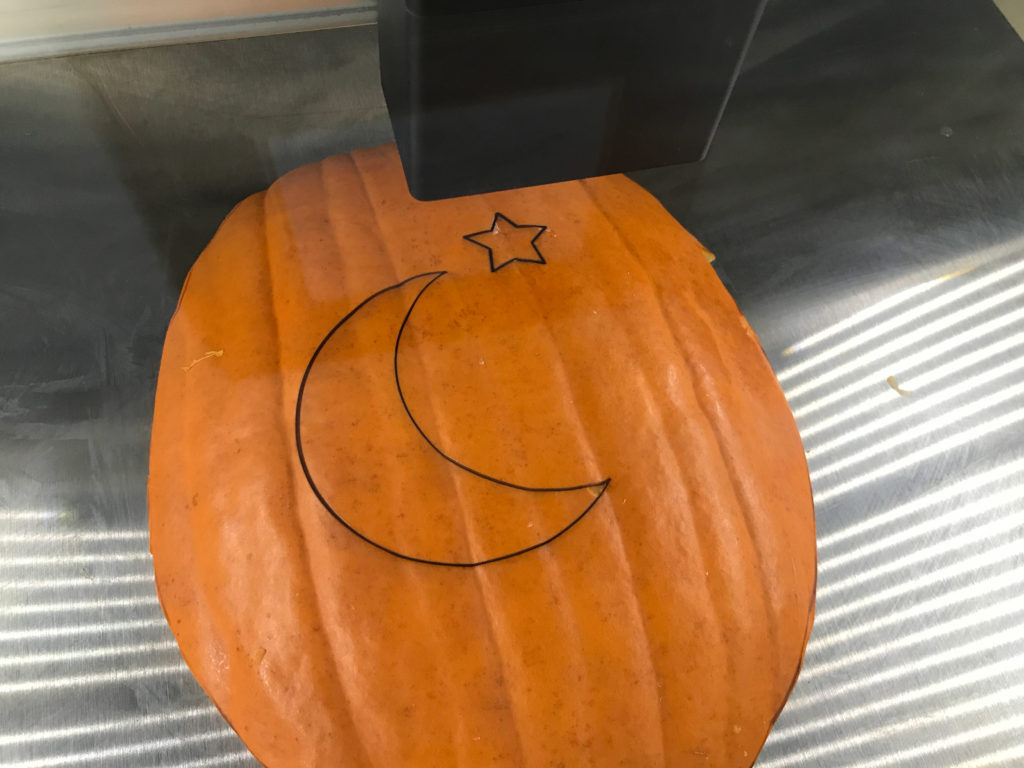
My first single pass using these settings did not work (the moon). It did however make a nice score! If you still want to have that handmade experience you can always do a fast score on your pumpkin with your design and then hand cut it. In order to get it to cut all the way through I had to bump it up to three passes. This right here is MAX Glowforge power. I would never try these settings on anything dry enough to catch fire easily.
Some thoughts on Safety:
As it was cutting I could see the bright orange of the laser light being reflected back through the cut. I though about sticking a sheet of paper masking down to maybe minimize some of the reflection off the shiny bottom plate. FYI that might be a horrible idea – I don’t know because I didn’t try it. The pumpkin is so moist, the flashback didn’t scorch the inside really. I saw it steaming, for sure, but I don’t think it was a major fire risk. Ultimately, there is a reason they’ve put a metal surface at the bottom – it doesn’t catch fire. Let’s explore that idea:
Flashback (when the laser reflects back onto the back side of what you’re cutting) often causes scorch marks on your material. You may see this as bright flashes of light through your transparent acrylic when the laser passes over the grid in the crumb tray. Sometimes you can minimize this by reducing power or increasing speed. Other times putting a sacrificial piece of thin wood under can eliminate flash back and help you dial in your settings (great to do for mirrored acrylic). This is an often used technique when cutting acrylic or easily scorched materials and is perfectly fine when you have your settings dialed in just right (so as not to dig too deep into your sacrificial base material.
Why I didn’t Put anything Under the Pumpkin Slice When Cutting:
If I had put a piece of thin MDF under my pumpkin slice I would have been able to look at it after and see how deep the laser was going beyond the pumpkin (or if it even made it through) and seen if I need to raise or lower the power. OR, IT COULD HAVE BURST INTO FLAMES DUE TO HOW SLOW THE LASER WAS GOING and I wouldn’t see it until the flame engulfed the pumpkin.. See why this could be risky? No idea if I’m being paranoid, just thought I should share the train of thought I had about it.
So How did the Cutting Go?
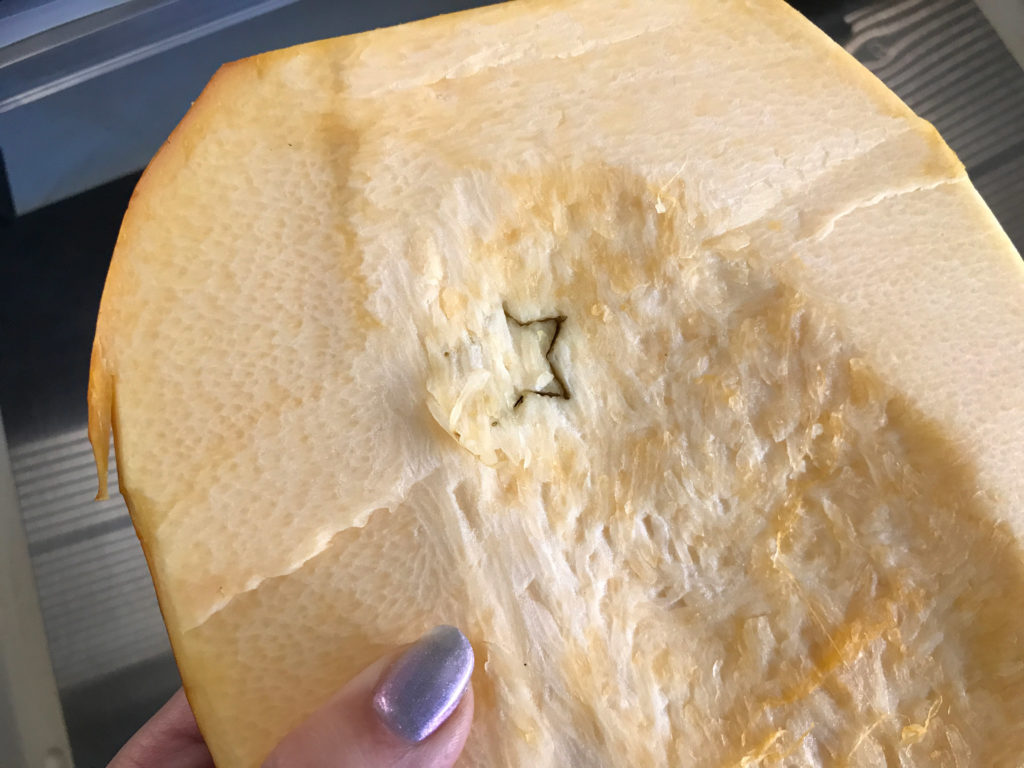
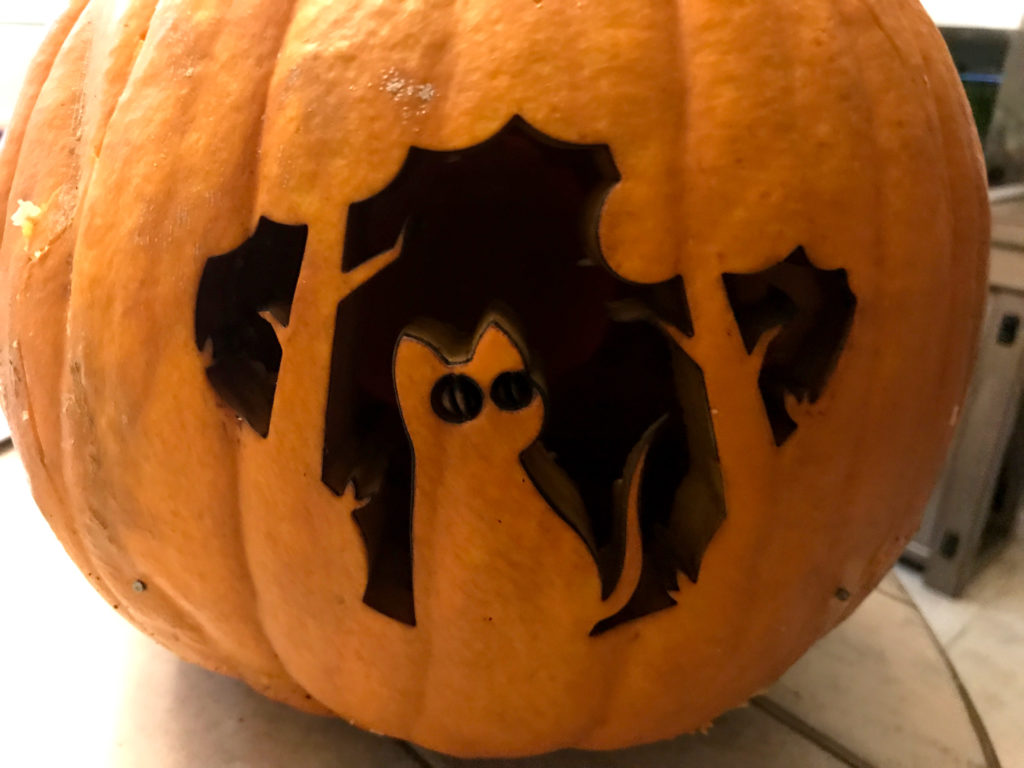
Not bad! It worked on the star, but it was SLOW. It could take a long time to do a full design. I think on a longer design it might actually be even better as each pass would have time to “cool” before the laser got to that area on the pumpkin again, meaning it might reduce the risk of overheating and catching fire.

On the back you could just see it through… but one quick push and it slid right out.
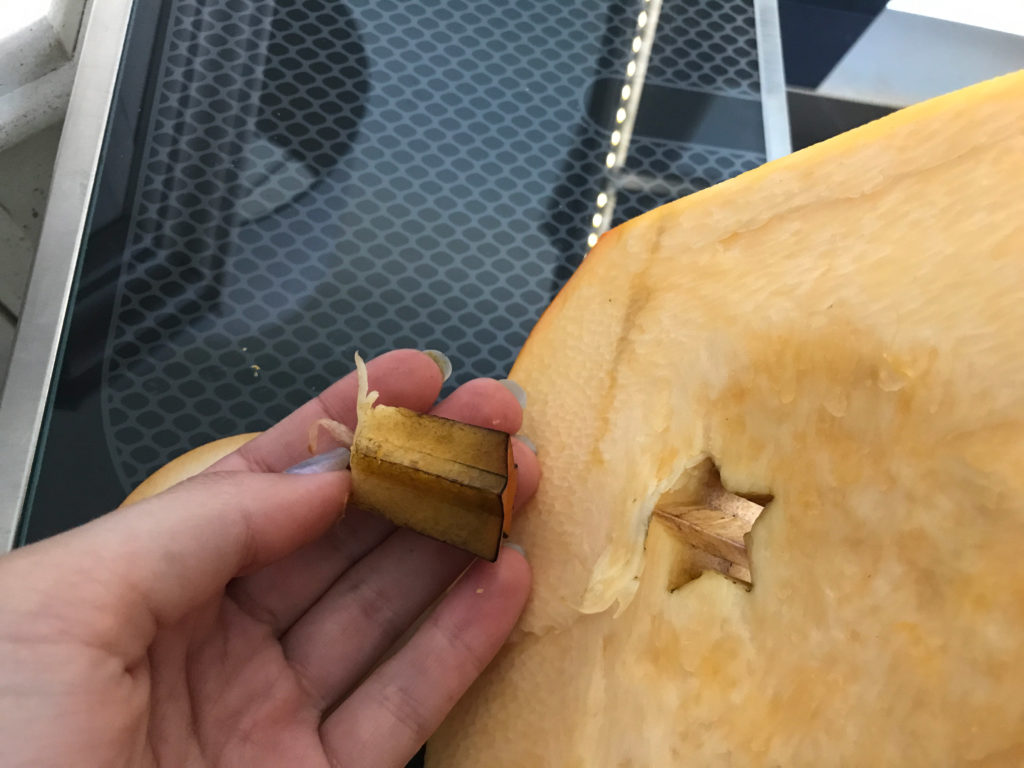
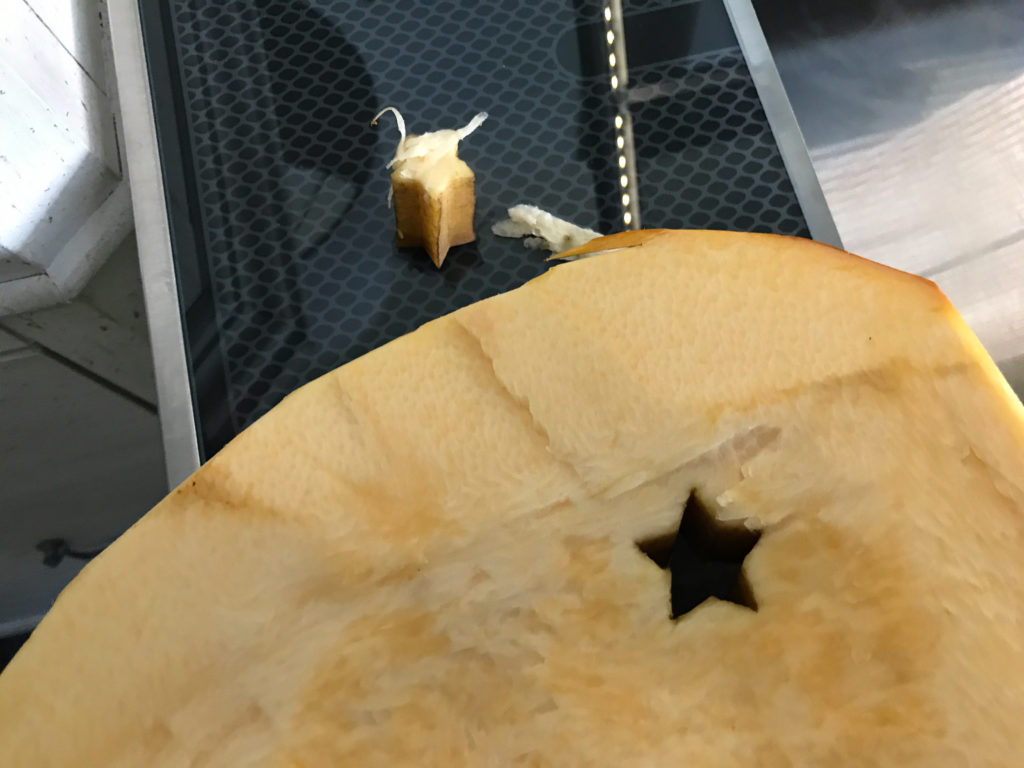
Seeing my success with the first cut I made a second attempt with a larger design. You can see three passes really dug in. It widened the line significantly so I would thicken the design to make sure the areas you intend to stay in the pumpkin are bold enough that they don’t get too skinny looking after the cut. This simple approx 6″ design took 27 minutes to cut.
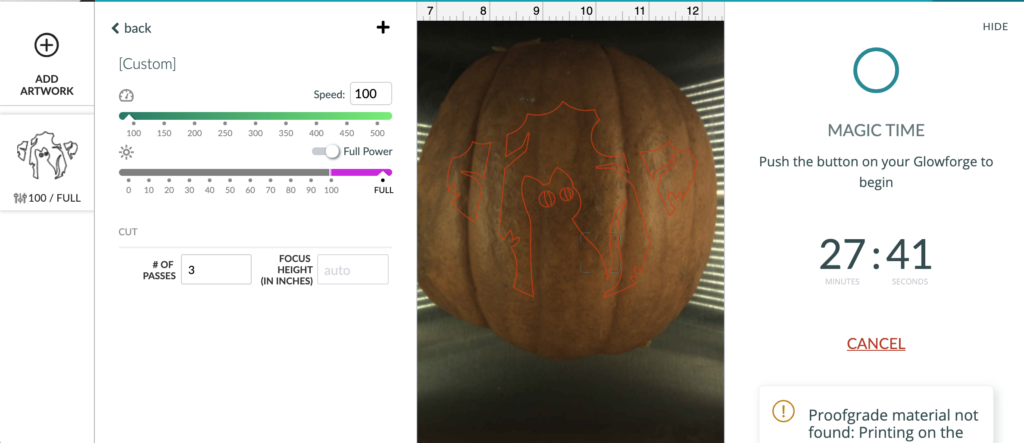
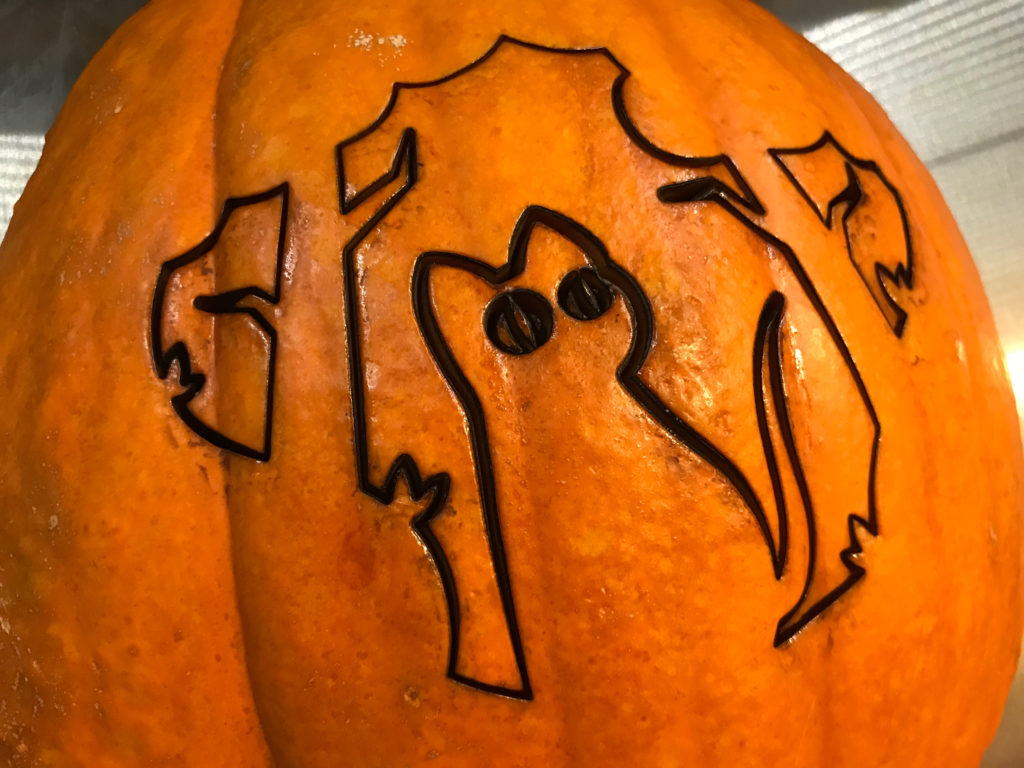
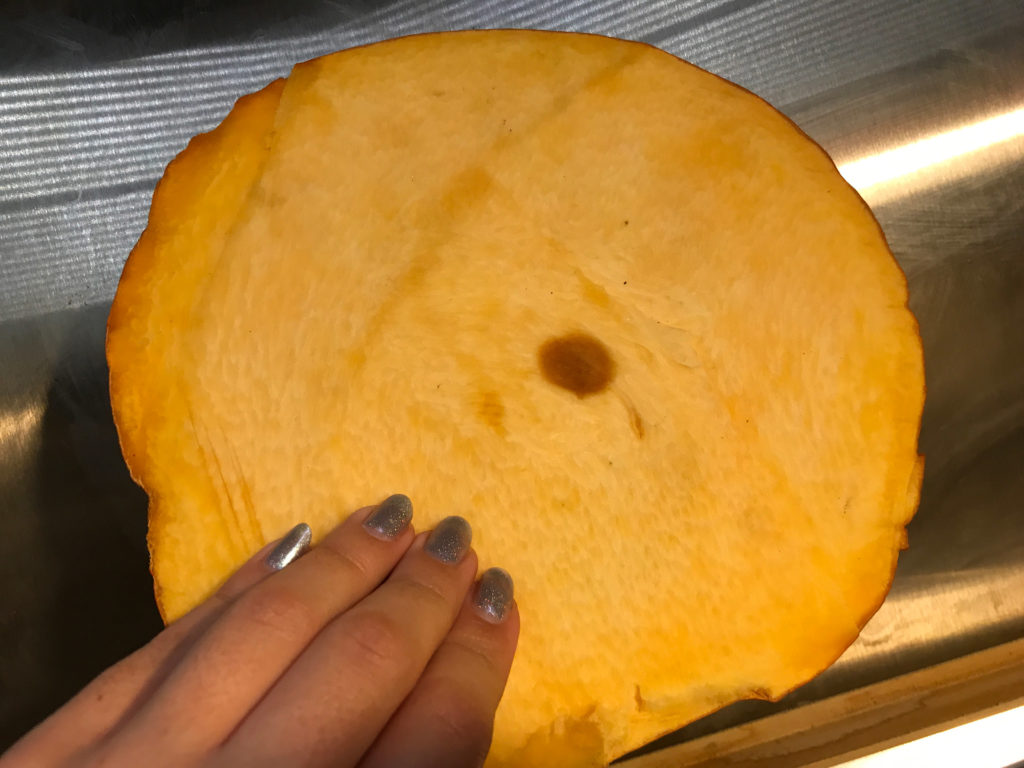
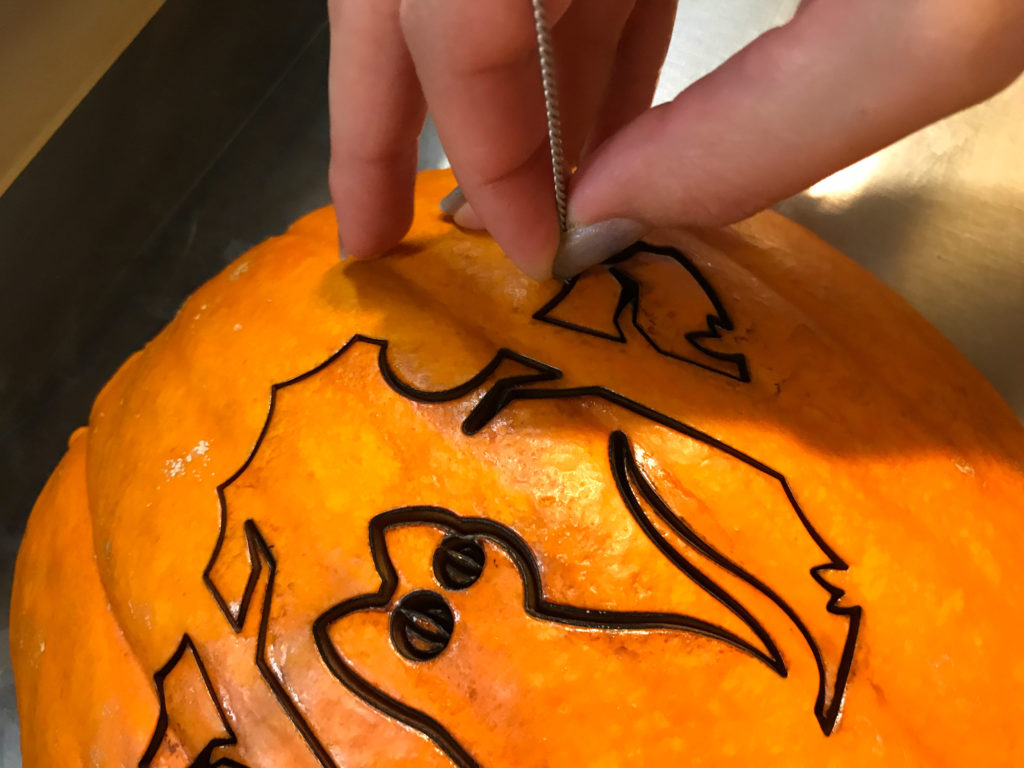
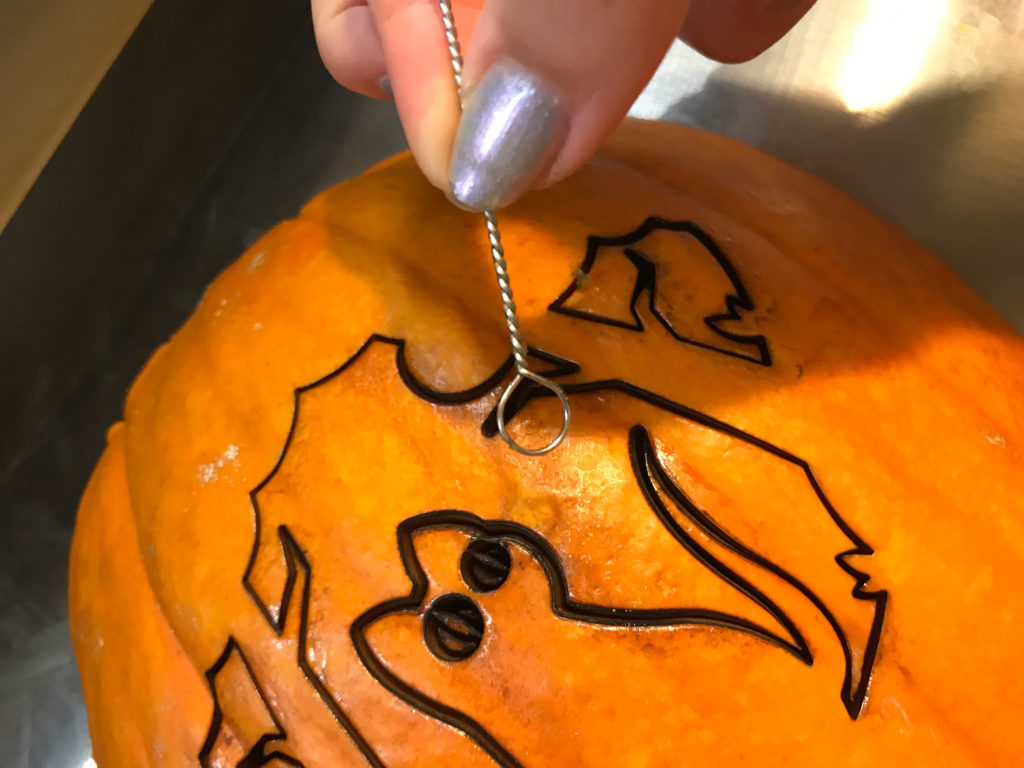
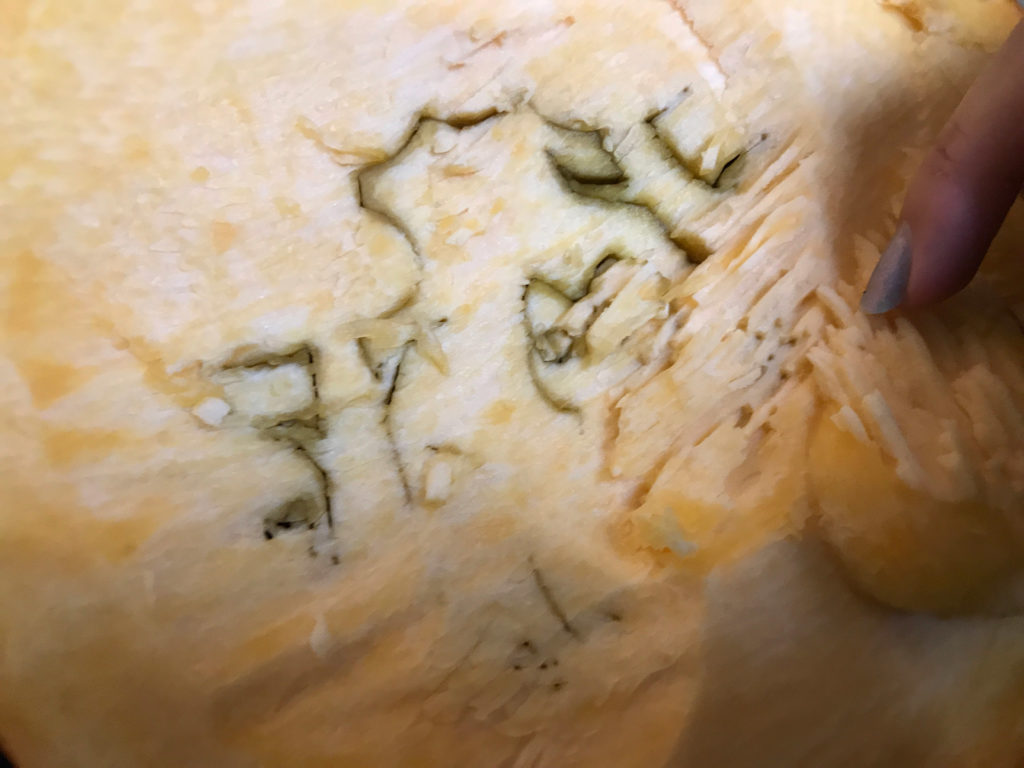
When I turned it over – oh no – it didn’t cut through at all! I took a nearby straw cleaner (which I use to clean the fans) and stuck it into the engraving to see how deep it went.
You can see the cut went about an inch to an inch and a half deep, so I knew I was almost through.
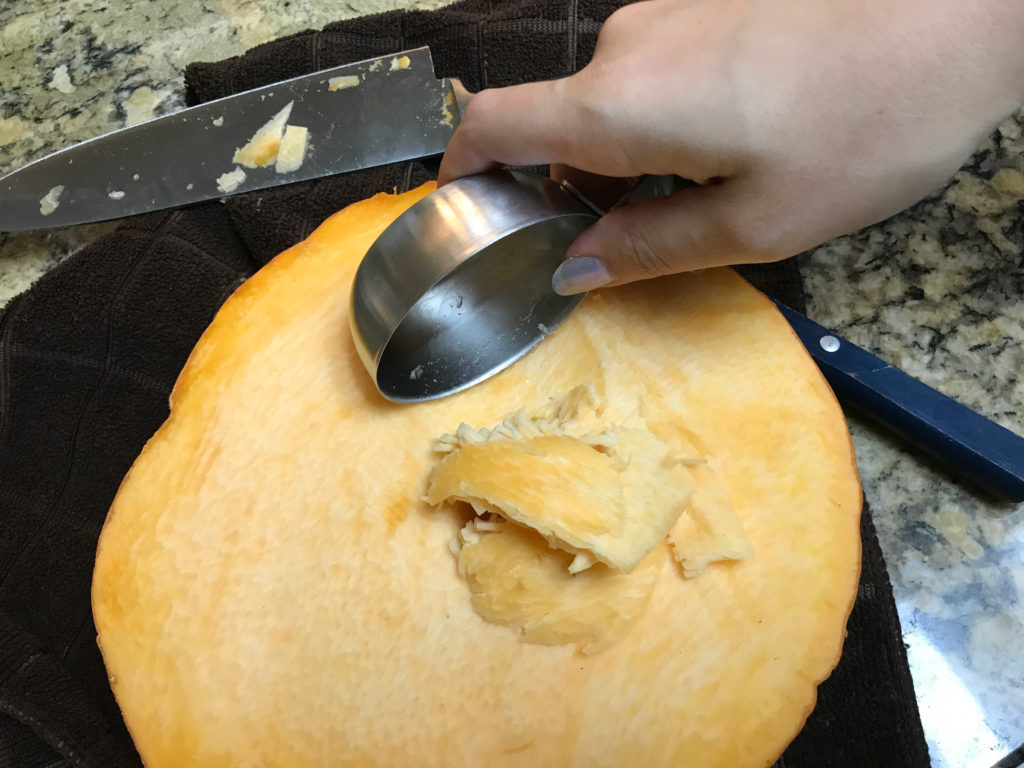
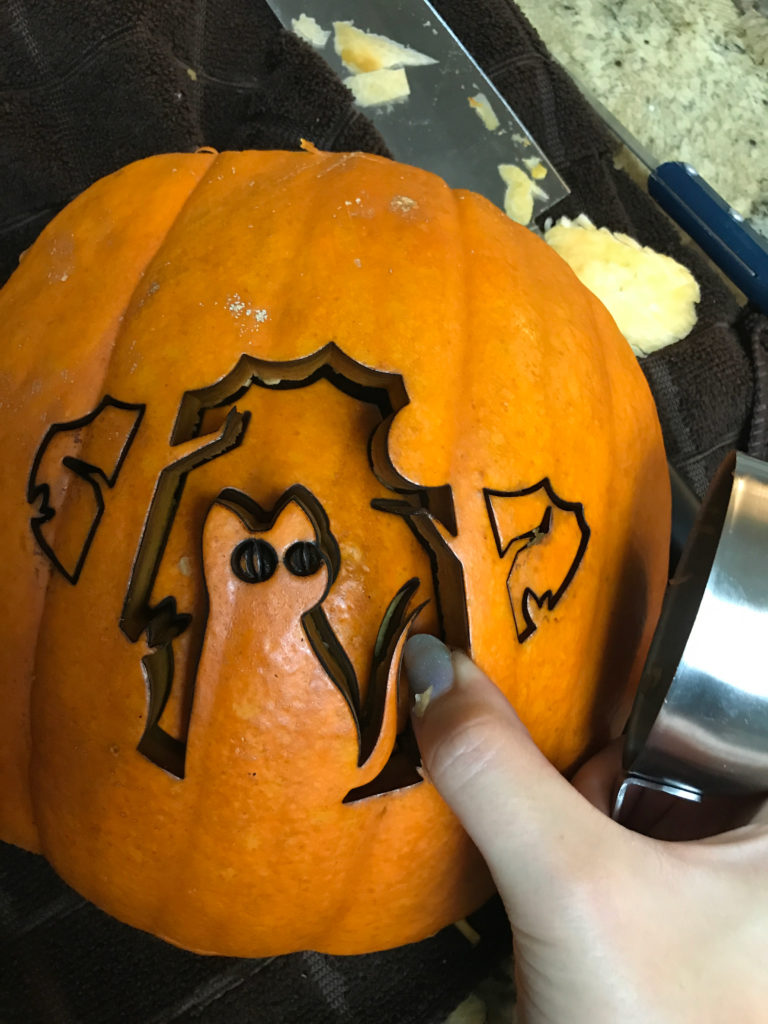
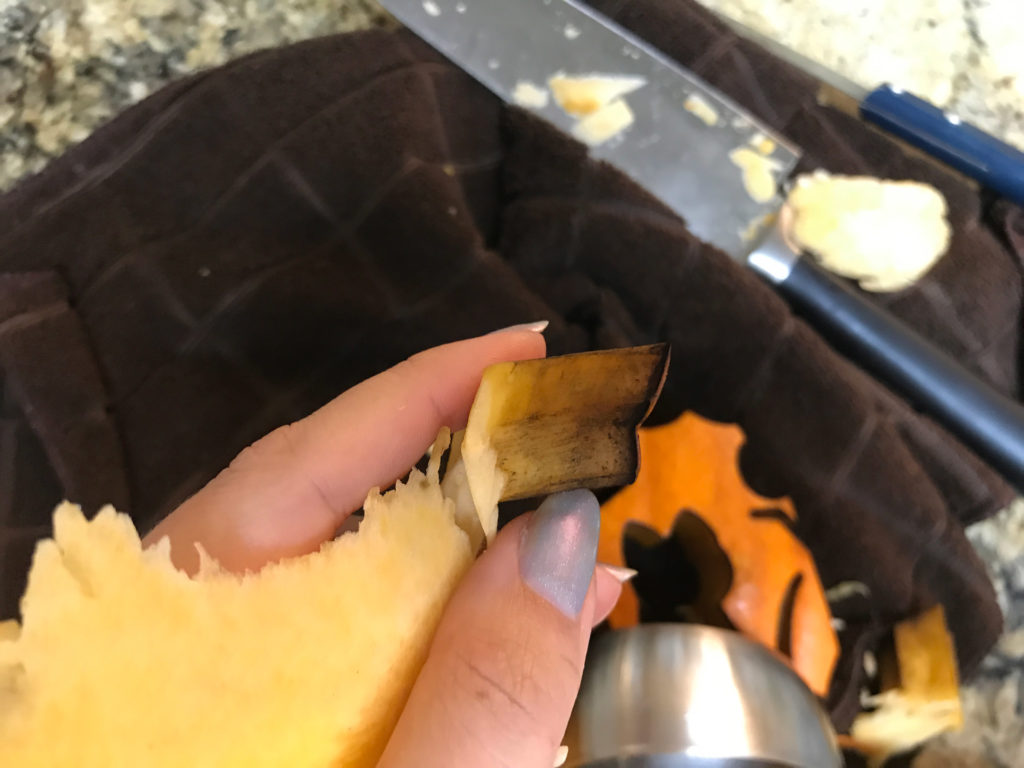
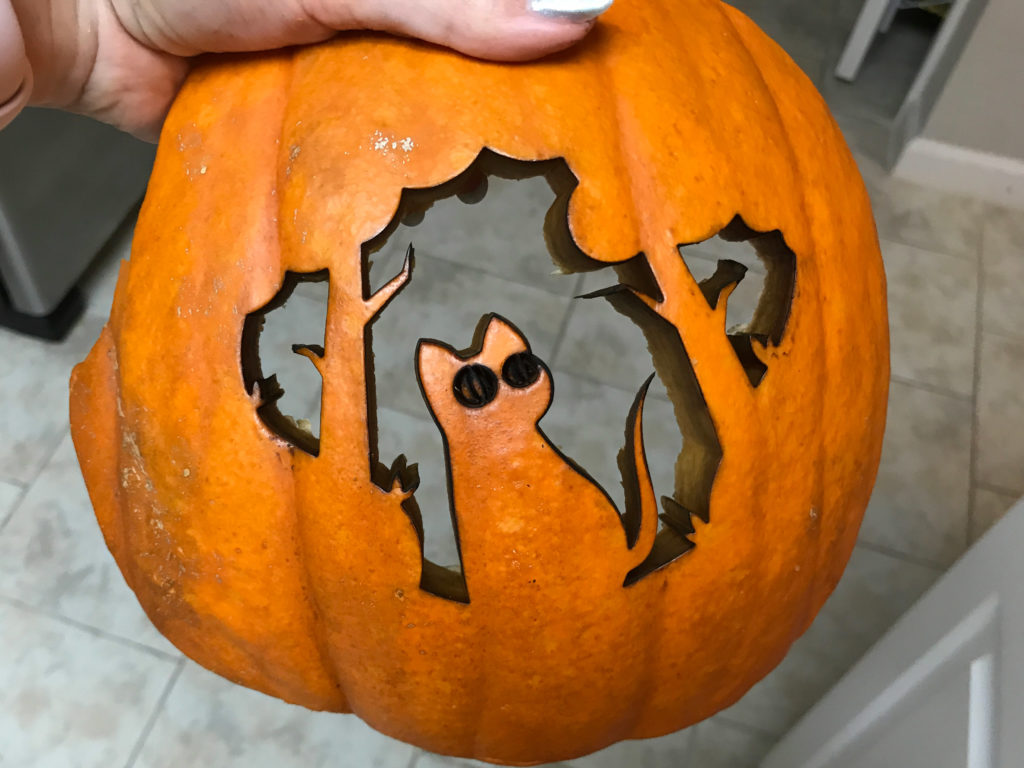
I wasn’t giving up, so I went downstairs and got a “sharp” edged measuring cup and scooped out the pumpkin face from the back until I could see the design emerge. Then I just pushed out the pieces.
Assembling the Pumpkin
Somehow I don’t own any toothpicks, SO I used nails (don’t worry I’ll retrieve them before tossing the pumpkins into the garden so no one steps on them or anything). I just pinned the pumpkin faces back on.
NAVIGATE POSTS
Helpful Links
Latest Posts
Posts by Category
Explore Posts By Tags
Acrylic Adobe Illustrator Alcohol Ink Baby Room Beginner Post Book Binding BuyTheFile Christmas Felt freefiles Gifts Gilding Glowforge Holiday Jewelry Journal Kaleidoscope LED Notebook Resin Rubber Stamp Settings Sign Stamping Yupo
Get Your Own Glowforge Laser
If you have found this post helpful and would like to purchase a Glowforge of your own you can receive a discount using my referral link when you are ready to purchase:
Sign Up to Blog Newsletter
CONCLUSIONS
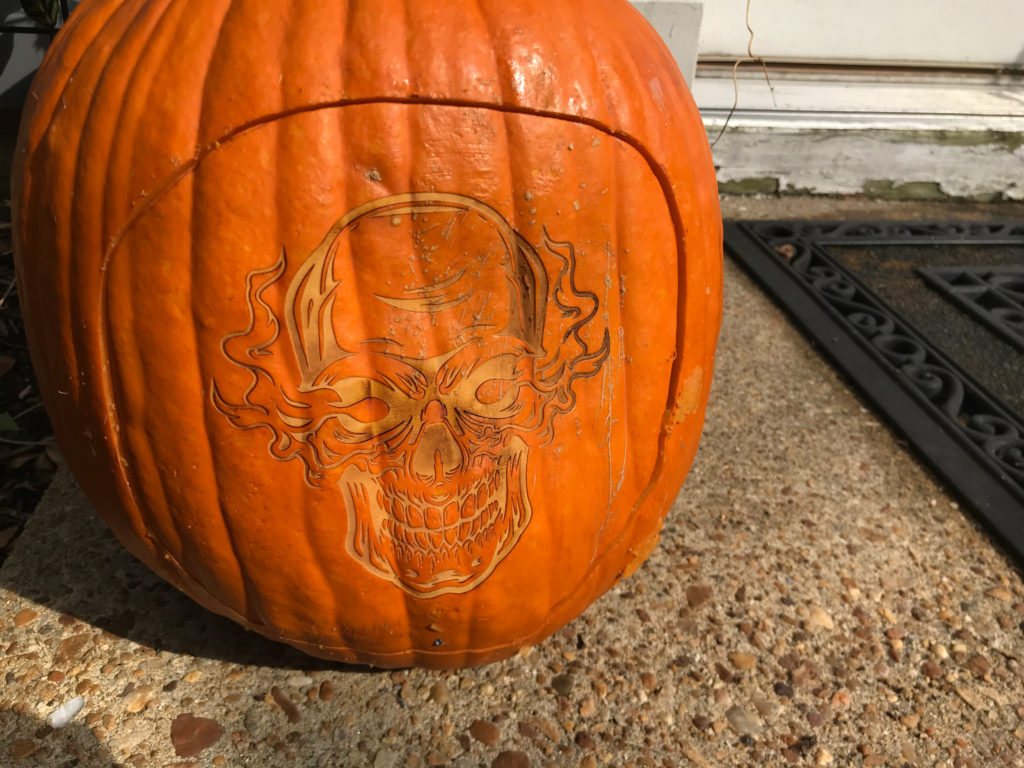
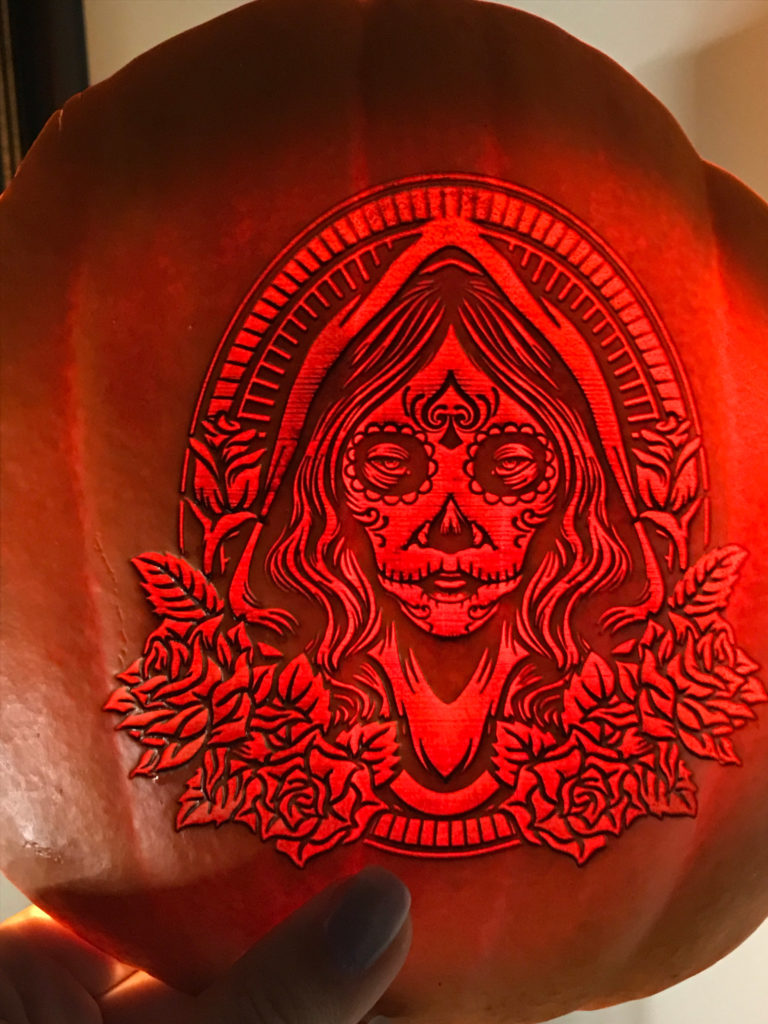
So yeah… I Glowforged some pumpkins! It was easy, and it was fun, and truthfully, I don’t enjoy spending ages carving a pumpkin with those horrible little jigsaw knives. Give it a try, especially if you run out of steam doing things the regular way. Finally, here are some tips gathered from my experience and reading other posts.
TIPS:
- The thinner your pumpkin slice the better, choose the flattest side and carve as thin as is reasonable. A thinner slice lets in more light, meaning a brighter design.
- Any soot is easily cleaned out of the engrave with water and a toothbrush.
- If you increase your LPI (we are already at max speed, max power) you can deepen your engrave. Doing multiple passes or slowing will also deepen the design (but increase the time). You may want to test on a small area to see how deep you need to go to get good illumination.
- Think about the light and dark areas of your design – you may want to reverse your image to get the right look.
- If not enough light is getting through try scooping out behind the design to thin it out.
- Both of these designs were downloaded from Freepik – they are free for personal use with attribution (I do have a commercial account with them though)
Obligatory Glowforge Discount Code Plug
If you found this post helpful and you plan to buy a Glowforge you can use my code (https://glowforge.us/r/QHDONFXB) for a discount of $100 off the Basic, $250 of the Plus, or $500 of the Pro:
Sign Up for Blog Posts Updates
And finally, if you’d like to be updated on posts like these in the future you can sign up for my email list. You will only receive an email if there is new content, and only once weekly in that case:


